Help articles
CATEGORY: Designs
Smart Editor: Overview
Once you have done the preliminary steps setting up your new design, you can launch the Smart Editor. Our step buy step guide on Setting up your design will walk you through this first stage.
Introduction to Smart Editor
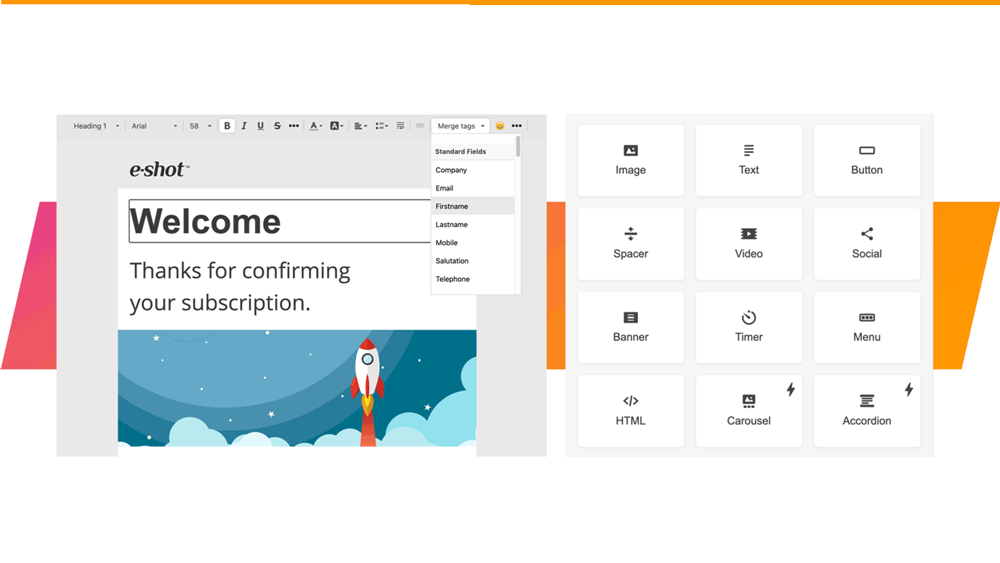
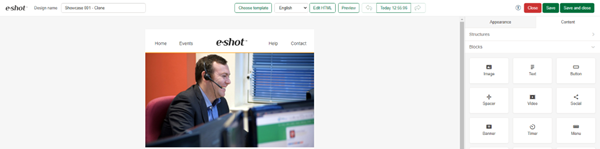
The Top Toolbar
The following functionality is placed on the top toolbar (from left to right).

E-shot logo – takes you back to the Design dashboard where you can see the list of
all your designs.
Design name – where you can see/amend your design name

Template library - In the template library you will find templates that you have created saved under the personal tab, templates shared across your account/subaccount created by other members of your team under shared and finally the tab where you can access our library of ‘stock templates’. Find out more about the template management.
Language selection – allowing you to change the core language of the interface. If you wish the content of your email to be in your chosen language you still need to input the text in that language as part of the design creation.
Edit HTML Button opens the built-in code editor, which allows you to make changes directly to the HTML and CSS code of the email.
The Preview button – allows you to switch to preview mode in which you can see how the email will look on desktop and mobile devices.
Undo/Redo and Version history - If you want to undo a change that you have just made then of course you have the Undo and Redo options available. Find out more about Version history and infinite restore.

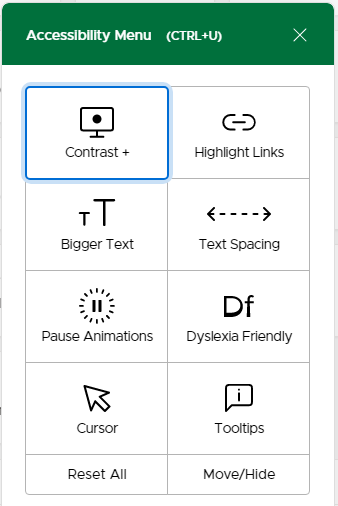
Accessibility menu - If you have additional accessibility requirements to make working with e-shot easier, you can select various changes to the interface to help facilitate easier use, for example; larger text, alternative colour contrast, sounds, larger cursor etc.
Close - This will take you back to the Design menu - however if you have done any amendments to the design since the last autosave, these changes will be lost if you don't save first. Losses should be minimal, however, as the Smart Editor autosaves your work every 30 seconds.
Save - This will create a 'version line' in your version history
Save and Close - this will save your design and take you back to the Design menu.
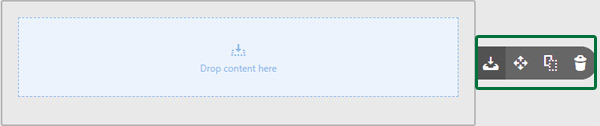
Editing area
Editing area takes the major part of the screen in edit mode.
It’s the area for editing emails and templates.
You can drag blocks / structures / modules into it from The Settings Panel.
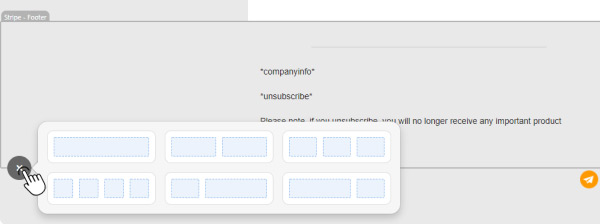
Here you can set the required number of Stripes and their type. Fore more info on Stripes read our dedicated article.
Each Stripe can hold an unlimited number of other elements.
Using the pop-out menus, you can delete, move, copy, or save any email elements as modules. Find out more about modules in our dedicated article
You can select any element by clicking on it. After selecting, you will see settings for this particular element in The Settings Panel.
Each Structure can hold from 1 to 8 containers, but for more than 4 containers you need to
add these in the content menu. See our dedicated article for more details on structures and containers and how to use them.

Containers can hold an unlimited number of other elements when you place it one under another, but if you want to place an element on the right or left, you would need to use different containers.

The Settings Panel
It contains almost all the functionality of the embedded settings for editing emails.
The Settings Panel is divided into 2 parts: Appearance and Content.
Appearance
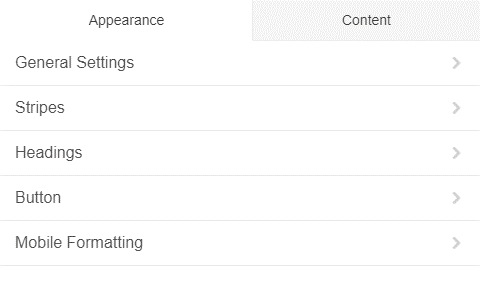
The Appearance tab contains a general set of embedded settings to create and edit emails.
In Appearance tab, you have access to the following settings
General settings - They allow you to set the entire email width.
Stripes - Here you can set the default font style, size, colour, font colour, link colour for stripes.
Headings - Here you can set the default font style, size, colour, bold and italics fonts for H1, H2, H3 headings. Using Header tags are important both for your design but also for accessibility as, for example, they assist screen readers make sense of the content.
Buttons - The button menu allows you to set some default parameters that will be applied to all buttons in the email.
Mobile formatting - Mobile view menu settings are only used to configure emails displaying on mobile devices.
For more information on each of these aspects have a look at Smart Editor: Appearance Settings.
Content

Structures Settings - For Structures, settings are available in three tabs – Appearance, Data and Conditions.
The Data tab allows setting your Structure as a Smart Container.
In the Appearance tab, you can set Background colour of structure or Background image. In addition, here you can hide some Structures of the email for the desktop or mobile version if you don’t want them to be displayed.
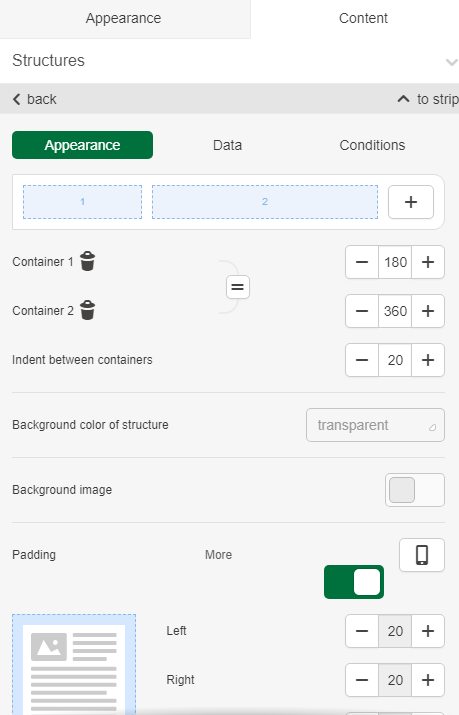
Conditions tab allows applying conditions which can be used in templates. You can apply conditions for stripes, structures, containers.
In addition, here you can hide some Structures or Containers of the email for the desktop or mobile version if you don’t want them to be displayed.
Block Settings - The block settings depend on the Block type. There are different settings for each basic block. You can learn more about basic blocks here.
Modules - In Smart Editor, you can create your own modules. Modules allow you to save any email elements, to modify (if needed) and reuse it over and over.
You can save stripes, structures, and containers in modules.
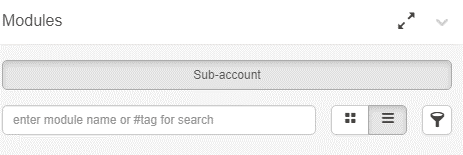
You can learn more about modules here.
Don't forget we're here to help
And of course there is always our chat icon in the bottom left corner so you can contact our Customer Success team if you have a question.

You may also like these articles
Designs
Smart Editor: Basic blocks and how to use them
January 27th, 2021 - Sadie Burgess
Smart Editor has its own hierarchy of elements. We can start from the stripes and proceed in descending order, through the structures and...

Designs
Smart Editor: Creating a new design
January 28th, 2021 - Sadie Burgess
Before you can start designing an email using the Smart Editor you must name the design, set the sender details and write the subject line. First...
Designs
Smart Editor: Templates and Template Library
January 27th, 2021 - Sadie Burgess
In the Design menu there is a Template option. These templates are specifically for use within the Smart Editor.
Solutions
Email Marketing
Create email campaigns and newsletters and manage end-to-end subscription processes with forms and preferences.
Marketing Automation
Create sophisticated automated campaigns for email and SMS combined.
Digital Communication
The comprehensive solution to manage and automate your digital communication across email, SMS, websites and landing pages.
Email marketing healthcheck
We are confident that we can help you, which is why we offer a free healthcheck to identify potential issues with your current programme and free advice on things that could be done to improve it.