Help articles
CATEGORY: Designs
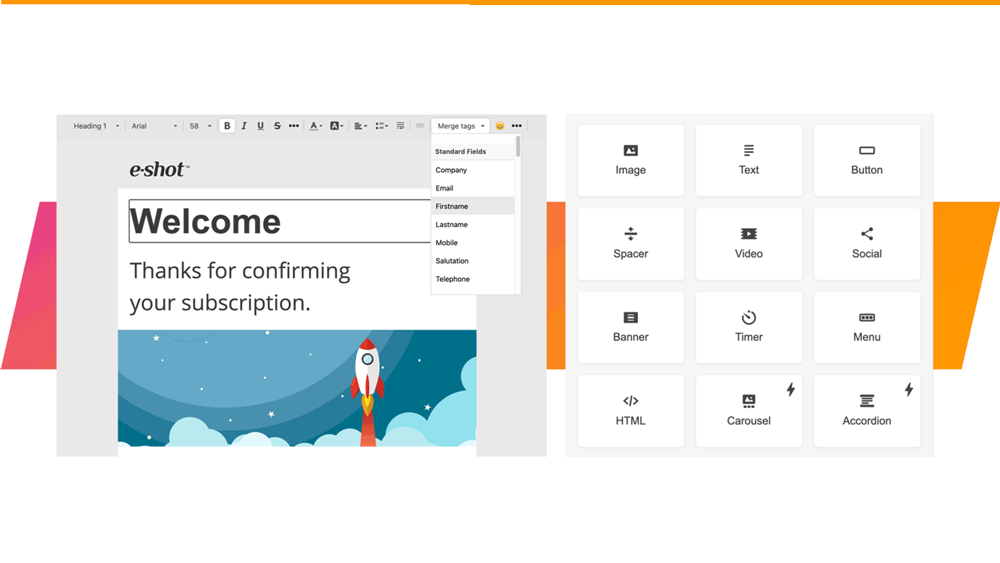
Smart Editor: Basic blocks and how to use them
Smart Editor has its own hierarchy of elements. We can start from the stripes and proceed in descending order, through the structures and containers down to the blocks.
Blocks are at the very bottom of the email elements hierarchy.
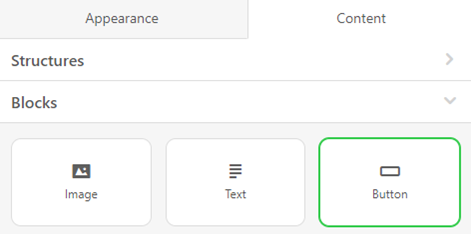
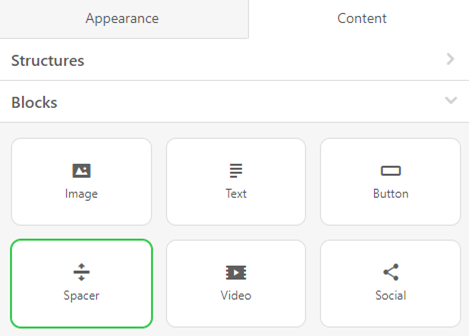
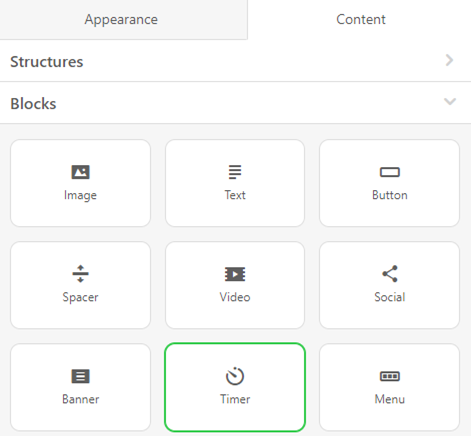
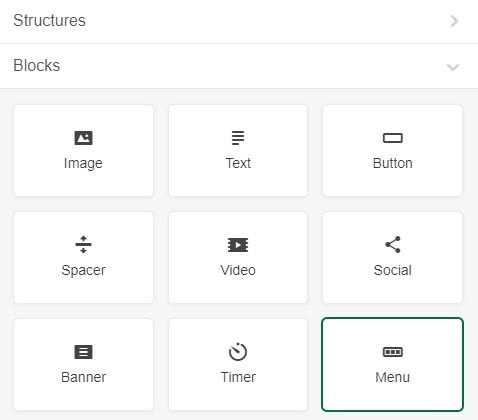
In editor mode, all the 9 basic blocks are available in Content/Blocks menu.
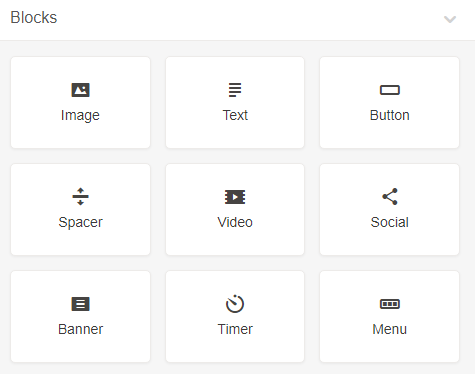
Blocks hold the basics to create the email content: image, text, button, spacer, video, social, banner, timer, menu, custom HTML element and two AMP-powered elements.
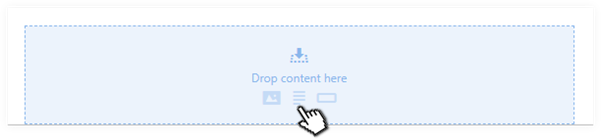
To use any of them, you need to drag and drop it to your template and then edit.
Let’s look at each one of them in turn:
Image
Image block allows you to add images in PNG, JPG, or GIF formats.
Images can be uploaded to different galleries depending on how they are needed:
Images uploaded to the email level can only be used on this email design. Great for one off campaigns.
Images uploaded to the Sub-account level can be used in any design in this sub-account
Images uploaded to the Account level can be used in any designs throughout your account and across every sub-account.
Stock images are royalty free images that we have provided because we are nice like that
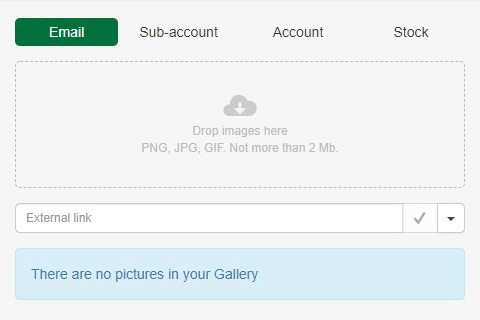
There are three ways of adding an image to your design:
1. Dropping/uploading image
Here, you can just drag and drop the image you are about to use for your campaign or upload it from your computer by clicking the "arrow" and selecting the image from your computer.
2.
Pasting external URL
If you do not have the image saved to your computer, can insert a link to this image on the web.
In the “External link” field, paste the link to your image.
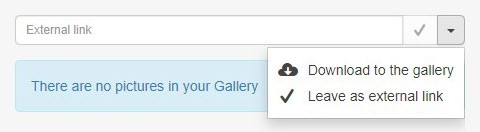
If you are going to use this image just once, in the drop-down menu, choose the “Leave as external link” option (as shown in the example above) and click the tick.
If you are going to use this image for other email campaigns, then click the “Sub-account” or “Account” tab featured above, then insert the link and choose the “Download to the gallery” option, and click the download cloud icon.
3. Using images already stored in one of the galleries
When you upload images or download them to the gallery as shown in the example above, your images are stored in your personal gallery. You just need to switch to the Email tab.
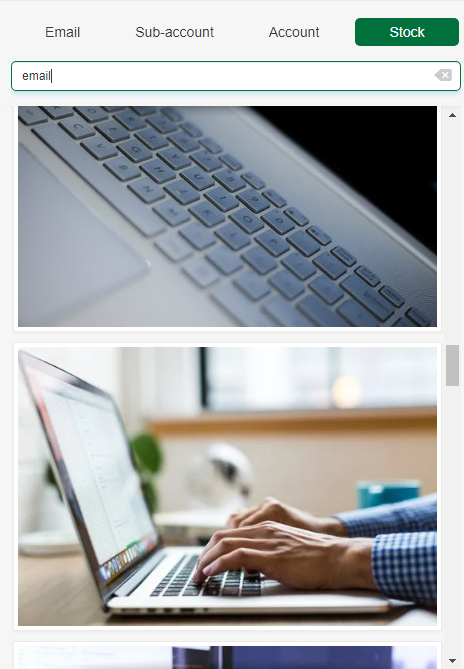
Images here are sorted by the dates, the most recent → the oldest ones.
If the list of images is too long, you may search by its name.
Images can be held in a personal album, shared with all users of the subaccount or across multiple subaccounts, as account level. There is also the opportunity to search a library of stock images, as shown above. Simply input your keyword/search-term and scroll through the options.
To use one in the design that you are working on, you simply need to click on the selected image and it will automatically appear in your email.
Text
How to add copy to your emails with Smart Editor
drop for example a 1-column structure into your HTML email template,
drop a “Text” block into it, or click the “text” button within this structure
enter your text,
set headings where necessary. In our example, for the greetings, I chose headings 2 — and as long as we’ve set parameters for Headings in the “General Settings” tab at the beginning, Smart Editor automatically used them (Arial, 24px) for our email,
enter your text in the next line,
highlight it,
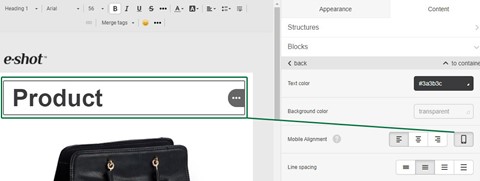
set desktop and mobile alignments for your text block,
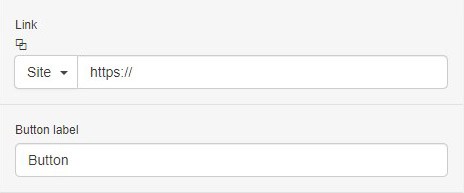
Button
How to build a CTA button with Smart Editor
drop the basic button block into your template and drop it next to the product it is related to,
tap the button block in your HTML email template to activate the settings panel,
insert the required URL link,
enter your button label text,
set text style, such as font, its type, and font size,
set button colour, font colour,
set border radius if you like rounded buttons,
specify alignment,
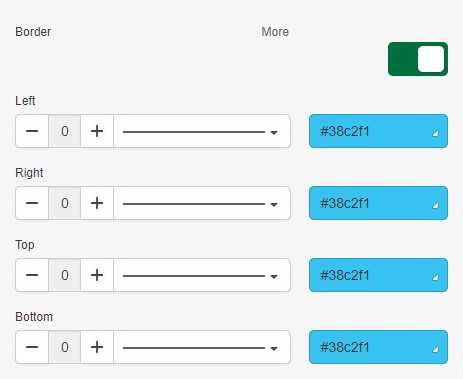
set the button border if you would like one,
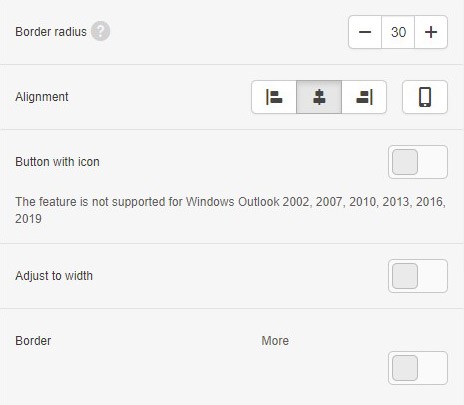
set internal paddings. They are responsible for the whitespace inside your button. Both the button text and the area around the text are clickable.
set external paddings — they are responsible for the whitespace outside the button, but within the container where it sits.
Spacer
How to set spacer in emails with Smart Editor.
drop the 1-column structure into your HTML email template
drop the “Spacer” block
double-click to activate the settings panel
set its colour
to set the “thickness” of your spacer — you need to set the “number” in the “Line” section — increase/decrease numbers
you also need to choose the style of your line. It can be solid, dashed and dotted
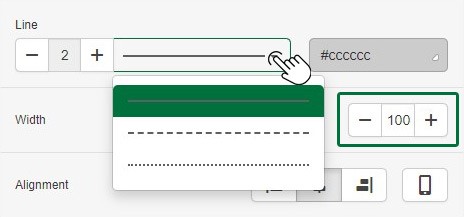
set width — N.B. the width here is measured in %, not in pixels!
specify the spacer alignment. By default, centre-alignment is set.
toggle the “responsive spacer” button for a spacer to render properly on mobile devices
if necessary, set paddings.
Video
Inserting URL link to your video
This is an absolutely safe way of delivering videos because it works perfectly well in all email clients and on all devices.
How to insert URL link to your video:
drop in the 1-column structure in your HTML email template
drop in a basic “Video” block
left click the container in the email
in the settings panel, you will only need to insert a link to your video on YouTube or Vimeo
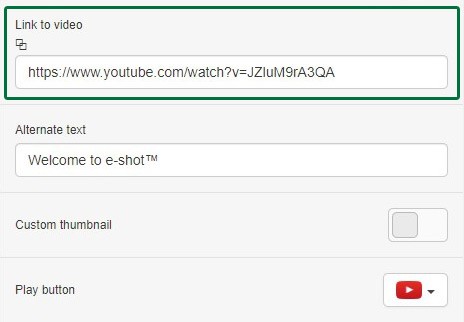
our system will automatically fill out the “Alternate text” field
select the colour of the “play button” — it can be white, traditional red and black.
Our system automatically generates the thumbnail/preview image for your videos. But you may also want to set a custom one.
How to set a custom thumbnail to video in emails:
toggle the “custom thumbnail” button in the settings panel

upload an image
edit it if necessary.
You may even insert an animated GIF as the thumbnail image if you like. It will certainly draw more attention to the video.

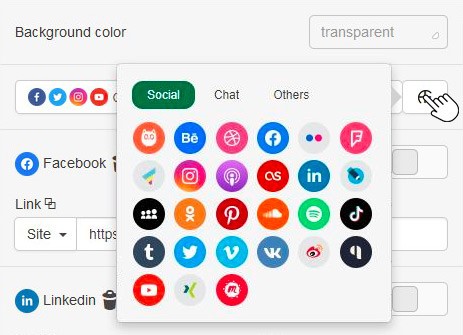
Social Networks
How to add social media icons with Smart Editor
drop the “Social” basic block in your template
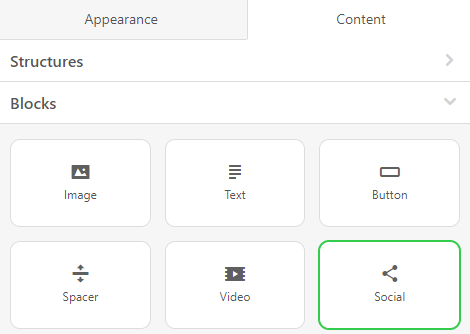
double-click it in your template to activate the settings panel
by default, you will see 4 icons. If you require more, simply click the “plus” button to add the additional icons
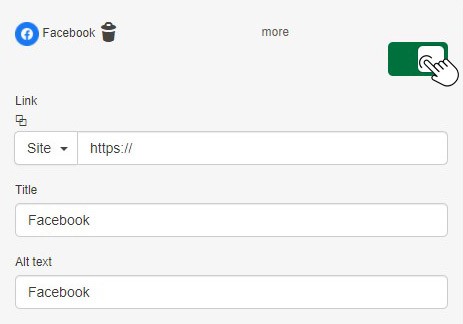
in the settings panel, next to the social media icon, toggle the “more” button to start working with this particular social network
insert the respective URL links
enter Title and Alt text
set style for these icons
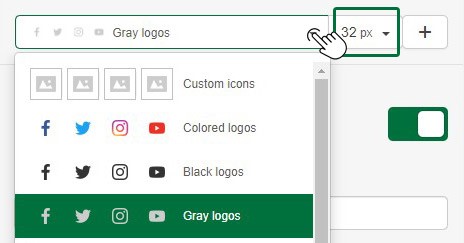
set their size
and finally set the paddings and indents between the icons.
Banner
How to build an email banner with Smart Editor
drop a 1-column structure into your HTML email template
drop the “Banner” block into this structure
click this block in the template to activate the settings panel
upload image that you wish to use
in the settings panel, the system will suggest that you crop the image if needed
set image orientation. It can be vertical, square and horizontal.

apply filters. For example, the Grayscale one
paste the link that will take recipients to the place related to the offer described on the banner
enter alt text — this text will be shown to recipients if images for some reason cannot be displayed and for screen readers
if you need to place any copy over the banner image, you need to click the “T” button on the settings panel above. Once it gets light, you need to left-click this image again
then you’ll see the “Caption” placeholder text on the banner
erase this placeholder text and enter your text here
set font size, font colour, and the font
from the banner fonts, choose the one that best fits your email/brand
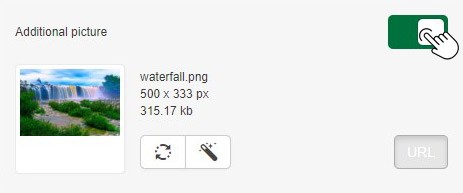
toggle the “additional picture” button in the settings panel. It can be anything you like: sticker, frame, logo, background to make your copy more noticeable, etc. Yes, you can place text over it :)
Please, be advised:
Once your banner image is added, you can make all the editing steps in any order you like. For instance, insert an additional image, add text and only then apply fonts.
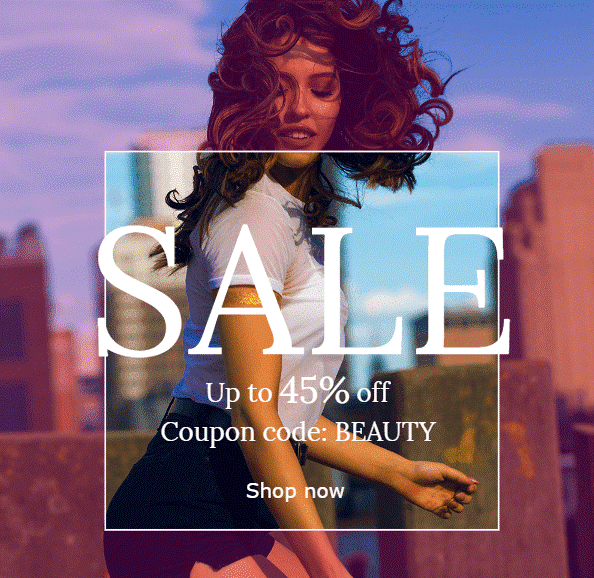
To build a banner like this one, you need to:
upload image
set image orientation
insert additional image over it
place copy over both images.
Timer
How to build and add countdown timer in emails with Smart Editor
drop the 1-column structure into your template,
drop the Basic Timer block in the container,
left-click this container in an email template to activate the settings panel to work with the timer,
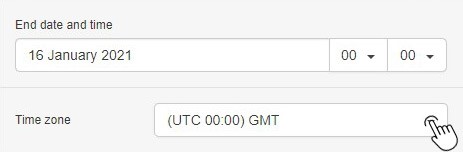
set the end date and exact time,
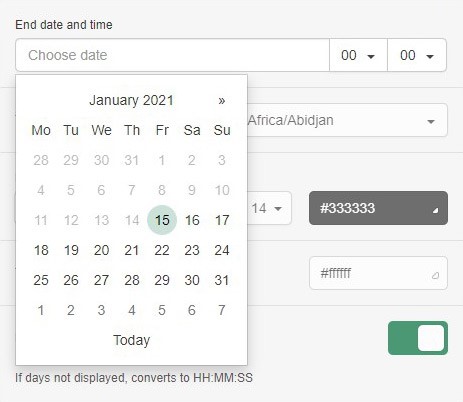
set the time zone;
set timer background colour that best fits your email design/brand;
make changes to the numbers’ size and colour if necessary.
Toggle the “Display days” button if you want recipients to see how many days are left. Otherwise, they will see just hours and minutes. “5 days 20 hours” is easier to understand than “140 hours”
change date style if necessary. By default, we use “:” (colon) to separate days from hours, minutes, seconds. You can also set “-” and “/”
toggle the “number labels” button to display names “days”, “hours”, “minutes” and “seconds” under respective numbers
set colour, font type, and size to the labels
toggle the “Expired Timer Image” button
upload the image that will be shown to customers once the timer expired. This is optional, but we strongly recommend doing it — this will not only inform recipients the offer has expired and give you an opportunity to provide an alternative message
insert URL link that will take recipients either to your website or to a particular page on your site when you describe the value offer in the details. This link will be applied to the “Expired timer image” as well
specify alt text for accessibility.
Find out more about countdown timers in our dedicated article.
Menu
How to add a menu to your emails with Smart Editor
click the “Content” tab in the settings panel,
drop the 1-column structure and put it below the logo,
now open the “Blocks” tab,
drop a menu block and drag it into your template,
add extra menu items if you like. By default, Smart Editor offers three
For details on the more advanced blocks, for HTML embedding or building AMP emails see our dedicated articles.
You may also like these articles
Designs
Smart Editor: Appearance settings
January 27th, 2021 - Sadie Burgess
In the settings panel on the right-hand side of the Smart Editor you find the Appearance and the Content tabs.
Designs
Smart Editor: Stripes and how to use them
January 28th, 2021 - Sadie Burgess
All the emails in our editor are structured by a descending hierarchy of elements. Stripes that contain structures, containers and blocks are at...
Solutions
Email Marketing
Create email campaigns and newsletters and manage end-to-end subscription processes with forms and preferences.
Marketing Automation
Create sophisticated automated campaigns for email and SMS combined.
Digital Communication
The comprehensive solution to manage and automate your digital communication across email, SMS, websites and landing pages.
Email marketing healthcheck
We are confident that we can help you, which is why we offer a free healthcheck to identify potential issues with your current programme and free advice on things that could be done to improve it.