Help articles
CATEGORY: Designs
Smart Editor: Modules and how to use them
What is a module?
In the Smart Editor, you can create your own modules. Modules allow you to save any elements of your email into a module library. Module can then be reused over and over again by simply dragging them into your designs.
You can save all elements of your email design as a module, that includes stripes, structures and containers.
How to save something as a module?
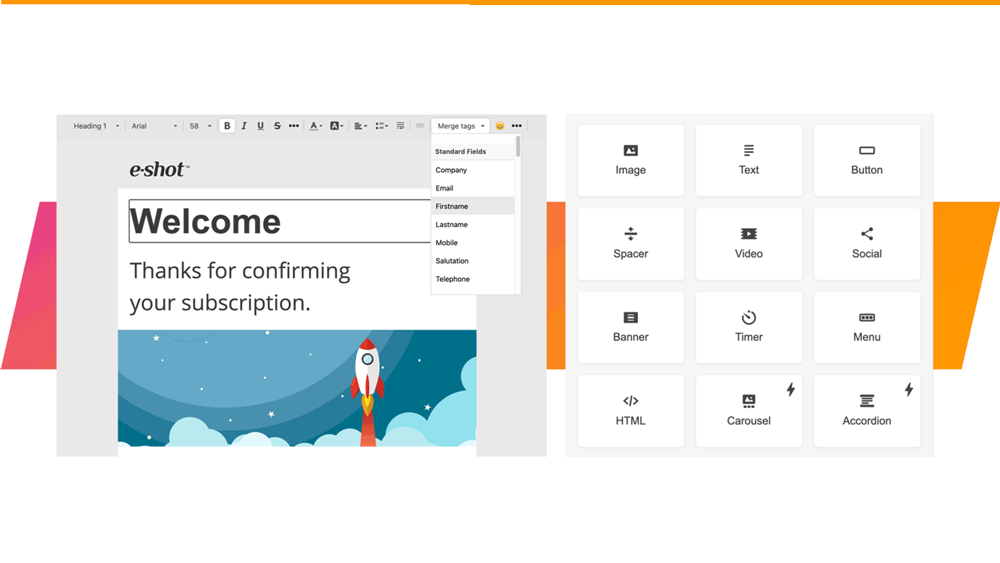
To save something as a module, first select the stripe, structure or container you wish to save. Once you have the correct item selected, you will find three dots; often on the right hand side of what you selected as shown below.

If you hover over these three dots, the editor will present you with various options for the content you have selected, including a delete and move button. In here you will also find an icon of an arrow pointing downwards into a box as shown below.

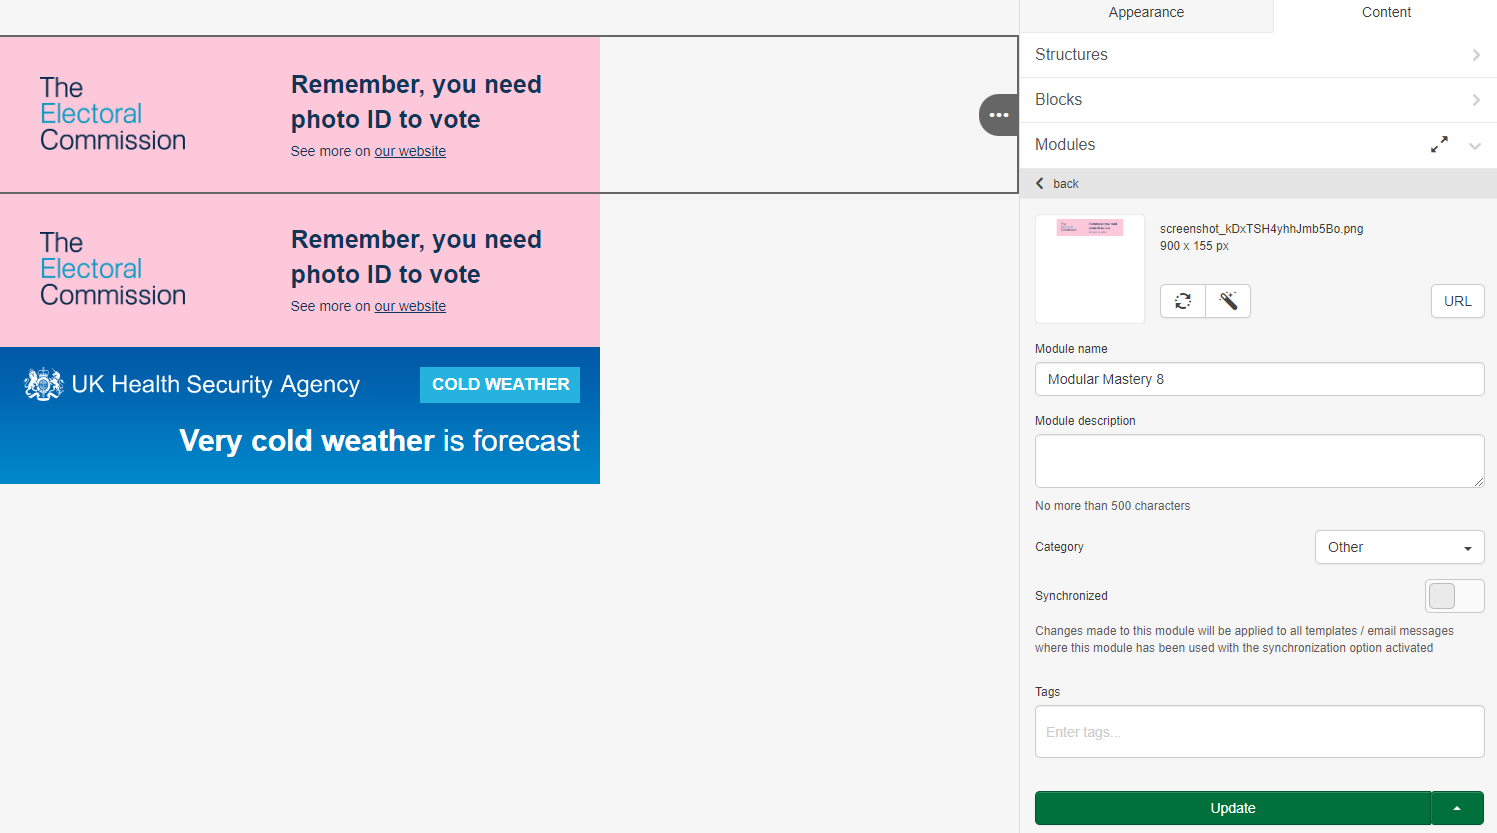
As circled in the above image, you can find the icon to save this element as a module. To begin saving your module simply click on this icon. Upon doing so, the modules tab will open up on the right hand side of your screen.
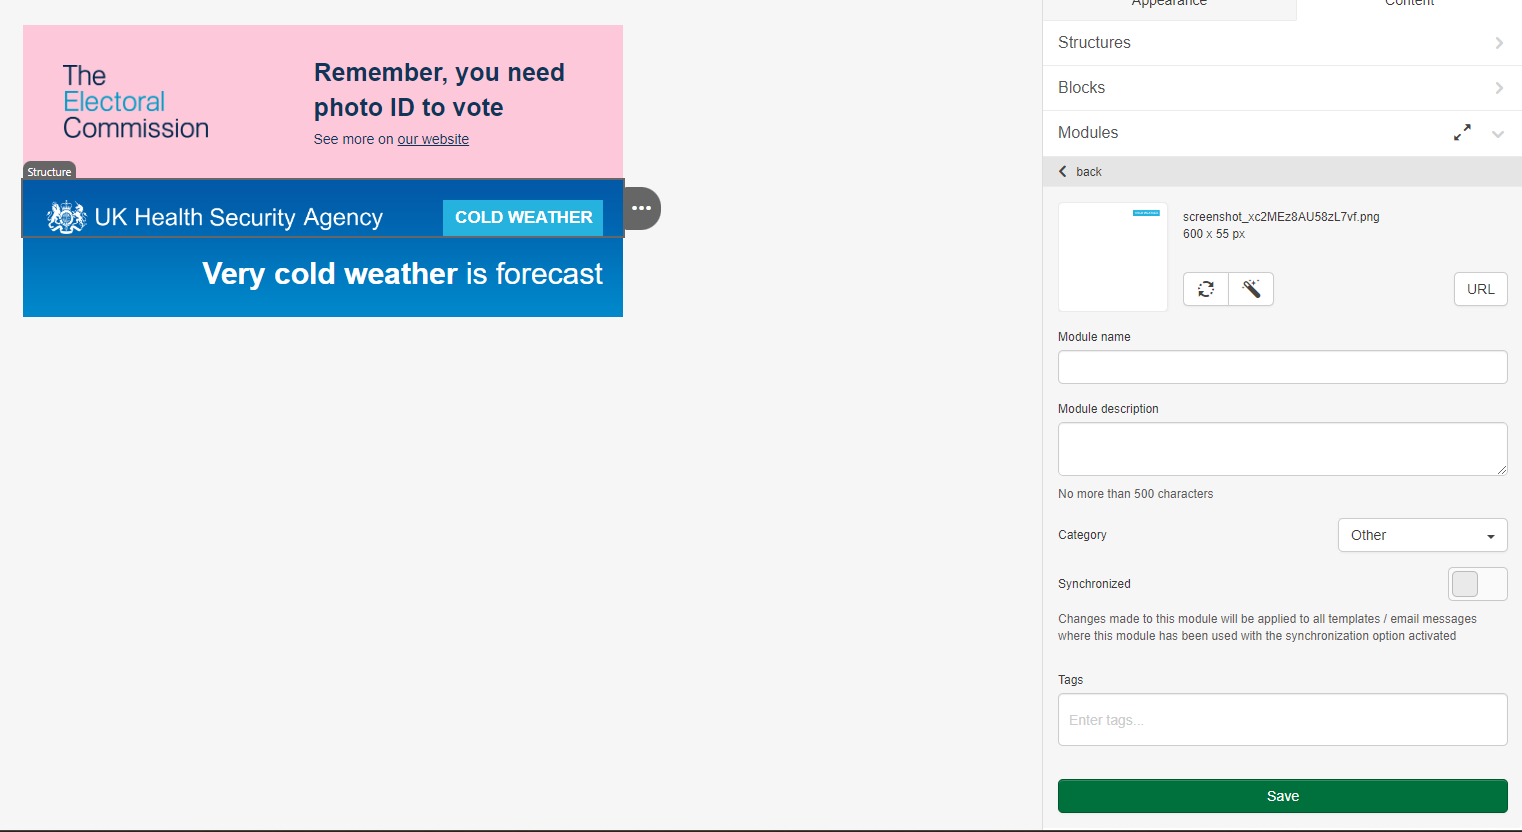
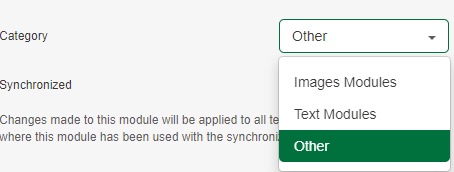
As shown above, you can now give your module a name and description. Under the category you can either put your module into a Image, Text or other category to help making finding them later easier.
You are also able to apply a tag to your module, similar to being able to on your designs.
Once you are happy with the details you have set, you can click the green 'Save' button to save this element as a module.
How can I access my saved module?
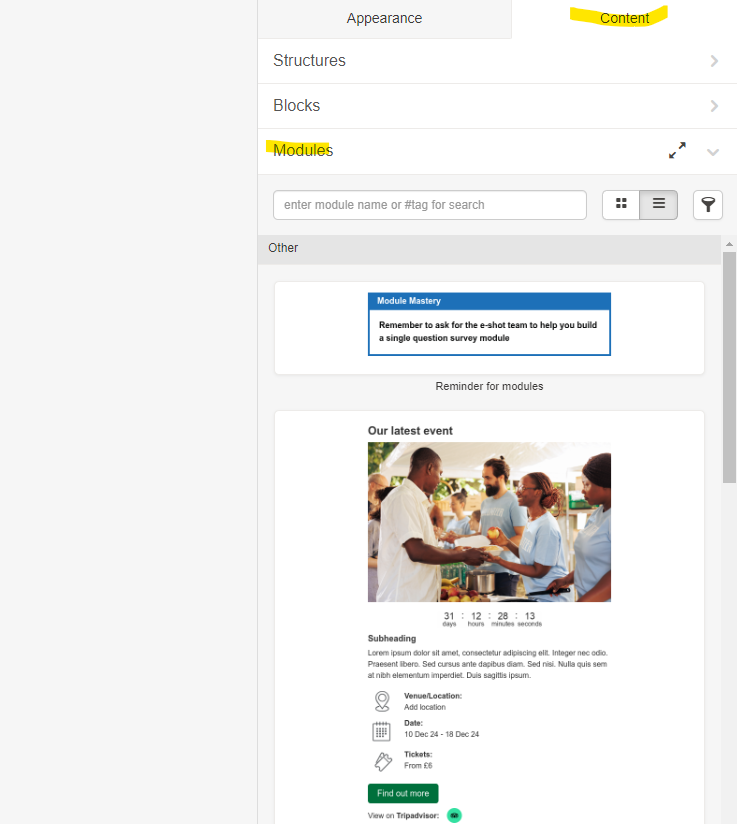
Once you have saved your module, it is available in the modules menu from within any of your email designs. The module will also be available for use in other emails in your subaccount and will be visible/useable by all users in that subaccount.
In the below screenshot, you can also see there is a search bar as well as various filters to help find the various modules that have been saved in your subaccount.
Module Management
Filling out the "name", "id" and "tags" fields are optional.
However, using "name" and "tags" fields will make it easier to locate the module when you are searching for it at a later date.
"Tags" field allows you to group the saved modules by tags. You can add one or several tags. Then, choosing the modules you will see that your modules are grouped by tags.
How do I update my module?
Once a module has been saved, it can be updated at any time. To do, firstly drag the module into your design. Then follow the same steps as if you was saving a new module by clicking the icon previously highlighted.
This time as long as you have the exact same stripe, structure or container selected instead of having a save button, you will find it says 'Update'.
You can also amend the modules name and tags etc if necessarily. Once you are happy, click the update button and your module will be resaved with any changes that were made.
*Please note, if a module is updated, it will not automatically update in all designs and will need to be re added into all designs using the module.
Modules key notes
Some modules elements display may vary in different emails as they have general settings based on the email they were created – so may need modification once in situ.
Modules will not automatically update in other designs if a change is made, the module will need to be readded into designs it is being used in.
It is important to give your modules effective names and assign tags so they are easy to locate when coming to use them
You may also like these articles
Designs
Smart Editor: Templates and Template Library
January 27th, 2021 - Sadie Burgess
In the Design menu there is a Template option. These templates are specifically for use within the Smart Editor.
Designs Accessibility
Smart Editor: Accessibility Preview
September 19th, 2023 - Harry Thomas
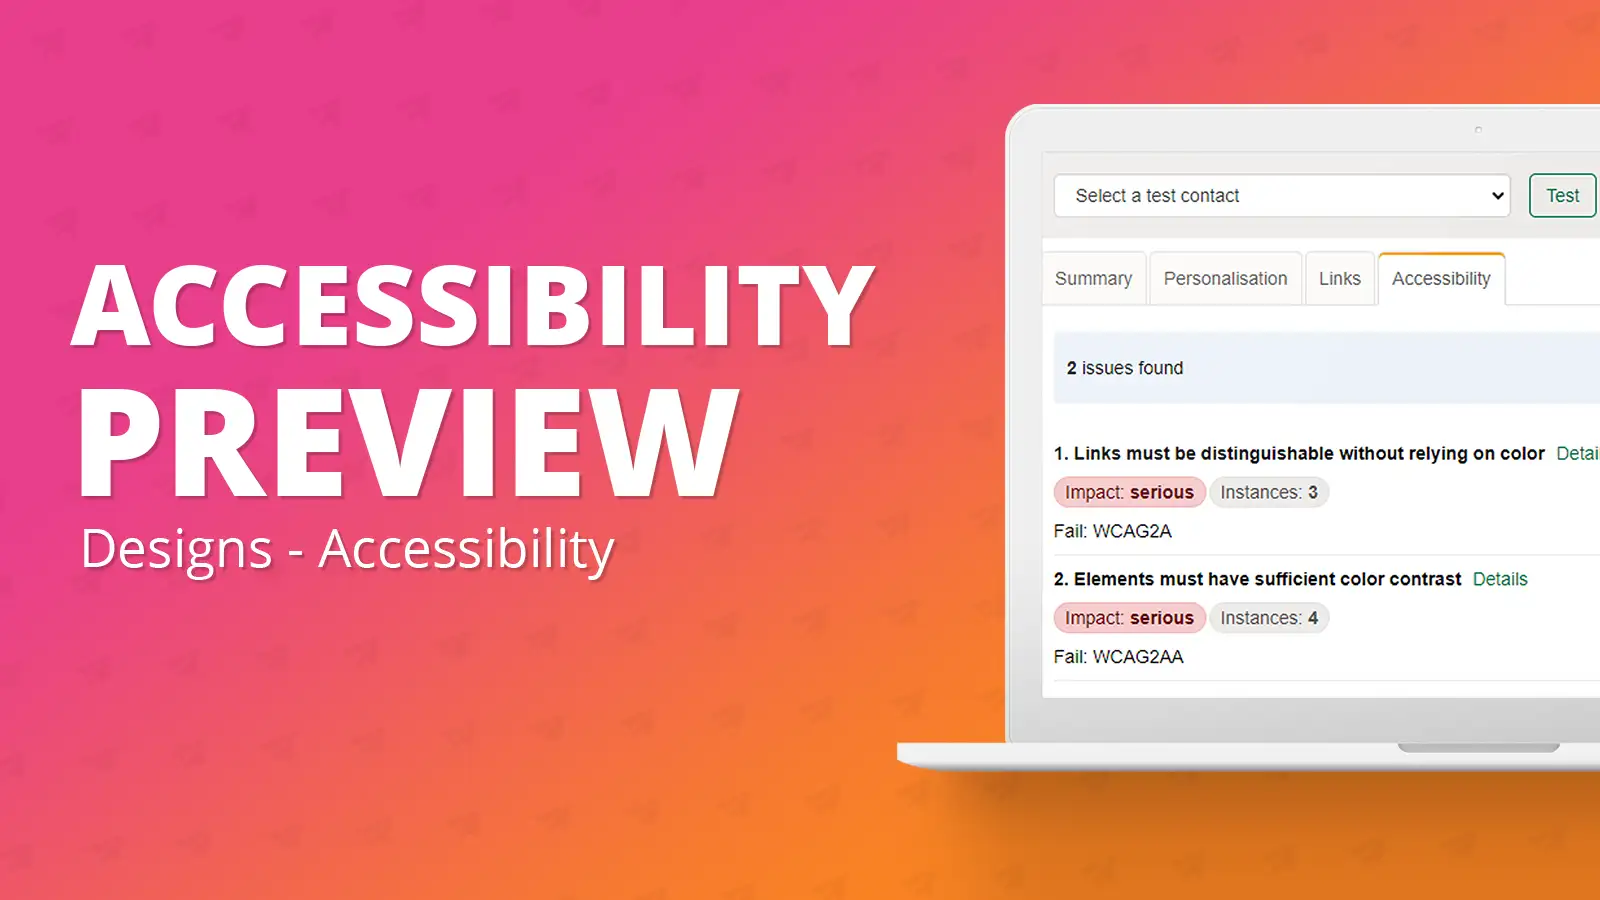
The accessibility widget tool allows the user at any moment in the design creation process to preview their design and address any WCAG AA...
Solutions
Email Marketing
Create email campaigns and newsletters and manage end-to-end subscription processes with forms and preferences.
Marketing Automation
Create sophisticated automated campaigns for email and SMS combined.
Digital Communication
The comprehensive solution to manage and automate your digital communication across email, SMS, websites and landing pages.
Email marketing healthcheck
We are confident that we can help you, which is why we offer a free healthcheck to identify potential issues with your current programme and free advice on things that could be done to improve it.