Help articles
CATEGORY: Campaigns
Campaigns: Split test campaigns
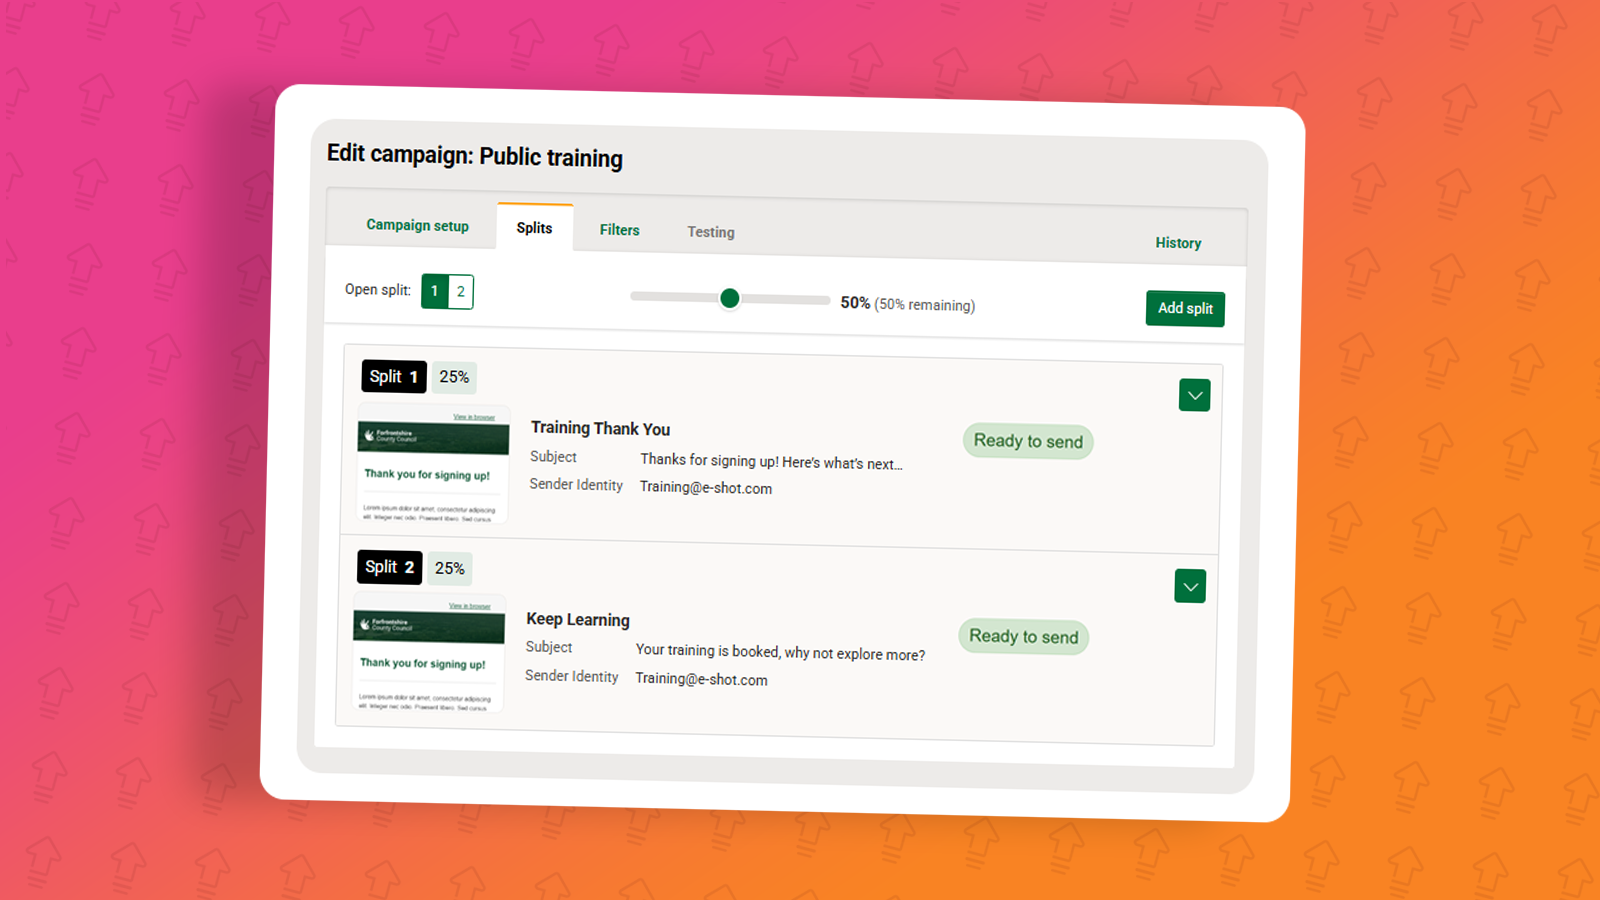
What is a split test campaign?
Split testing (also known as A/B testing) lets you try out different versions of a campaign, whether that's the subject line, message design, sender details, or send time, to see which one actually gets the best response from your contacts. Rather than sending your best guess to everyone, you send each version to a small portion of your list, measure how each performs, and then send the winning version to everyone else. It takes the guesswork out of campaign decisions and replaces it with real data from your own audience.
This matters because even small changes can have a big impact on open and click rates, and what works for one audience won't always work for another. Split testing helps you build a clearer picture of what your contacts respond to over time, so future campaigns are informed by evidence rather than assumption. It's particularly useful when you're testing a new approach, like a different tone of voice or a new send time and want some confidence in the result before rolling it out to your full list.
Campaign creation
To start your split test campaign creation, head to Campaigns > Create new campaign and assign the ‘Split test campaign’ type.
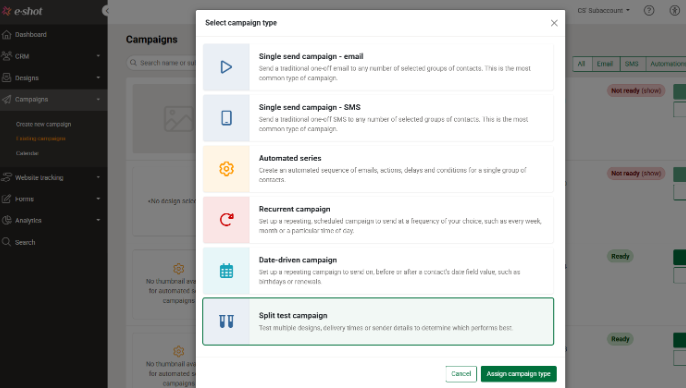
Double click on 'Split test campaign' or select it and click 'Assign campaign type' to continue.
You will be redirected to the campaign setup screen as seen below.
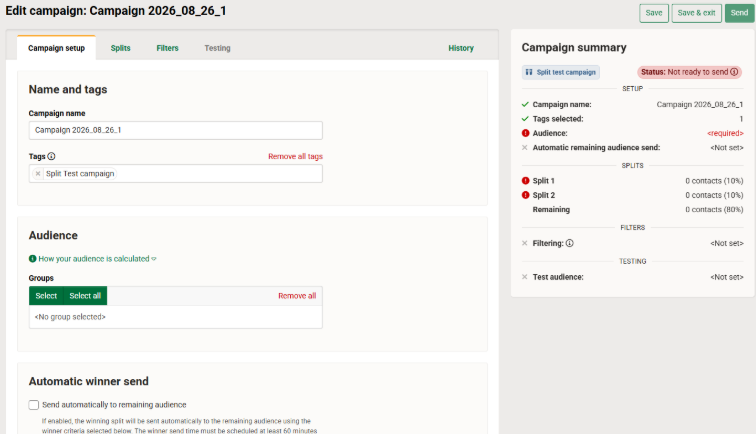
Campaign setup
Here is where you set the parameters for the campaign including the the name, any tags and who which audience you want to use for your split test.
Name and tags
Setting a relevant name is important for internal purposes, once the campaign has been sent, it is the main identifier for the campaign once it moves to the analytics section.
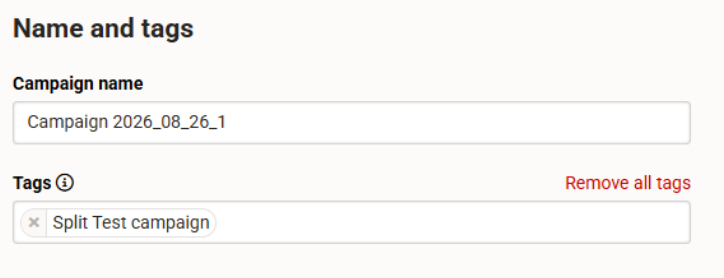
Tags are similar, they help you to identify in the analytics section, what this campaign was related to. Tags are also great for filtering your analytics e.g. you might have one tag for events, another for fostering.
Audience
This is where you can choose who will receive your split test campaign.
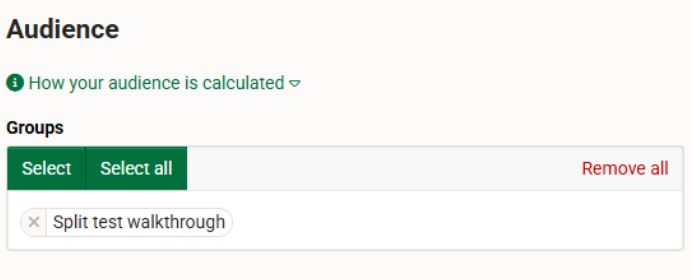
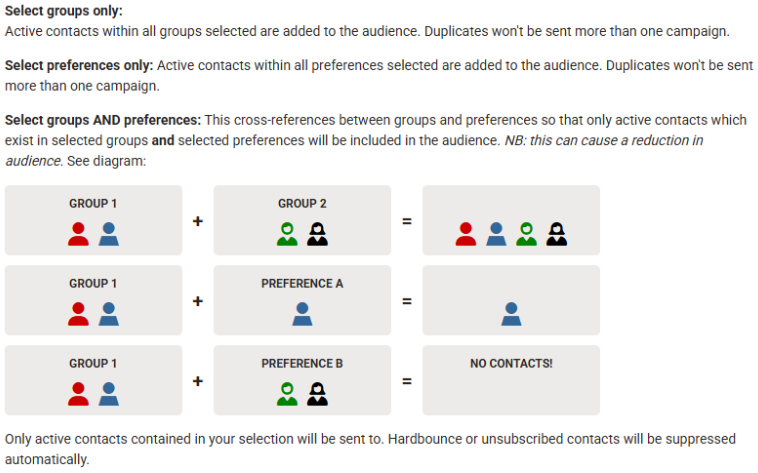
Users can choose between groups, preferences or both to make up their audience. Although typically just one group or one preference will be selected.
Automatic winner send
Here you can choose if you would like e-shot to automatically send the winning split to contacts. If not setup, the user will manually need to send the winning split via the Analytics section.
The winner send time must be scheduled at least 60 minutes after the final split is scheduled to send.
To send your winning split automatically, first tick the tickbox.
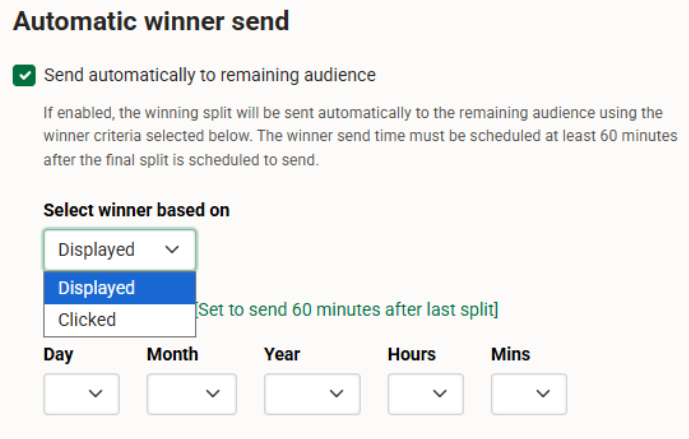
This will open the options for you to:
Select the winner based on the highest display or highest click through rate from your original splits.
When you want the winning split to be sent (this but be at least 60 minutes after all original splits have been sent)
Splits
Here is where you configure what will be sent as part of your split test.
2 splits are automatically added (this is the minimum number of splits required for the campaign to send)
If you require more than 2 splits, click the 'Add split' button in the top right. The number of splits allowed varies depending on your e-shot package.
To edit what is sent as part of a split, either click the down arrow or click the 'Open split' number.
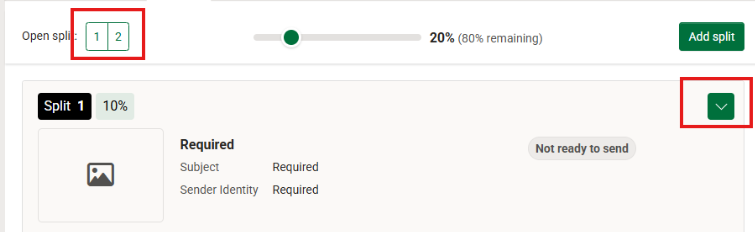
Once you open a split, you'll be asked to set the details for that particular split.
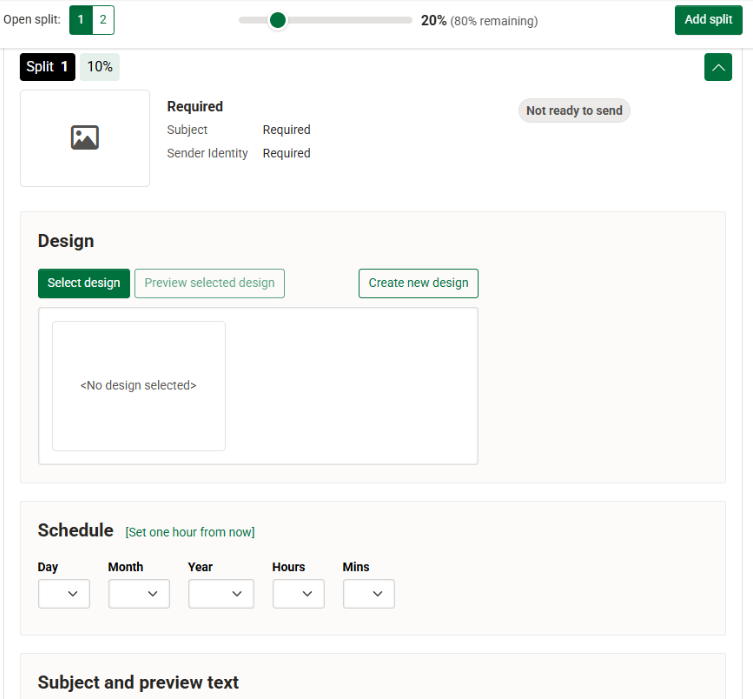
For each individual split, you must set and can control/change per split:
A design (the email used to send to that split)
A schedule (what date and time will that split be sent out)
Subject line and preview text
Sender identity (who the email will appear from in the contacts inboxes)
You also need to select the % of contacts you want that split to be sent to. At least 2% must be saved for the winning split to be sent.
For an equal split test across two splits. We typically recommend each split going from between 30-45% with the rest being sent as the winning split.
Once you have set all these parameters for your split, click 'Save' in the very top right, where that particular split should now be marked as 'Ready to send' as seen below.
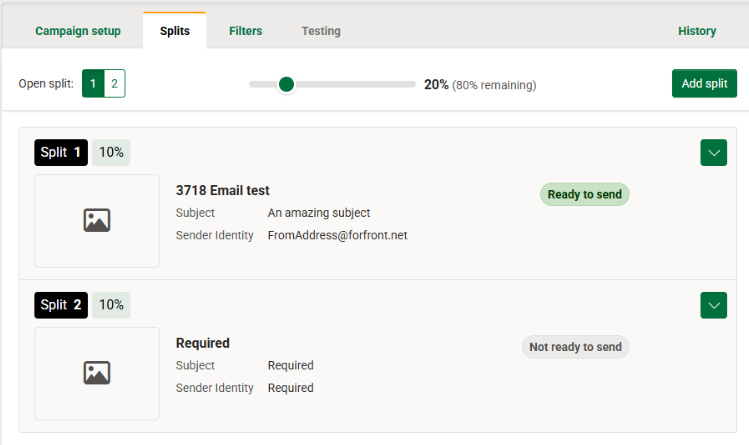
Repeat this process for each split you have.
*Remember, the purpose of a split test campaign is to test different things against one another. We recommend only changing one thing at a time, for example two different subject lines for each split. The mor you change, the harder it is to know why that split performed better.
Example split:
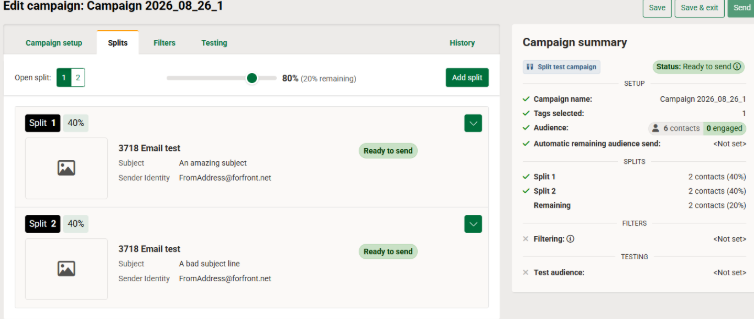
Same design, same identity but a change of subject line.
Split 1 and 2 going to 80% of my audience (40% each)
The winning split will be sent to remaining 20% of contacts in my selected audience
Copying a previous split
Setting up an split (A/B) test shouldn’t mean starting from zero each time. The “Copy previous split” button duplicates the design, subject line and sender identity from your previous split into the one you’re working on, so you can get a new variant ready in seconds.
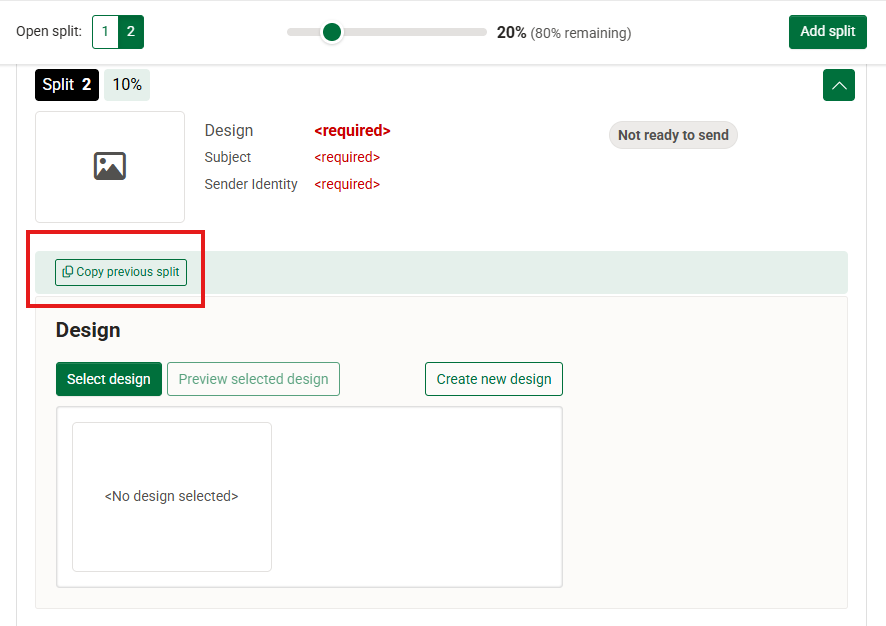
Once copied, simply change the element you want to test. For example:
Testing a subject line? Keep the design and sender identity the same and edit only the subject line.
Testing a sender name? Leave everything else untouched and swap the sender identity.
Testing a design? Keep your subject and sender, and select a different design.
Changing one element at a time means you can be confident that any difference in results comes from the change you made, not from several things at once.
Filters
Here you're able to filter your audience down further by applying different filter types.
Saved filter: A filter setup in the CRM
Sign up form filter: Filter your audience down to contacts who ONLY signed up via the chosen sign-up form
Performance filtering: Filter your audience based on previous campaign sends. For example, only send this split test to contacts who DID NOT open X,Y or Z emails.
Typically for split tests, filtering won't be applied, hence this being away from the main setup steps.
Testing
Here you're able to test the splits you have setup.
*We ALWAYS recommend testing before you set your campaign live.
To test you can either:
Send a quick single email test
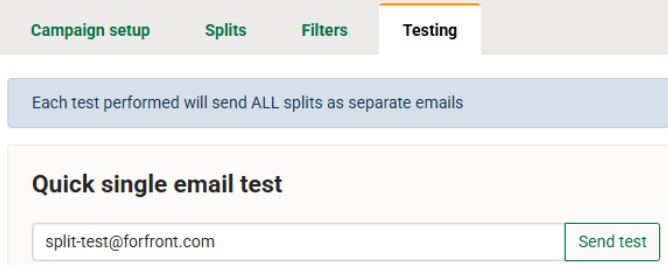
This will be pre-filled with the logged in users email address but can be overwritten. This option is great for sending a single test to a single person. Clicking send test will send you multiple test emails, one for each of the splits you previously setup.
Full test
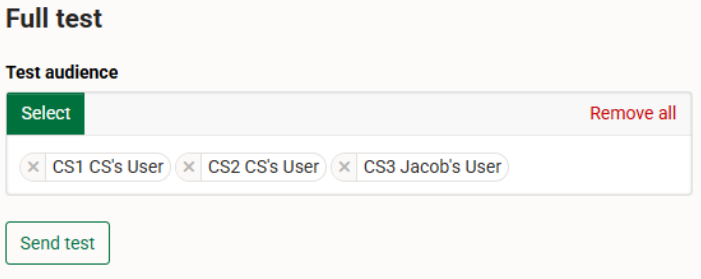
This allows you to send the same test emails but to multiple users from the e-shot account. Great for if multiple staff are involved in the campaign or you want to test it to yourself and another colleague/manager.
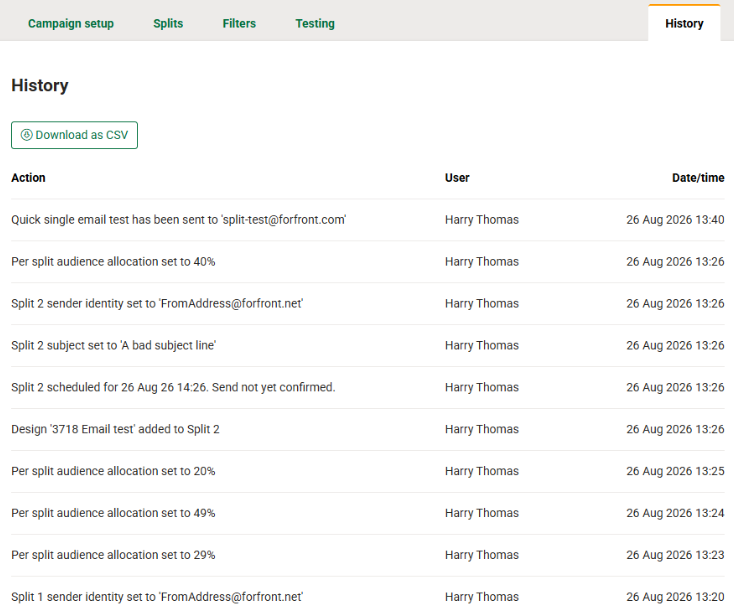
History
The history tab acts as an audit for what has occurred in the campaign's setup thus far. History includes things such as a design being assigned, an audience being set and a test being sent out.
Campaign summary
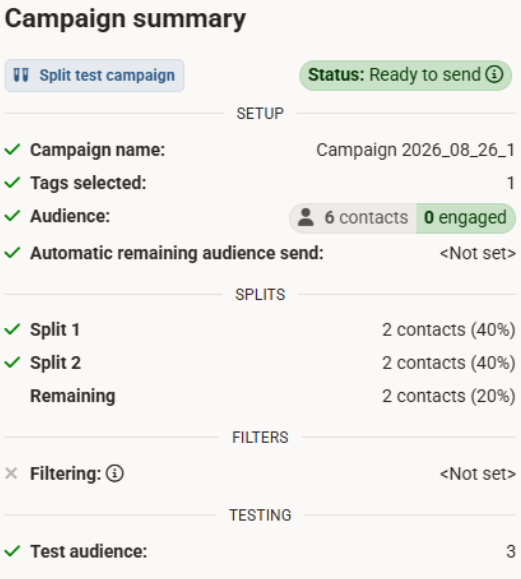
As you're going through all the above steps, and saving as you go, the campaign summary updates and provides a quick overview of what's been set on the campaign. Now I have finished all my steps, I can see my campaign is marked as 'Ready to send'.
Sending your split test campaign
If you're happy to start your split test, click the 'Send' button in the top right. This will give you the below pop up.
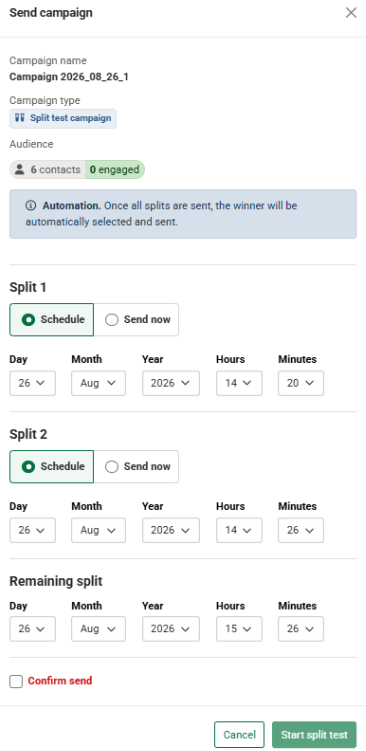
Here you must confirm when you want your splits to be sent and the winning split (if chosen to send automatically).
Once happy, tick the 'Confirm send' box and click 'Start split test'. You'll then be returned to the campaign list page where your split test is now 'Active'.

*Once a split has started sending it cannot be cancelled along with any of the other splits.
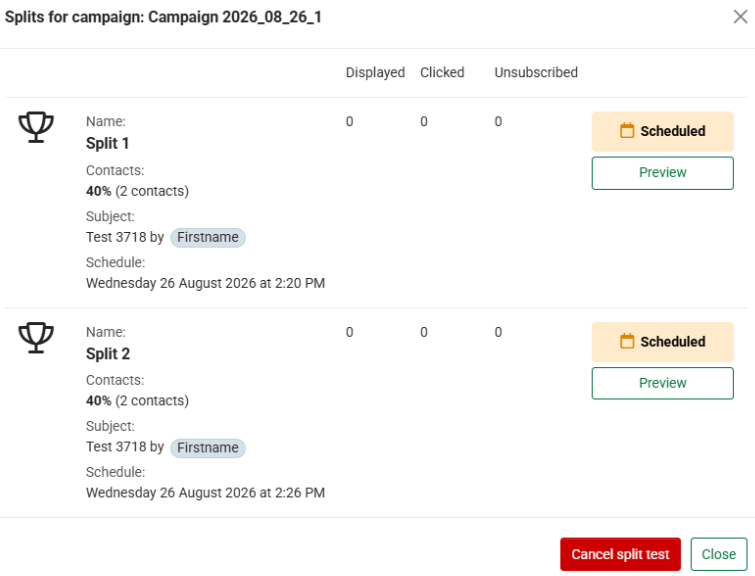
To monitor how the splits are performing or cancel them before they start sending, click 'Show splits'.
Analytics
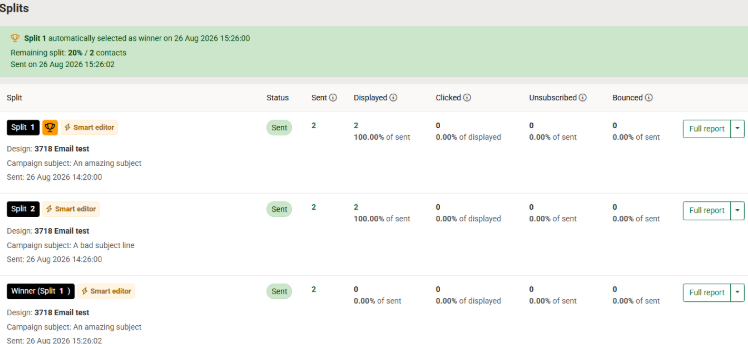
Once your splits have all finished sending, the campaign moves to the Analytics section. Here you'll be able to view each individual splits performance.
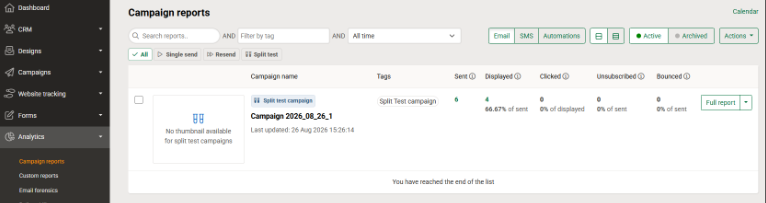
From the Analytics > Campaign reports page, you get a full overview for how the campaign performed as a whole (all splits). If you want to see how each individual split performed, click the 'Full report' button.
Here you can see how each split compared across those key metrics.
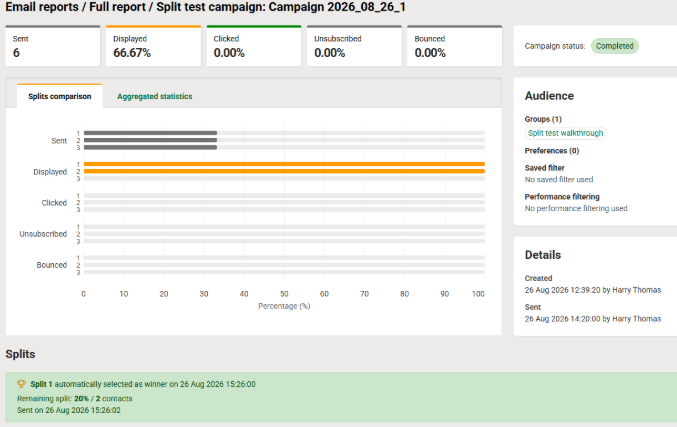
Slightly further down, you can see each split that was sent and again use the 'Full report' button to see more in-depth stats for a singular split.
Use split test whenever you're not certain which approach will perform best whether that be a new subject line, message layout, or send time. It can be especially useful for validating changes before you commit to them across your whole audience, turning a one-off guess into a repeatable, data-backed decision.
You may also like these articles
Campaigns
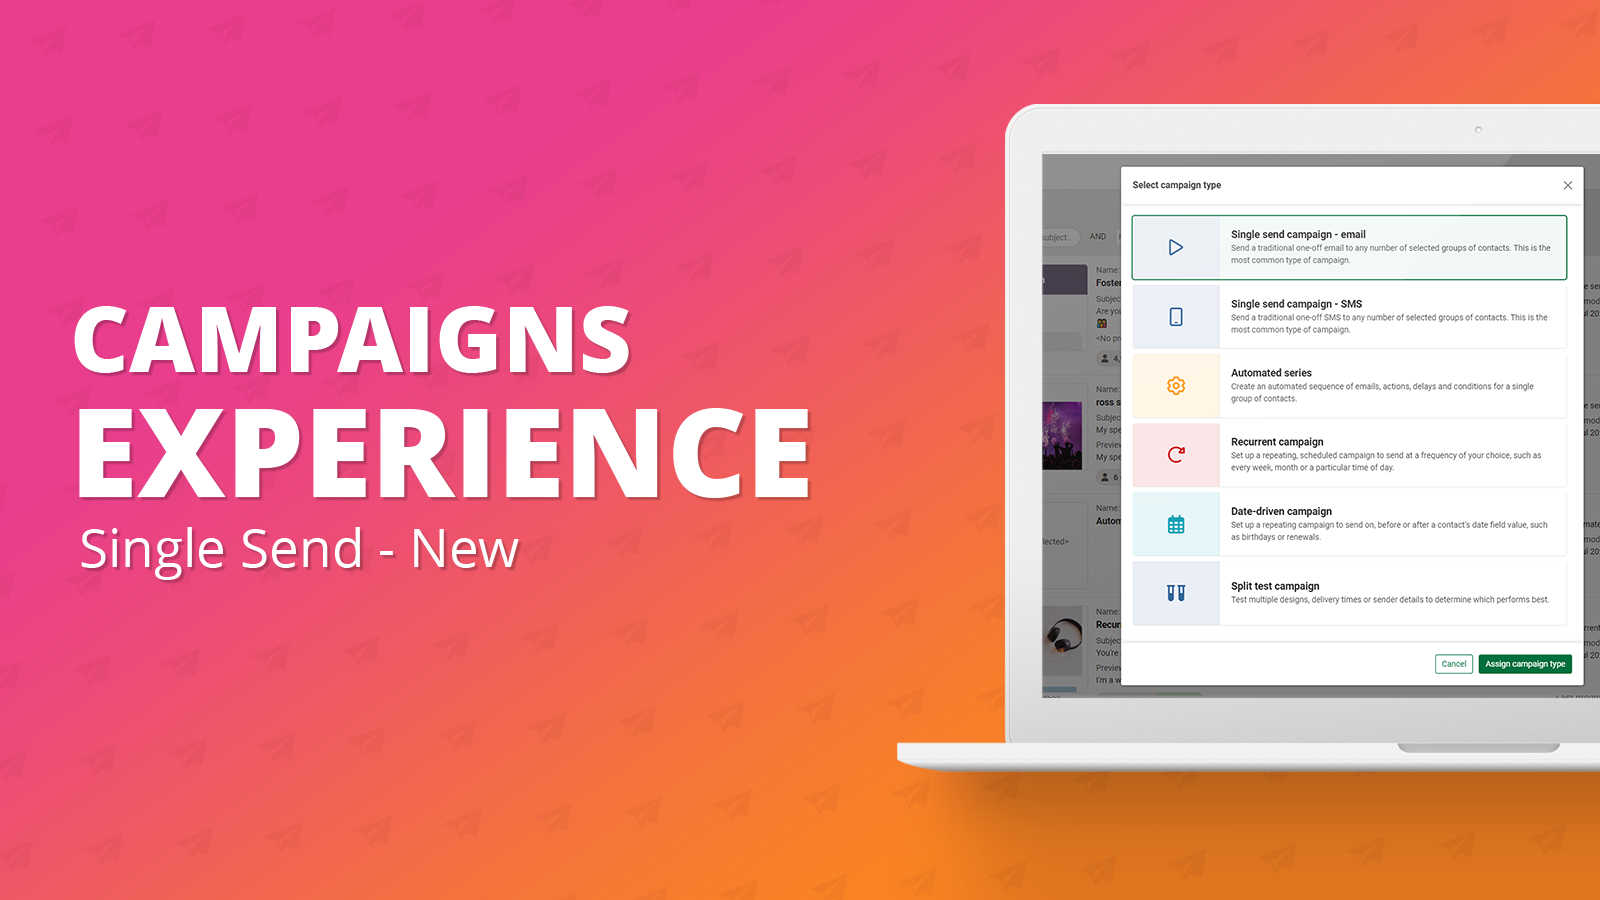
Campaigns: Single send campaign
June 11th, 2024 - Harry Thomas
The ‘New single send campaign’ offers the same functionality as the legacy single send campaign but with an improved overall user experience. New...
Campaigns
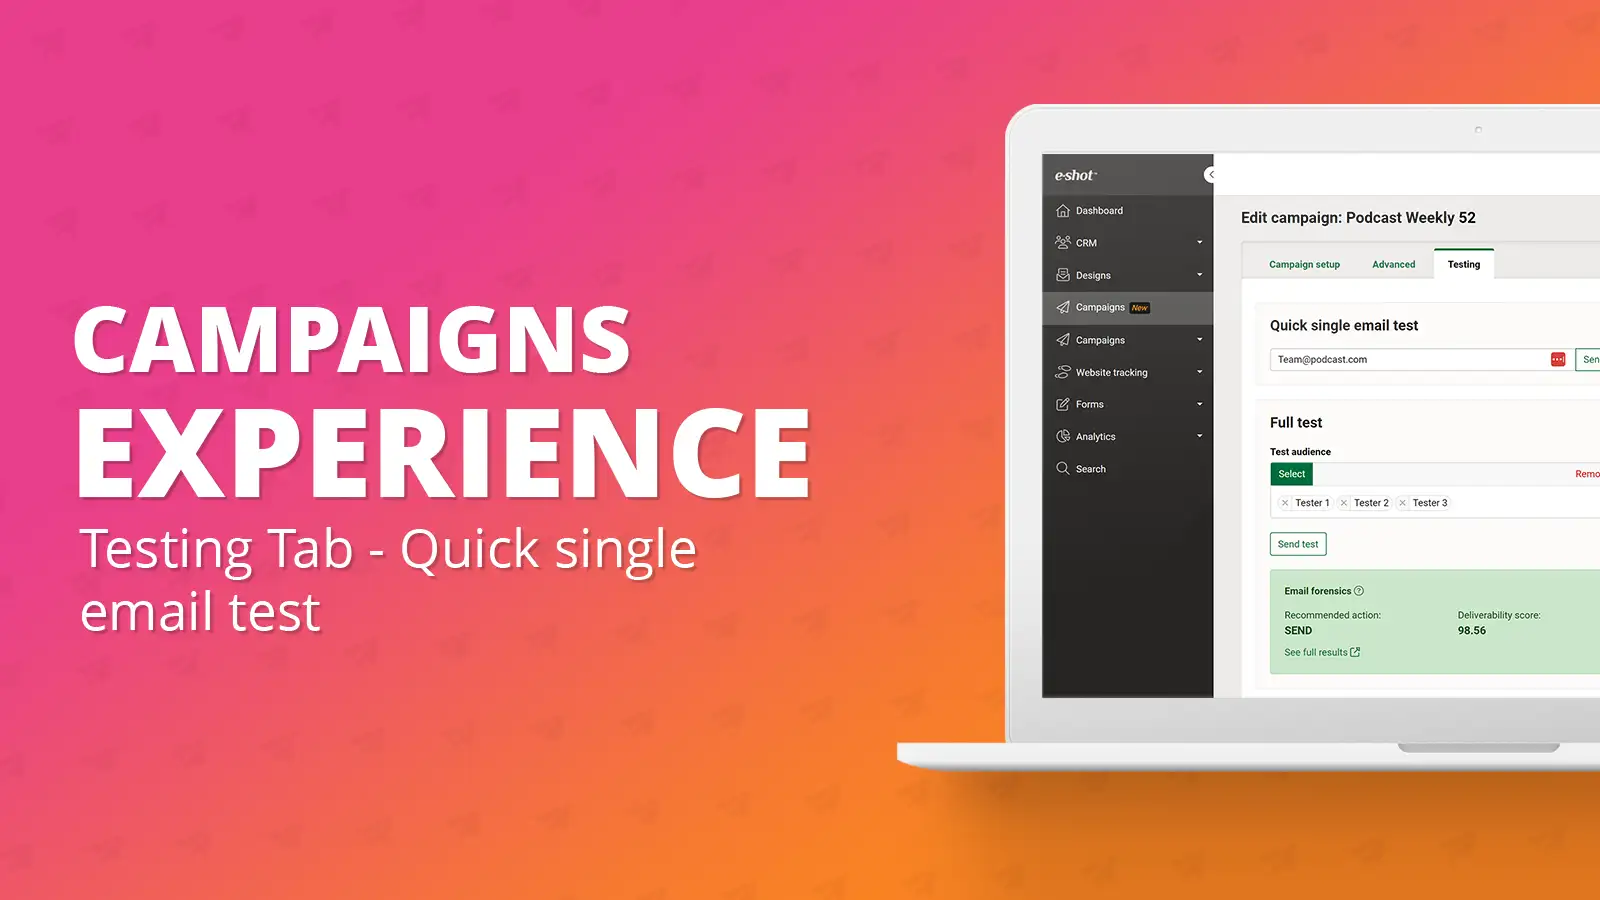
Testing tab: Quick single email test
July 24th, 2023 - Harry Thomas
We have now simplified the testing experience from within the campaign and added an additional area labelled ‘Quick single email test’. This is a...
help-articles Designs
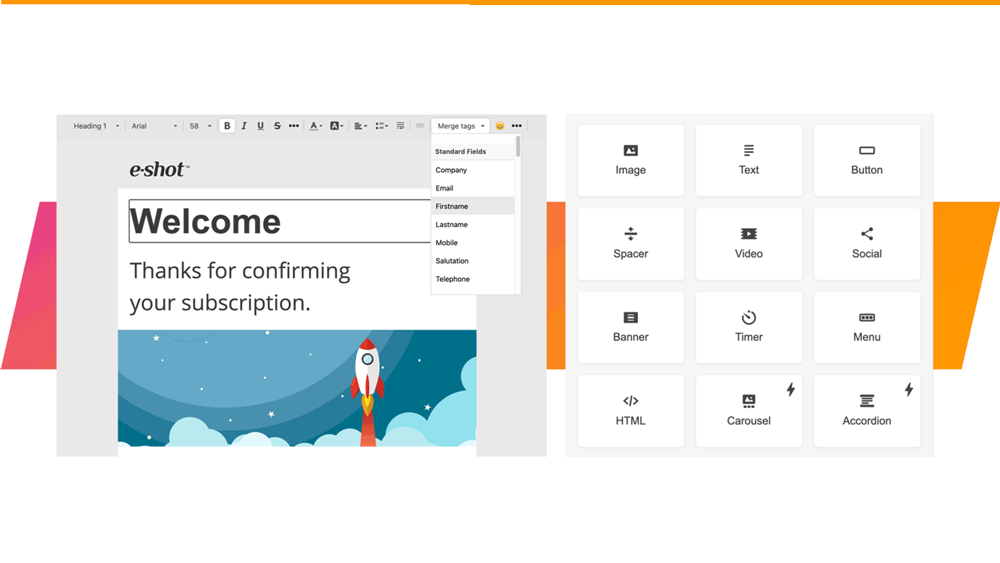
Smart Editor: Creating a single question survey
November 17th, 2021 - Sadie Burgess
Single question surveys are easy to assemble and a convenient way to get insight into your contacts views. And as it is only one question it is...
Solutions

Email Marketing
Create email campaigns and newsletters and manage end-to-end subscription processes with forms and preferences.

Marketing Automation
Create sophisticated automated campaigns for email and SMS combined.

Digital Communication
The comprehensive solution to manage and automate your digital communication across email, SMS, websites and landing pages.

Email marketing healthcheck
We are confident that we can help you, which is why we offer a free healthcheck to identify potential issues with your current programme and free advice on things that could be done to improve it.