Help articles
CATEGORY: Campaigns
Campaigns: Single send campaign
The ‘New single send campaign’ offers the same functionality as the legacy single send campaign but with an improved overall user experience.
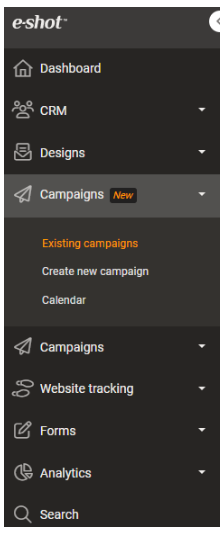
New customers will only have access to this single send method but for older e-shot customers, you can access the new campaigns page by visiting ‘Campaigns New’ in the e-shot navigation bar.
Existing campaigns list
Once you visit this page, you will be presented with all the existing campaigns (Active or not yet sent) in a list format, like the ‘Existing designs’ page.
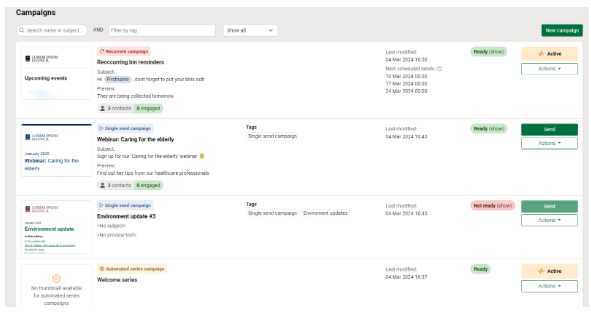
From this page you can send campaigns marked as ‘Ready’ or ‘Deactivate’ campaigns that are currently ‘Active’.
Next to each campaign you will find the campaign name, the campaign type being used, the subject line and preview text attached to the campaign, any tags that have been assigned, when the campaign was last modified and if it is ready to send or not.
From this page you can also search for campaigns and filter them by tags or campaign type.
For more details on the campaigns list view page, you can view the dedicated help article here.
Creating a new campaign
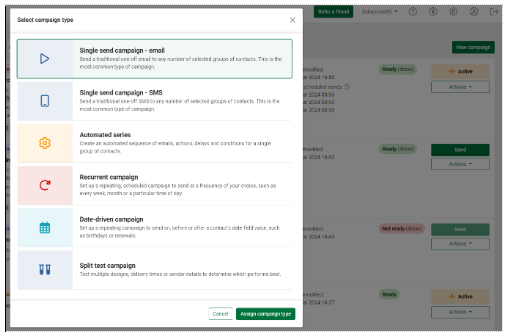
To begin creating a new campaign, click the ‘New campaign’ button in the top right of the page.
Doing so will bring up the below pop-up where you can choose the campaign type you would like to use. To choose your campaign type, you can either double click on a campaign type or single click then click the ‘Assign campaign type’ button.
Once you have assigned the ‘Single send campaign – email' campaign type, you will be taken to create a brand-new campaign like below.

Creating your campaign
You can now create your campaign, but lets go through all the steps.
Campaign setup tab
The basics.
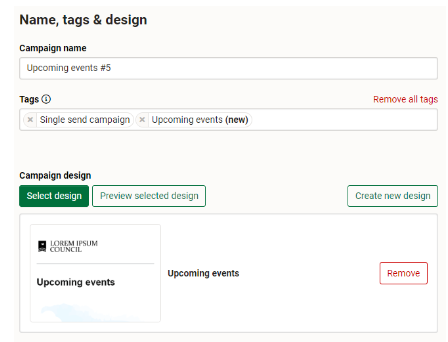
To begin you can give your campaign a name (this is what you will see in the existing campaigns list and also in analytics once the campaign has been sent). The campaign name is only seen by e-shot users.
You can assign any tags to your campaign. These are also seen on the campaign list view and are useful for filtering purposes. For the full details on tags, you can find out dedicated help article here.
Finally, you can assign a design you previously created to your campaign, to do simply click the ‘Select design’ button. Doing so will bring up a list of the recent designs available in your account.
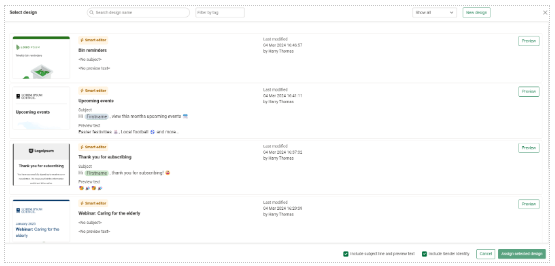
You will see the options ‘Include subject line and preview text’ and ‘Include Sender Identity’ are automatically ticked, this will carry across those details that may have been set on your design (NOTE: You do not need to have these set on your design and they can be updated at any time from within the campaign).
To assign your design, double click or single click and click the ‘Assign selected design’ button. Once you have assigned a design you will be returned to the campaign.
The campaign name, tags and design can be changed at any point before the campaign is sent.
For the full details on this section, find our dedicated help article here.
Here you can set a schedule for when you would like your campaign to be sent. This section does not need to be filled in to send your campaign and if set, the campaign will still need to have this schedule time sent.
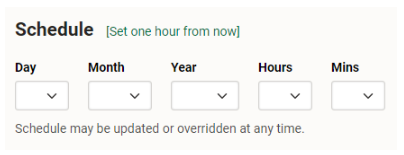
For the full details on setting a schedule, find out dedicated help article here.
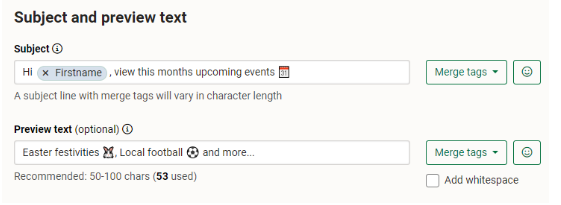
Subject line and preview text
Here you can update your subject line and preview text if it was pulled in from the design or if it has not been set, you can set it here. Only the subject line is mandatory, although we advise you also make use of the preview text.
For the full details on this section, view our dedicated help article here.
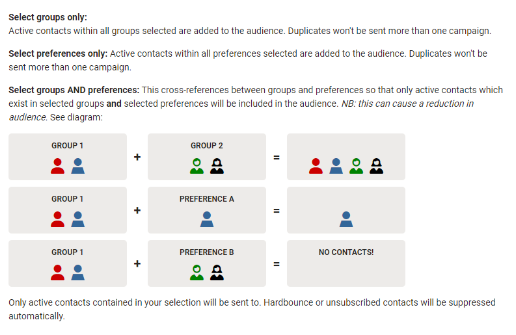
The final section under the campaign setup tab is ‘Audience’. Here is where you choose who your campaign will be sent to. You can send to a group, preference or both.
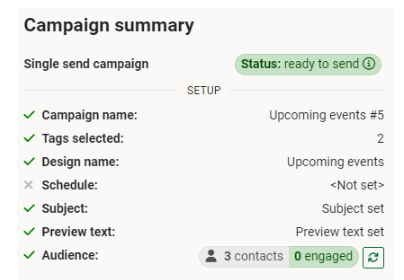
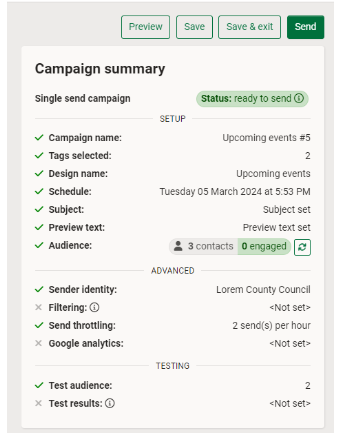
Your audience can be updated at any point up until your campaign is sent. Once you have attached an audience, you will see how many contacts will be sent to under the campaign summary.
For the full details on setting an audience, find our dedicated help article here.
Advanced tab
The additional.
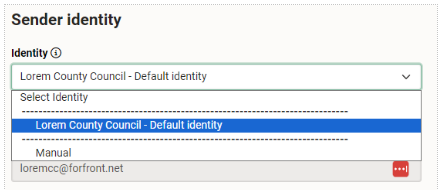
The sender identity is where you can choose who your email comes from. It includes your sender email, sender alias and reply email.
As mentioned at the design stage, this will automatically be pulled into the campaign from the design you assign if one had been set. However, this can be overruled.
To do use the dropdown to choose one of the identities that has been setup.
For the full details on setting and updating the sender identity attached to your campaign, find the dedicated help article here.
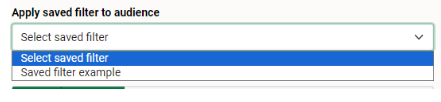
Audience filtering allows you to filter the audience you previously set. You can either filter using a sign-up form or a saved filter.
To apply a saved filter, first you will have needed to create a saved filter in the CRM section, you can find out how to do that here. Once you have your filter, to add the filter to the campaign, use the dropdown, this will bring up a list of all the saved filters that are available for you to use.
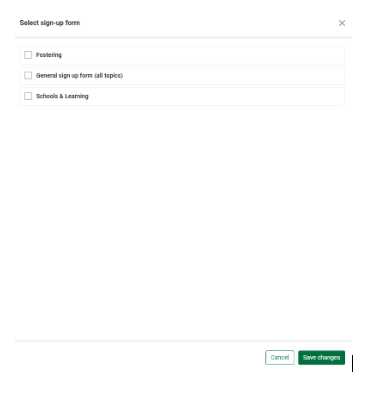
To apply a sign-up form filter, click the ‘Select’ button. This will bring up all the active sign-up forms in your account. This will bring up the below pop up, where you can select and apply the sign-up form/s you would like to use to filter your audience.
Similar to when you apply your original audience, once an audience filter has been applied, your audience size will update under the campaign summary. For the full details on applying audience filtering, find the dedicated article here.
The final section under the advanced tab, is the send speed of your campaign.
A send speed allows you to control how many emails will be sent per hour. This helps with deliverability and manageability for those larger sends.

To apply a send speed, first tick the box available, once you have done that, you will be able to specify the number of sends you would like to go per hour.
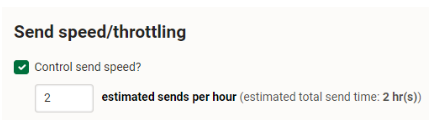
Once you have done this, you will see the estimated total send time for the campaign. In the above example sending to 4 contacts, 2 per hour means the campaign will be completed after approximately 2 hours.
For the full details on send speed, see our dedicated help article here.
Testing tab
Arguably the most important.
The testing tab allows you to send a test to either yourself or a select few contacts. This test email will appear the exact way it will to your contacts in their inbox, the only different being ‘[TEST]’ will be in front of the subject line.
Quick single send test
This test allows you to send a test to one email. The field will be prepopulated with the email you use to login to e-shot, meaning all you need to do is click that ‘Send test’ button.

Full test
This test allows you to send a test to any number of the test contacts that have been setup on your account. To perform this test, click the ‘Select’ button to choose your test contacts, tick the contacts you would like to receive the test and apply that audience by clicking the ‘Select test audience’ button.
Once you return, simply click the ‘Send test’ button to send a test to all the chosen contacts.
After a few minutes, you will be able to access the email forensics data for that test send. This allows you to view your test email in over 40 different email clients and devices.
For the full details on each of these areas, find our dedicated articles below.
History tab
Who did what on this campaign?
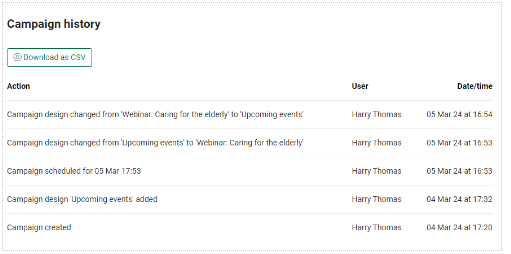
The history tab gives you an overview of what user performed which action and when. These actions include updating a design or setting a schedule. Find out more here.
Sending the campaign
There are a couple of areas you can send your campaign out from. From within the campaign you can click the ‘Send’ button.
This will allow you to send the campaign now or set a scheduled send date.
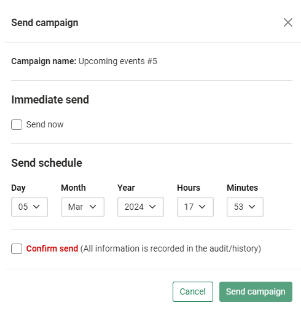
The other way to send a campaign is from the ‘Existing campaigns’ list view page. To do this, again click the ‘Send’ button next to the campaign to bring up the same pop up as above.

Once your campaign has sent, it will be found in the analytics section of e-shot where you can analyse how well the campaign performed.
Solutions
Email Marketing
Create email campaigns and newsletters and manage end-to-end subscription processes with forms and preferences.
Marketing Automation
Create sophisticated automated campaigns for email and SMS combined.
Digital Communication
The comprehensive solution to manage and automate your digital communication across email, SMS, websites and landing pages.
Email marketing healthcheck
We are confident that we can help you, which is why we offer a free healthcheck to identify potential issues with your current programme and free advice on things that could be done to improve it.