Help articles
CATEGORY: CampaignsWhatsApp
How to create a WhatsApp campaign
A WhatsApp campaign lets you send an approved WhatsApp design to a selected audience. Before you can send a campaign, you'll need an approved WhatsApp design ready to use. If you haven't created one yet, refer to our How to Create a WhatsApp Design guide.
Step 1 — Navigate to campaigns
From the main navigation, go to Campaigns and select Existing Campaigns. Click the New Campaign button in the top right of the page. Or from the Campaigns dropdown select Create new campaign.

If you do have a Meta approved WhatsApp design, you may also create a campaign for that design from the designs list page.
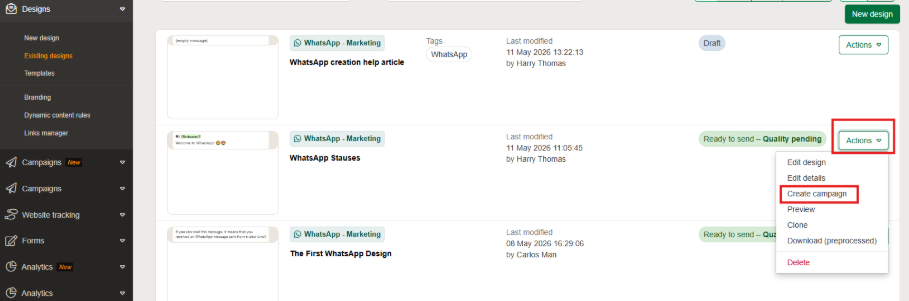
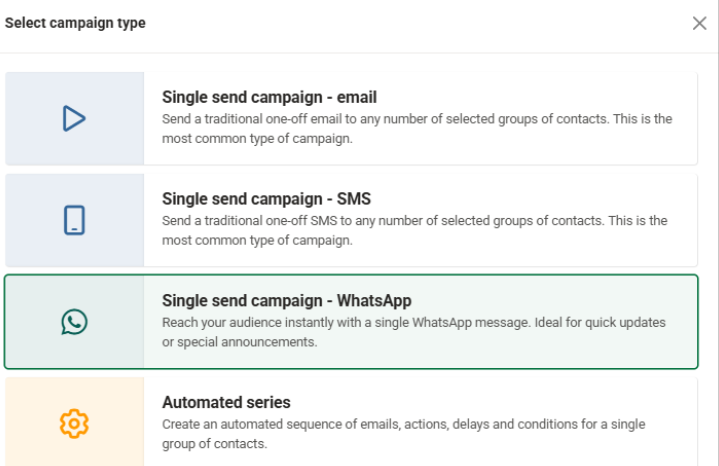
Step 2 — Select your campaign type
A pop-up will appear asking you to choose a campaign type. Select Single send campaign – WhatsApp, then click Assign campaign type to continue.
Step 3 — Name your campaign
Give your campaign a name. This is an internal reference only and will not be visible to recipients. Choose something descriptive that will help you identify it later in the campaigns list and in analytics, for example "Housing Appointment Reminder – June 2026".

Step 4 — Assign Tags (optional)
You can assign tags to your campaign to help with filtering and organisation on the Existing Campaigns page as well as the Analytics page. Tags are important as they help you to organise campaigns, find them easier and compare sends over time.
Similar to the name, this again is internal but it's good to have a tag for each type of campaign send you perform, following on from our campaign name example, Housing Appointment Reminders would be suitable as it is a tag that can be used over and over for all campaigns relating to housing appointments.

Step 5 — Select your design
Click the Select Design button to choose the WhatsApp design you want to send. This will bring up a list of available designs in your account. Only designs with an Approved status can be used in a campaign.
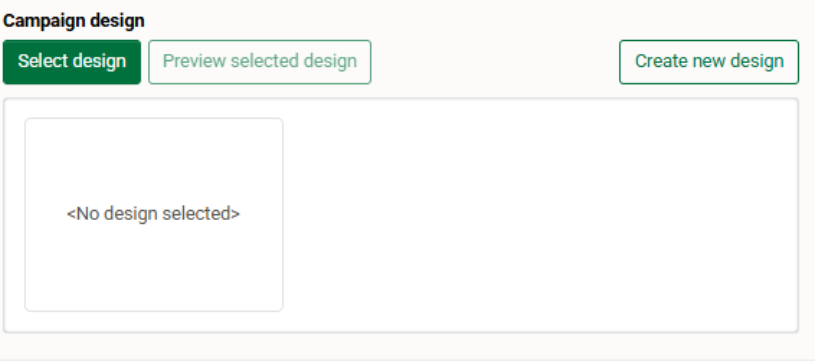
To assign your design, double click it or single click and then click the Assign selected Design button.
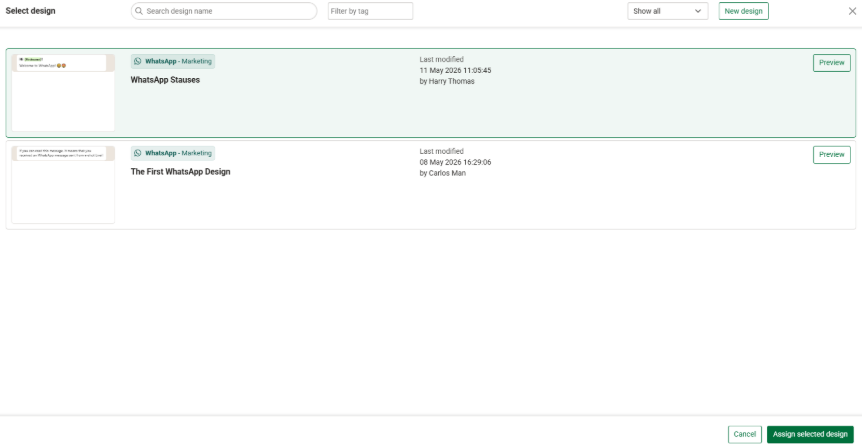
Note: If your design does not appear in the list, check its status on the Existing Designs page. Designs that are still In Review, Paused, or Rejected cannot be selected.
Step 6 — Choose your audience
Under the Audience section, select the groups or preferences you want to send to. You can send to a saved group, a preference list, or both.
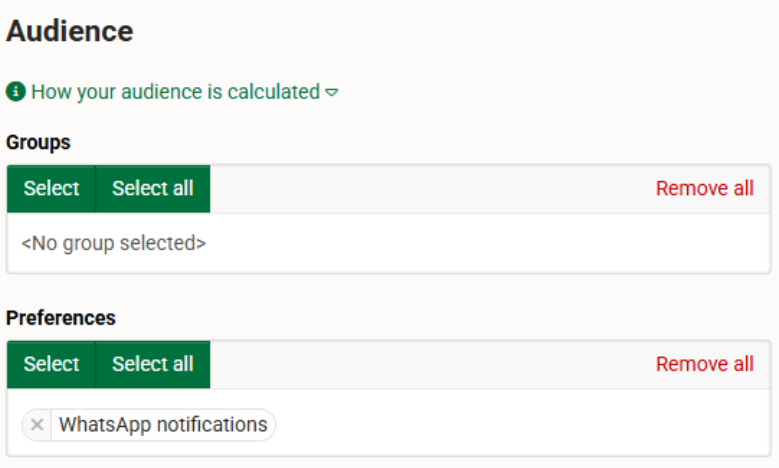
Once an audience has been selected, you'll see a contact count update in the campaign summary on the right-hand side. Your audience can be changed at any point before the campaign is sent.
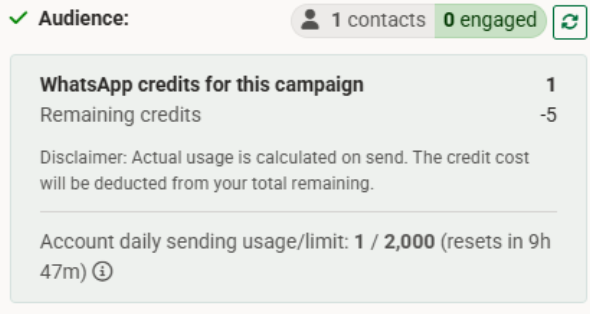
Remember: Your WhatsApp daily send limit applies here. If your audience size exceeds your Meta daily limit, not all messages will be sent. Refer to our Understanding WhatsApp Messaging Limits & Credits guide for more detail.
Under the campaign summary, you can also see how many WhatsApp credits will be used and how much of your Meta daily send limit.
Step 7 — Set a schedule (optional)
Under the Schedule section you can choose when your campaign will be sent. This is applicable if you don't want to send the campaign right away, you can set a specific date and time for the campaign to send automatically.
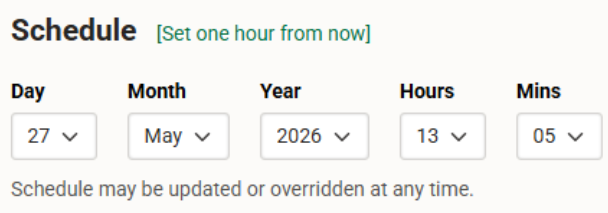
If you set a schedule, the campaign will still need to be confirmed before it sends. Leaving this section blank means you'll send manually when ready.
Step 8 — Review and send
Once you're happy with all your settings, you can send your campaign in one of two ways:
From within the campaign, up in the top right click the Send button. You'll be prompted to confirm whether to send now or use your scheduled time.

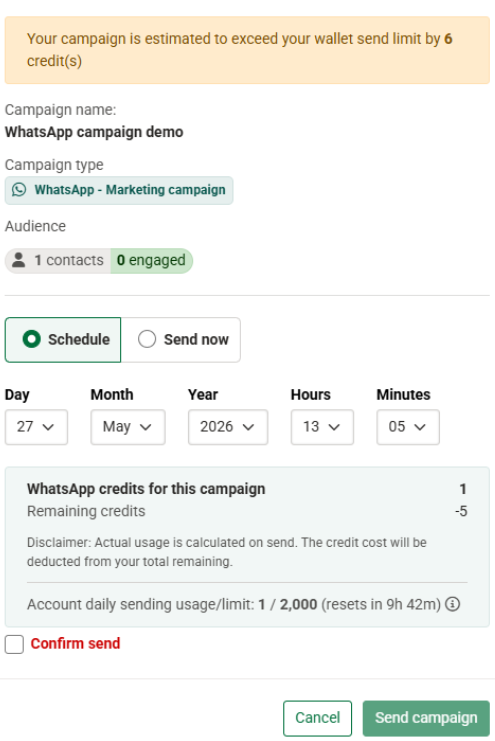
From the Existing Campaigns list, click the Send button next to your campaign to bring up the same confirmation prompt.
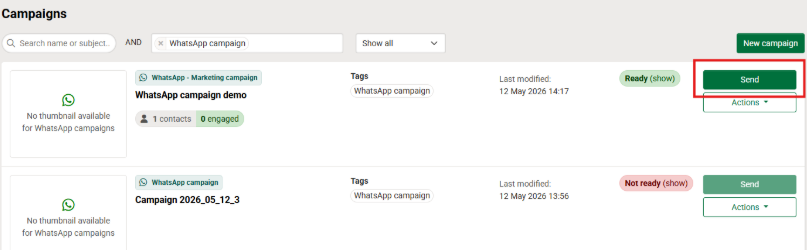
Before confirming, check the campaign summary to ensure the correct design, audience, and schedule are all in place. You will need to tick the Confirm send tick box before the Send campaign button becomes available.
Important: Campaigns cannot be cancelled or retrieved once sending has begun, ensure you are 100% happy before clicking the Send campaign button.
After sending
Once your campaign has sent, it will appear in the Analytics > WhatsApp reports section where you can review delivery and engagement performance.
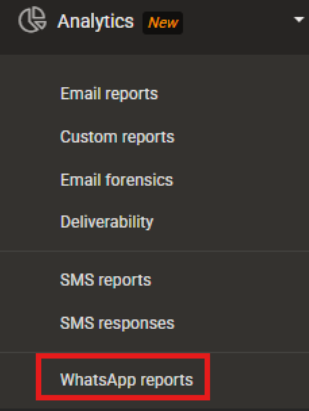
For more details on WhatsApp analytics, you can read our dedicated Analytics article.
Quick checklist
Before sending, make sure:
Your WhatsApp design is Approved by Meta
You have sufficient credits in your account
Your audience size is within your daily send limit
The correct group or preference has been selected
You are happy with the send time
You may also like these articles
Analytics WhatsApp
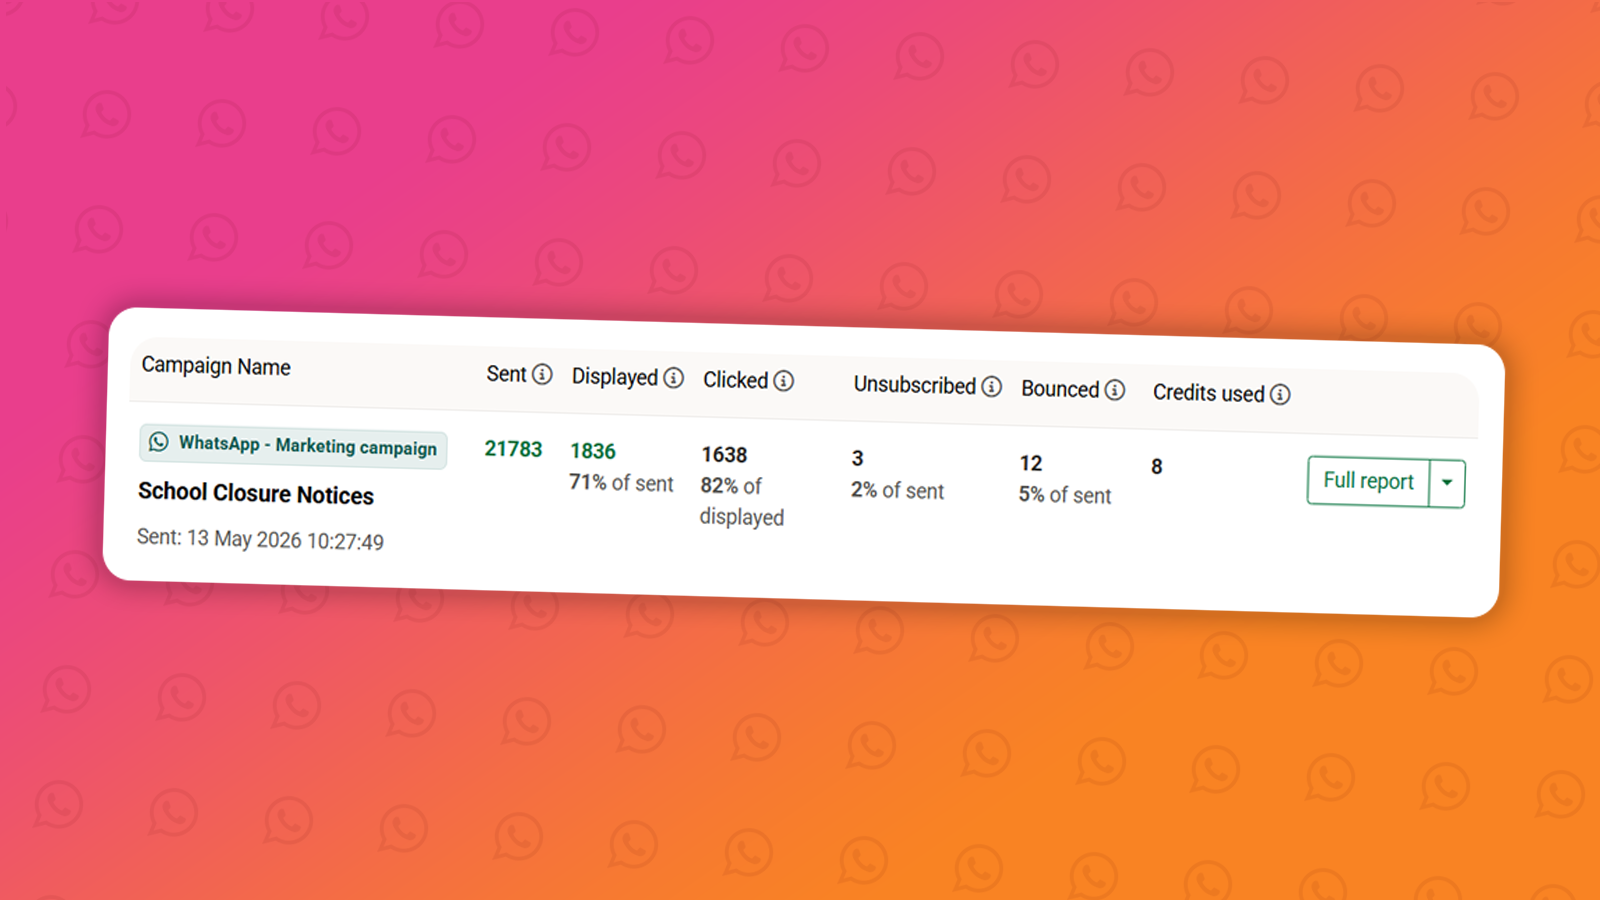
WhatsApp campaign analytics
January 1st, 2027 - Harry Thomas
Once a WhatsApp campaign has been sent, you can track its performance through the Analytics section. WhatsApp reporting gives you visibility over...
Solutions

Email Marketing
Create email campaigns and newsletters and manage end-to-end subscription processes with forms and preferences.

Marketing Automation
Create sophisticated automated campaigns for email and SMS combined.

Digital Communication
The comprehensive solution to manage and automate your digital communication across email, SMS, websites and landing pages.

Email marketing healthcheck
We are confident that we can help you, which is why we offer a free healthcheck to identify potential issues with your current programme and free advice on things that could be done to improve it.