Help articles
CATEGORY: Forms and Landing Pages
How to use JSON to customise your e-shot forms

In this help article we will go through how to use JSON files to customise your forms and how they can be used to reach different targeted audiences, such as those who speak a different language, JSON can help with in many different situations such as giving you more control over how your landing page is presented as well as changing certain words or sentences on your forms.
*Please note using JSON to change the text on e-shot forms as well as editing the JSON file should only be attempted by those who understand Java Script. If you don’t have anyone in your team that knows how to use JSON, please contact The Customer Success Team through the live chat.
Overview:
When building a sign-up form or a preference centre form you have the ability to adapt the JSON values in e-shot's sign-up forms. This allows you to override the text labels and validation rules as well as override the default language which is displayed.
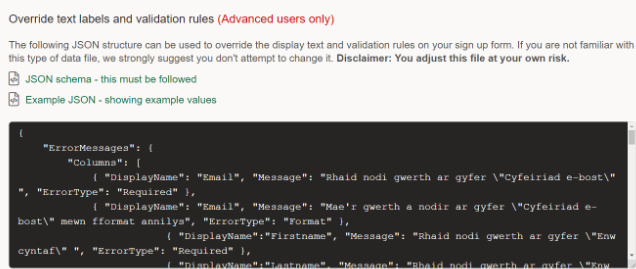
On the publish stage of both the sign-up and preference centre, e-shot gives you two example JSON formats for use in e-shot.
The top file ‘JSON schema – This must be followed’ this file is the structure of how you should you build your custom JSON format to allow it to work with e-shot.
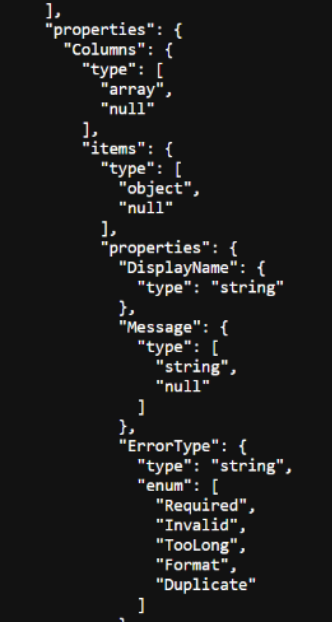
Full example code can be viewed here.
And the second file ‘Example JSON – showing example values’ This document is populated with fields which are built into e-shot e.g. Email field.
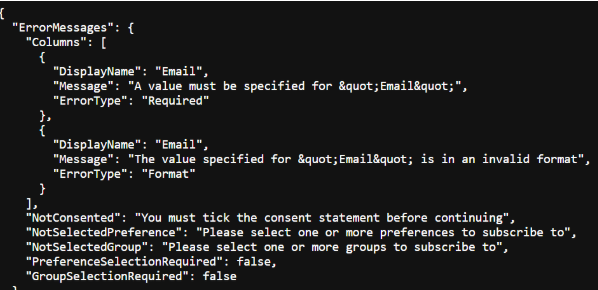
Full example code can be viewed here.
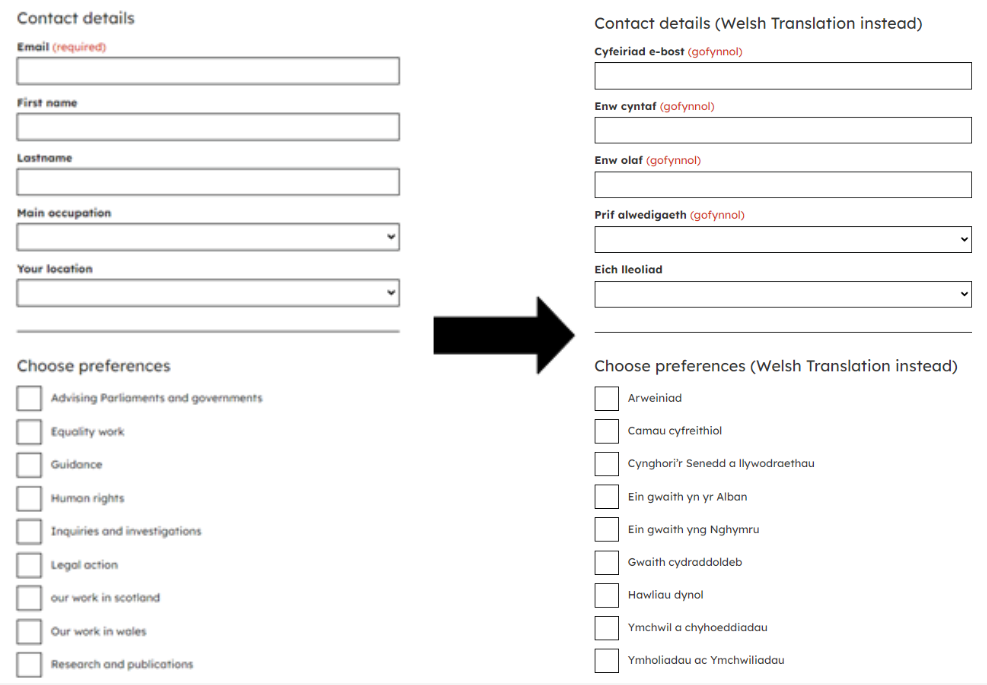
When starting to edit the JSON file you need to make sure that the display names of the values are on the sign-up form/preference centre. In my example, I will be changing all the headings in this sign-up form from English to the Welsh language.
See completed example below.
Making the changes of contact fields
To start the translation in the JSON file below the Fields section there will be a variable called ‘columns’ where all the headings of your forms contact fields can be changed.
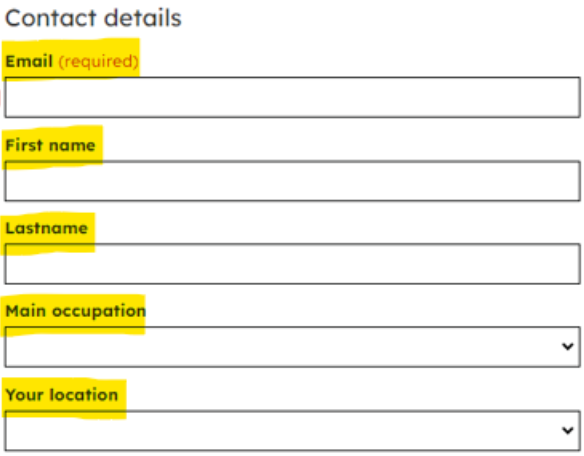
When changing them in the code you will need to navigate to where it says “Columns”, this field will only change the headings of the contact details field names. To change the Email heading, you would need to change the word email next to the “text” field. For example, I will be changing the email field next to “text” to “e-bost”.
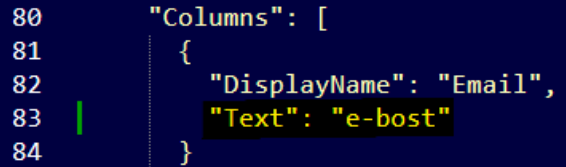
To add more fields, this can be done by adding “DisplayName”: “name of field”, “Text”: “example text” (The Display name needs to match exactly what is on the sign-up form) and this can go directly below the previous ‘ “Text”:”e-bost”, ’
Don’t forget to add commas at the end of every line otherwise e-shot will give you formatting errors.
Once you have added the next name you would like to change, your JSON file should look similar to the below, I have added the first name contact field in my example.

Changing Preferences name
Next, we can move to changing the preferences as well as the headings of the different sections.
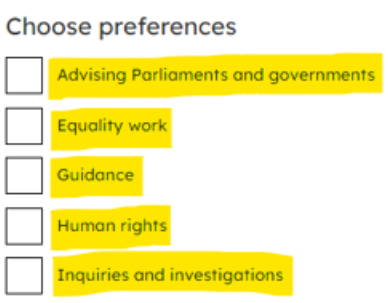
To change the preference centre names, you need to add the code below to your JSON file below the “Fields” section to begin changing the names of the preferences. *You would need to change the preferences name and their alt text. *
When changing the preference centre name, you need to make sure it is matched to exactly what is on the form, otherwise it will not change the text in your form of choice once you have added this to your JSON file and populated it with your preferences.
You can then start to translate the preferences to the names you want; you can do this by changing the preference name after the word text. For example, changing Advising and Parliaments and governments to the Welsh Cynghori’r Senedd a llywodraethau will look like the below.

Once you have changed all the alternative next, yours should look similar to this.

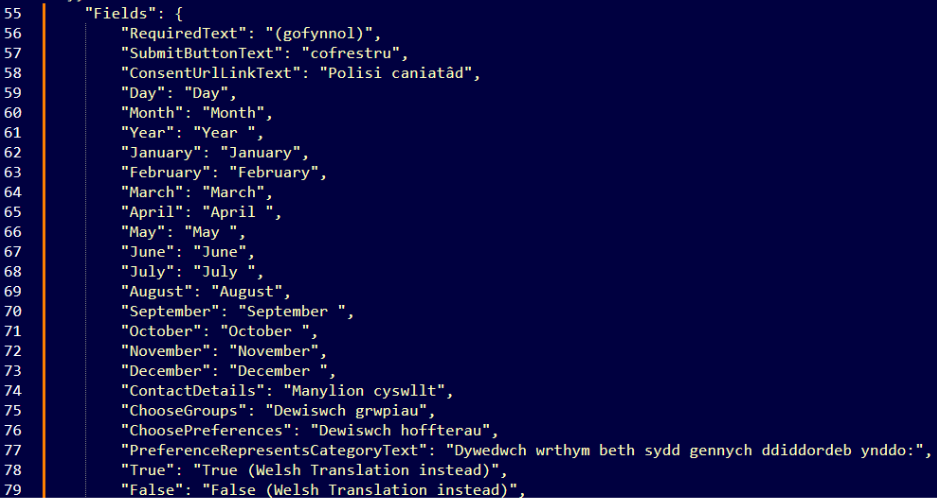
The last thing to do would be to change all the headings, the “consent policy” text and the “required” text as well as the “Sign-up” button text on the sign-up form. All of which can be found in the JSON code under the Fields section.
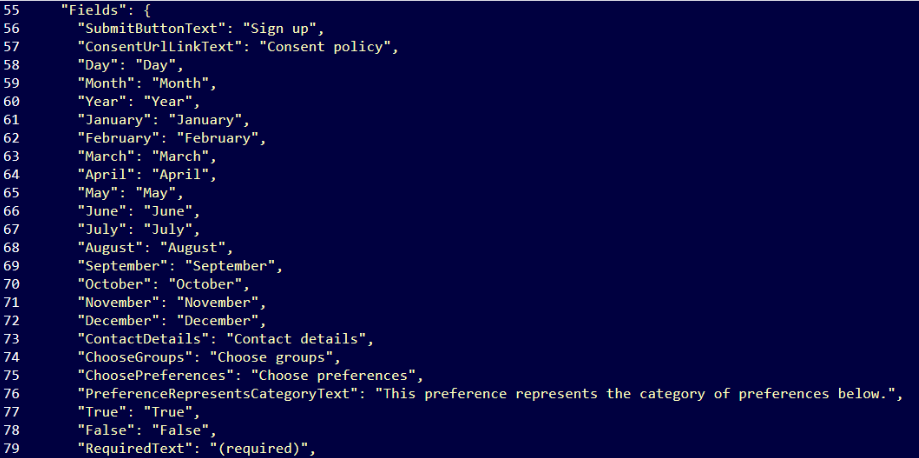
This is the easiest section, as all of text on the forms are on the left and all of the alt text is on the right and it is as simple as changing the alt text on the left, for example changing the sign-up button text, you would need to go to “SubmitButtonText” : “sign up”, and change the “sign up” text to something that’s more fitting to your requirements. This also goes for the rest of the text within this field.
Once you have changed the alt text to something that is better suited to your form, your JSON file should look similar to this.
Once you have made all these changes you are able to then upload your JSON file to your sign-up form. You can do this by creating a sign-up form > stage 7 Publish. On this page there will be a black box which will appear empty the first time you see it.
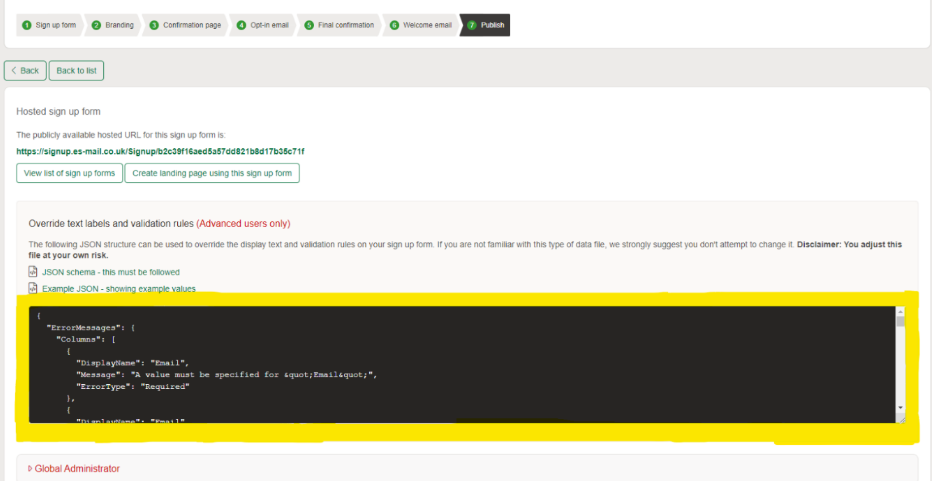
When you have finalised your JSON code you can copy and paste it in this box here, and you will then see a save button appear below the box, once you have completed all of these steps and saved your JSON file to e-shot you should then be able to see your sign-up form change to the text you have selected.
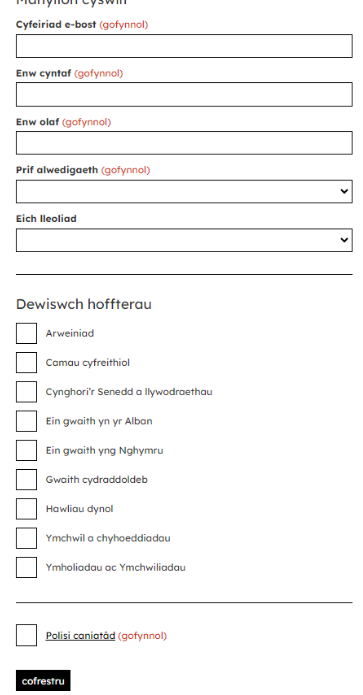
See my completed Welsh example below.
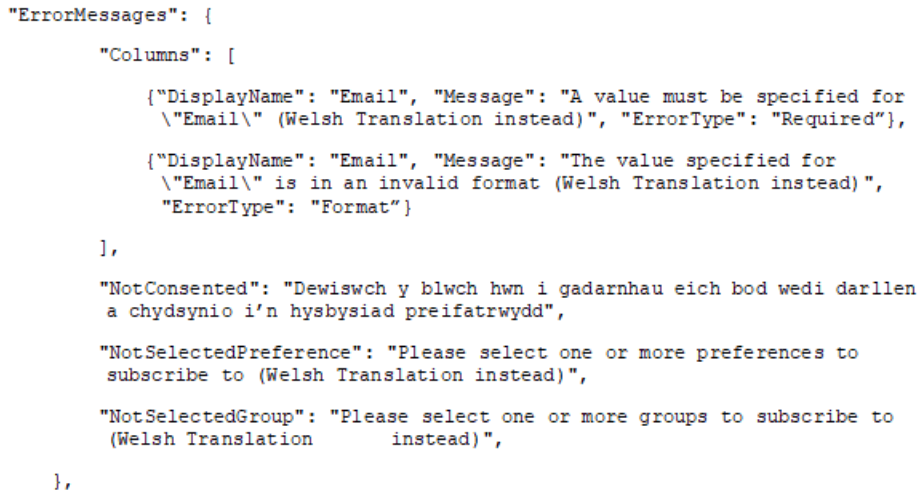
If you wish to make Contact fields required, go right to the top of your JSON code, and manually input The Display name and the error code which you wish to be displayed, for example, you could have an error message such as: Rhaid nodi gwerth ar gyfer \"Enw cyntaf\", not having error messages in the JSON code will change the contact field from being required to not being required
For an invalid First name, adding all the error code which you wish to have on your sign-up form would look like this:
Following these steps will allow you to manipulate the text on the sign-up form and preference centre form, which means that you are able to have multiple copies of the same form in different languages to accommodate for those who may not have an enhanced use of English.
*Please note using JSON to change the text on e-shot forms as well as editing the JSON file should only be attempted by those who understand Java Script. If you don’t have anyone in your team that knows how to use JSON, please contact The Customer Success Team through the live chat.
Using JSON allows you to have control over the words that are displayed within your sign-up form or preview text. Below are some links to live sign up form examples which has used JSON.
You may also like these articles
-1657540460.jpg)
Forms and Landing Pages
Forms: Preference Centre
July 11th, 2022 - Harry Thomas
There are 3 areas in e-shot that make up a ‘Preference Centre’. Settings > Preference settings - where you define the individual preferences for...
Forms and Landing Pages
Forms: Sign-up forms
January 19th, 2022 - Sadie Burgess
To grow your subscriber base, you need somewhere that new subscribers can sign up. To manage your forms, go to the forms section in the main menu...
.png)
Product walkthroughs
Forms & landing pages walkthrough: Platform overview
March 26th, 2024 - Harry Thomas
Collecting sign ups is a key aspect of email marketing. Forms, landing pages and preference centres make this possible as they allow for users to...
Solutions
Email Marketing
Create email campaigns and newsletters and manage end-to-end subscription processes with forms and preferences.
Marketing Automation
Create sophisticated automated campaigns for email and SMS combined.
Digital Communication
The comprehensive solution to manage and automate your digital communication across email, SMS, websites and landing pages.
Email marketing healthcheck
We are confident that we can help you, which is why we offer a free healthcheck to identify potential issues with your current programme and free advice on things that could be done to improve it.