Help articles
CATEGORY: Campaigns
Testing tab: Campaign approvals
The campaign approvals feature is a way to receive an approval on your campaign before it is sent to contacts. Please note, although a campaign is marked as needing an approval, it will not prevent the user from sending the campaign.
In order to assign an approver to a campaign, you will first need to:
Setting an approver
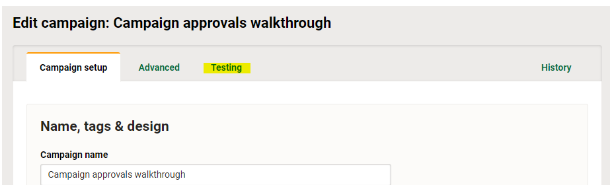
Once you have assigned the design and subject line to your campaign, you will find the ‘Testing’ tab is enabled as highlighted below.
To continue and set an approver, visit the ‘Testing’ tab. On this page you will find a tick box labelled ‘Request approval’.
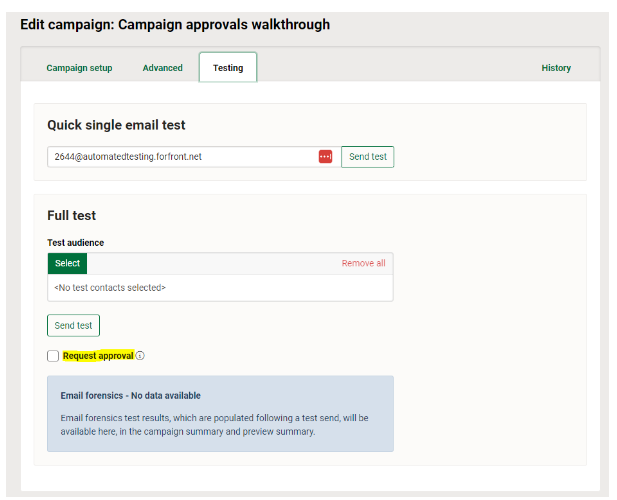
Ticking this box, enables you to set an approver for your campaign as seen below.
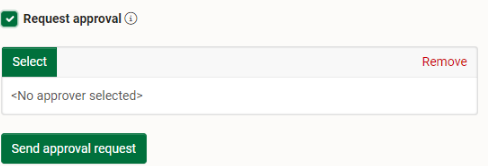
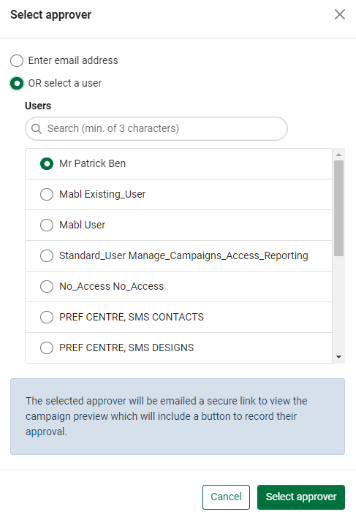
To add your approver, click the ‘Select’ button. You now have two options for choosing your approver:
Enter an email address: Allows you to enter a one-off email address. Once the approval is requested, it will go to this email address. This is the best option if your approver is not an e-shot user.
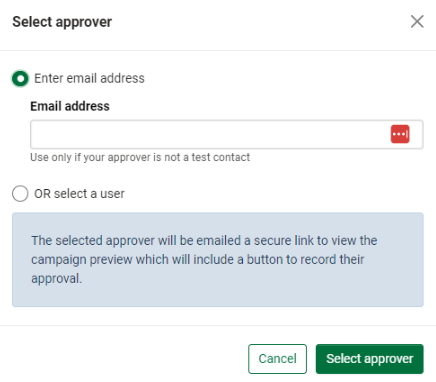
Select a user: If your approver already exists in your account as an e-shot user, you will find them in the list after ticking this option and can then select who you wish to approve your campaign.
Once you have entered your email or chosen the test contact to approve your campaign, use the ‘Select approver’ button to assign them as the approver for your campaign.
*Please note, after clicking the ‘Select approver’ button, the approval is not sent.
Sending the approval email
Once an approver has been selected. You will be returned to the campaign and will find the approver has now been assigned to the campaign.

Once you are happy with approver that has been set, it is important to ensure your campaign is then finished before the approval request is sent.
*Please note if any changes are made to a campaign after the approval is sent, the approval link will become invalid and will have to be resent.
When your campaign is good to go, you can send your approval request to the chosen approver by clicking the ‘Send approval request’ button.
Approving the campaign (approvers side)
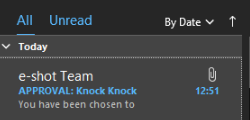
When the ‘Send approval request’ button is clicked, an email will be sent to the inbox of the user or email that was set as your campaign approver.
The email received will have the subject line ‘APPROVAL: subject line of campaign’ as shown below.
Once the email is opened, the approver will be presented with the email you are sending as part of your campaign (like the existing testing function). The only difference will be there is a black strip all the way across the top of the email. This lets the person know they have been chosen as the approver for the campaign.

In order to approve the campaign, the approver will need to click the ‘View/approve campaign’ button.
Upon doing so, they will be taken to a page which looks a lot like the existing preview page of a design as shown below.
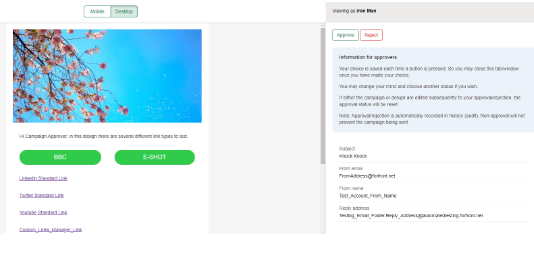
The approver is presented with some information on the right-hand side about the approval itself. Underneath that, they can see the subject line for the campaign ad the sender details (identity) that is being used.
At the top of the email itself, the approver can switch between the desktop and mobile view, again much like the design preview feature in e-shot.
Once the approver has made their decision, they can click either the ‘Approve’ or ‘Reject’ button in the top right. Upon doing so, there action will be presented to them.
How do I know the status of my approval?
From within the campaign, in the campaign summary, you will find the approval statuses under the ‘Testing’ option. As shown below.
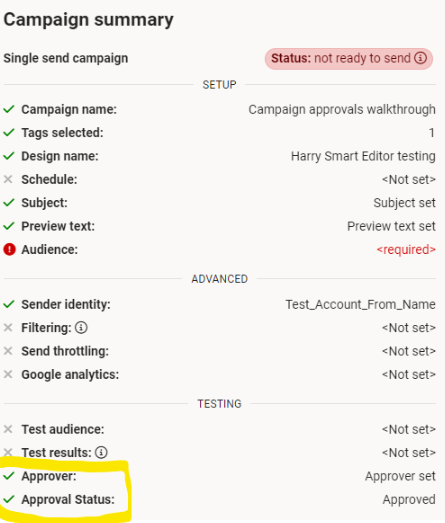
The messages shown for the ‘Approver’ will either be ‘Approver set’ or ‘<Not set>’. The messages for the ‘Approval status’ will be ‘Approval pending’, ‘Approved’ or ‘Approval rejected’
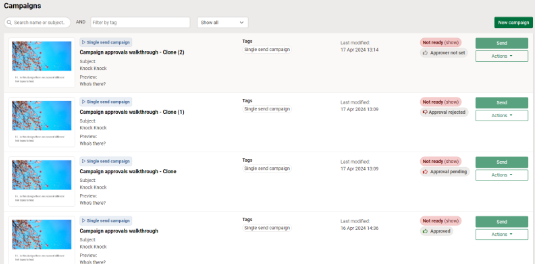
From the campaigns list view under the ready or not ready to send status for your campaign, you will also find the approval status for the campaign (if the approval option is enabled in that campaign). The various statuses shown on the list view can be seen below.
The final way to see the status of your approval is by checking the ‘History’ tab from within the campaign. The history tab will record the actions performed by you (the user) such as ‘Campaign approval is requested’, ‘Campaign approver, "NAME", is assigned’ and ‘Campaign approval request is sent’. The history tab also records the approvers action, for example ‘User has approved Campaign "Your campaign name”’.
The history tab will also record the name of the user that performed the action (if they exist in the account) as well as the date and time the action was completed as seen below.

*Please note if an approver rejects your campaign. This will not prevent the user from being able to send the campaign. The approvals feature is there just an extra way to get the go ahead for your campaign before it is sent. If you find your campaign has been rejected, we would advise speaking to the approver before the campaign is sent.
You may also like these articles
Campaigns
Campaign setup tab: Designs
July 24th, 2023 - Harry Thomas
Designs are essential for your campaign. To send any campaign within e-shot a design must be assigned to the campaign. Selecting a design To add a...
Campaigns
Campaign setup tab: Subject and preview text
July 24th, 2023 - Harry Thomas
It is now possible to update your subject line and preview text at any time whilst creating your campaign. Applying a subject line and preview...

Campaigns
Campaign setup tab: Audience
July 24th, 2023 - Harry Thomas
Campaign setup tab: Audience Your audience is all the people who will receive your campaign. An audience will be made up of groups, preferences,...
Solutions
Email Marketing
Create email campaigns and newsletters and manage end-to-end subscription processes with forms and preferences.
Marketing Automation
Create sophisticated automated campaigns for email and SMS combined.
Digital Communication
The comprehensive solution to manage and automate your digital communication across email, SMS, websites and landing pages.
Email marketing healthcheck
We are confident that we can help you, which is why we offer a free healthcheck to identify potential issues with your current programme and free advice on things that could be done to improve it.