Help articles
CATEGORY: Forms and Landing PagesHelp Articles
Forms: Landing Pages
.png)
A landing page effectively enables you to put a vanity URL wrapper around your sign-up form, and indeed allow you to do some other things as well. There is an element of technical set up required before you can get started building your landing pages so initially you will need to contact our customer success team if you would like the landing page functionality enabled on your account. Once landing pages are enabled you will be able to find the landing page feature underneath Forms > Landing pages > Add landing page.
When you enter the Landing page section you first see the list of pages that you have created, the domain the pages are being created on and the button to build a new page:

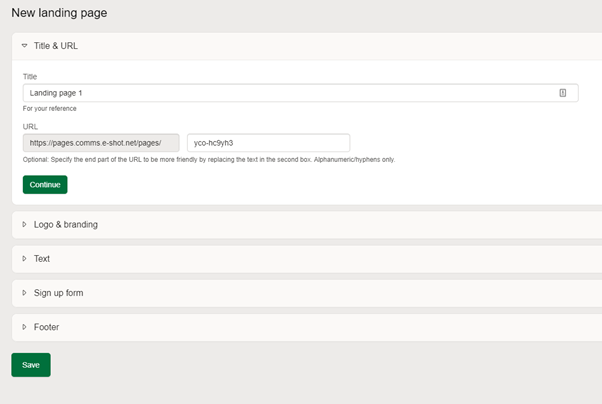
If you create a landing page using this signup form, then effectively, the first thing you’ll be asked to do is give that landing page a title. This is not just an administrative title; this is the friendly name that will go on the top of the page which will be visible in the browser.
And indeed, you can also then specify a URL for that landing page, something easier to remember than the code allocated that you will see in the URL editing field
Note: only hyphens and alphanumeric characters can be used. Special characters cannot be used in the URL.

The next step is to set the braining elements for the page:

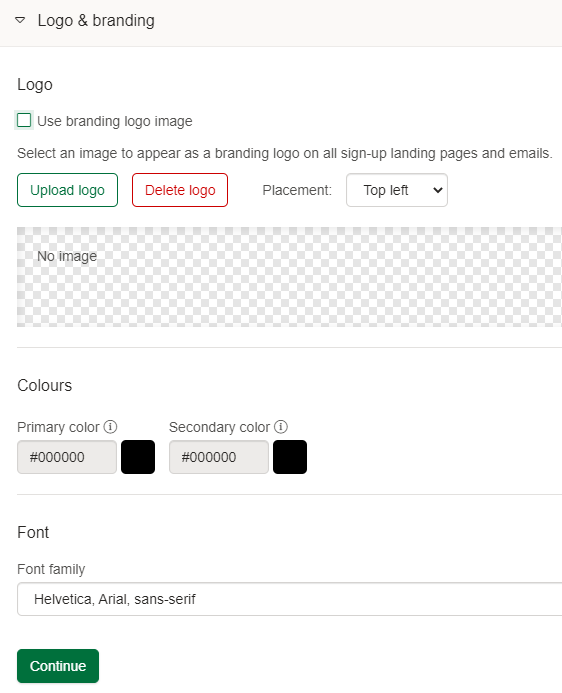
The second stage of the process is to select a custom logo for your landing page, this is where you would add your brand logo (company or product depending on the purpose of the page), which can be customised for each page created.
The selected image will display on all sign-up landing pages and emails.
The position can be set to either the top left, centre or the top right.
Your primary colour is a coloured strip that runs horizontally across the top of the page. The secondary colour is used for links, buttons and dividers.
N.B. If the logo and branding in the form used on the landing page is different to the logo and branding settings here – the page will show the elements set here.
Step three is where you add the text that you wish to appear at the top of your page. First input the header text and then the body copy beneath it.

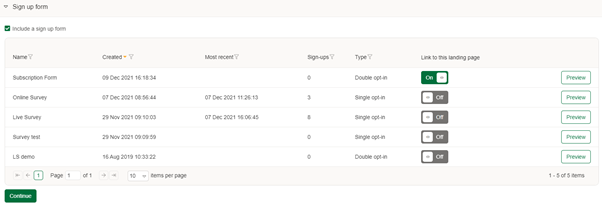
If you have created your landing page by clicking on Forms > Add landing page, then you would have to select the form that you wish to include. (If you created a form first and started the landing page build from the end of the form set up – the form that brought you to this builder will be automatically selected for you). However, you do not have to have a sign-up form on you landing page. Landing pages use it for other things.

Finally, you can add footer text to your landing page. You have the option to include a link to your privacy policy and your company’s information.

The information to populate Companyinfo is held within your account settings and is the same information as appears in the footers of the emails that you send through e-shot.
On completion of this final step then you are taken back to the landing page list page where you can preview and activate the page.
For more information on form building take a look at the dedicated article.
Solutions
Email marketing healthcheck
We are confident that we can help you, which is why we offer a free healthcheck to identify potential issues with your current programme and free advice on things that could be done to improve it.


.png)