Help articles
CATEGORY: Designs
Using dynamic content in Smart Editor designs
Disclaimer: This feature is currently a request only feature and will not be on your account by default. If you would like access to it for no additional charge, please contact us via the live chat.
e-shot’s dynamic content rules feature helps you personalise your campaigns by showing different content to different audiences — all from a single email design. This means you can tailor your messaging without needing to build multiple versions of the same campaign and design.
Dynamic content uses the rules you defined by contact fields to determine what each subscriber sees. This makes it simple to deliver relevant, timely content that resonates with each recipient while saving you valuable design and build time.
We’ve also made it easy to manage your rules, so you can adapt messages for different audience groups, keep your communications more personal, and improve engagement without overcomplicating your workflow.
In this help document, we’ll walk you through how to set up dynamic content rules and add them into a design.
Setting up your dynamic content rules
Before you can add dynamic content into your design, you first must set up your relevant dynamic content rules. To do so, head to Designs > Dynamic content rules as seen below.
This will take you to the below page, where you will also find pre-existing rules if any other users have set them up.

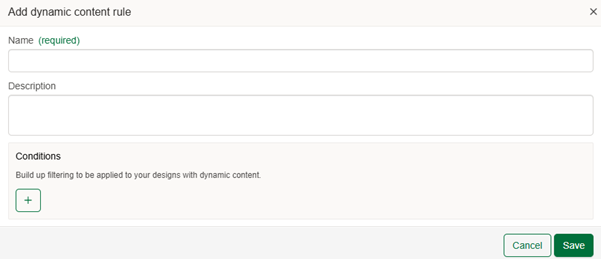
To begin, click the ‘New rule’ button in the upper right corner. Doing so will bring up the below pop up.
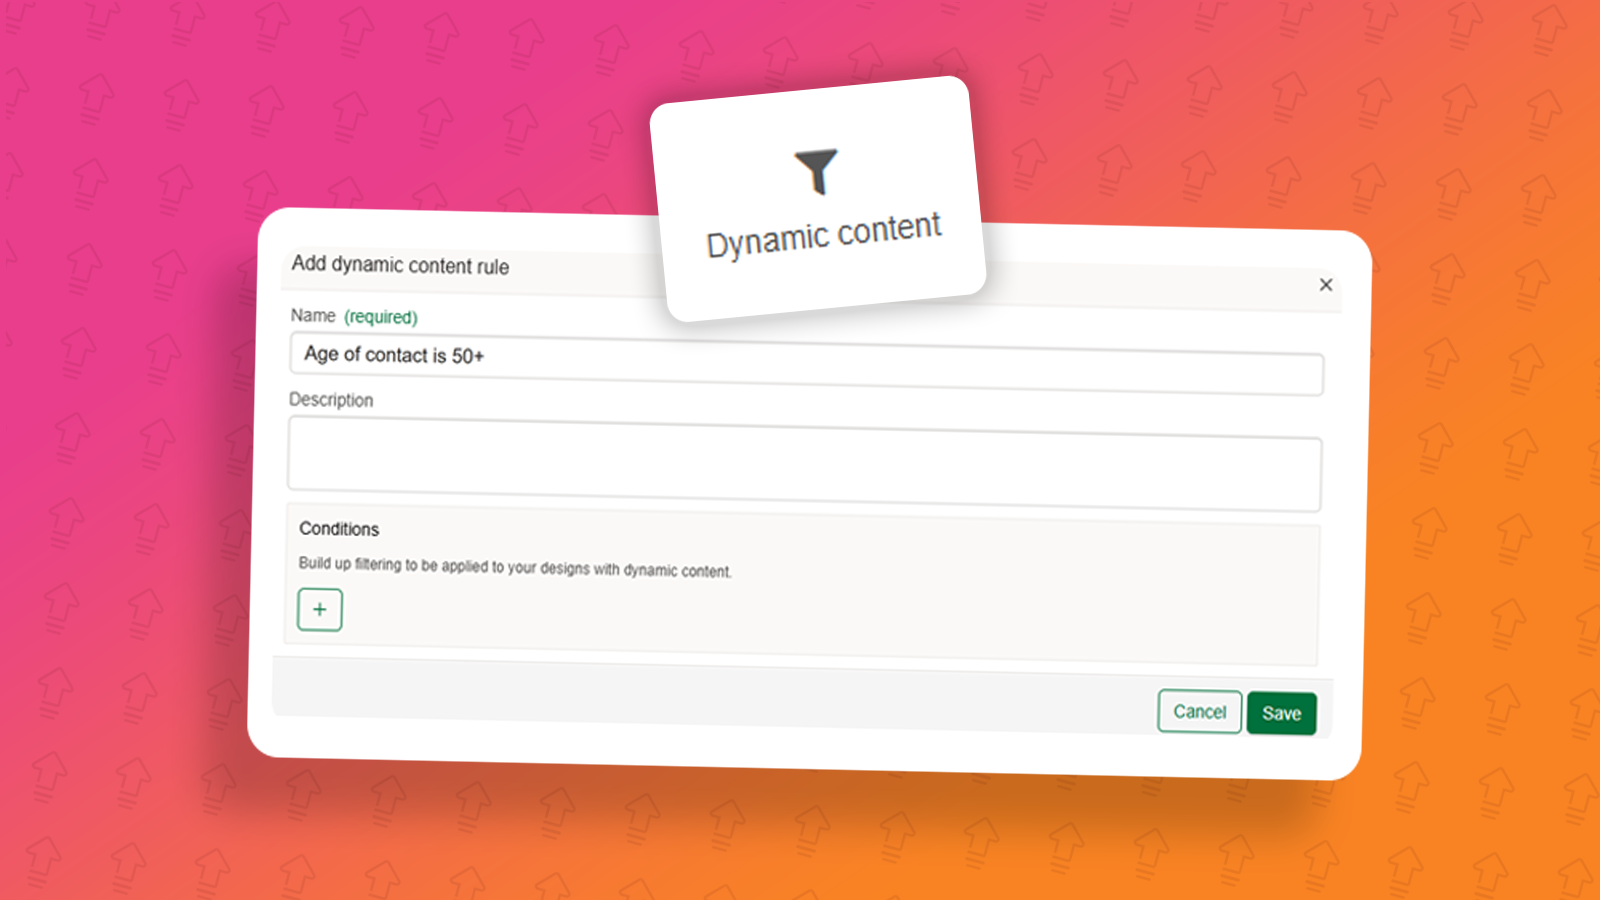
Firstly, name your rule, this is an internal reference, however we recommend making it something clear e.g. if it's a rule for age is greater than 18 a name of ‘Age is greater than 18’ would be suitable whereas ‘18’ would not.
The description again is an internal reference which allows you to provide a bit more detail. Following on from the above example, my description might be ‘Rule that filters contacts to only those who are greater than 18 years old for use where content is only suitable to those of a legal age e.g. voting’
Finally, the conditions section is where you set your rules. To begin, click the + icon. Doing so will add one rule line.

In the first dropdown you choose the contact field you wish to create a rule against, again using my 18 or over example, I am going to use the 'Age' contact field.
Depending on your choice in column one, the options in column two will vary. As my age contact field is number related, I am given options such as equals, is greater and is less than. For my example, I will want to choose greater than.
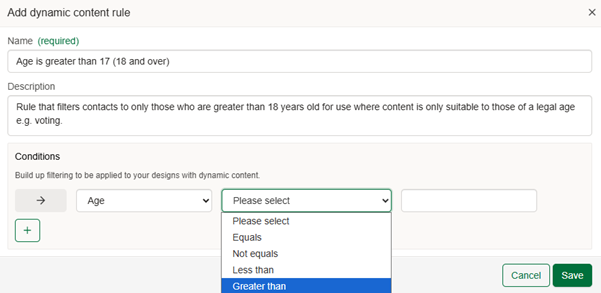
Again, the third column will vary depending on your column one selection but as my age field is a number field I am required to enter a number. So, for my example of is 18 or older I will set to is greater than 17.
This would leave my rule looking like this.
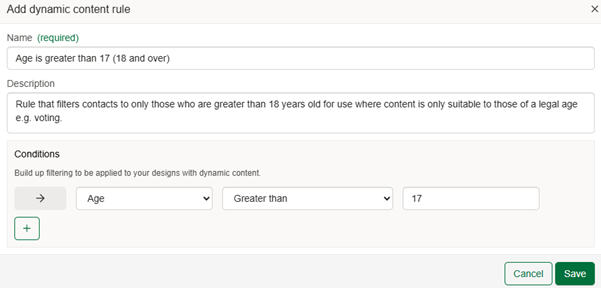
My example when applied to a design would only show the content to contacts who age is set to 18 or above.
Note: Each dynamic content rule can contain more than one rule, for example let's say now I wanted this rule to cater for contacts 18 and over that use a Gmail address.
I can use the email contact field to filter to emails that contain ‘gmail’ as seen below.
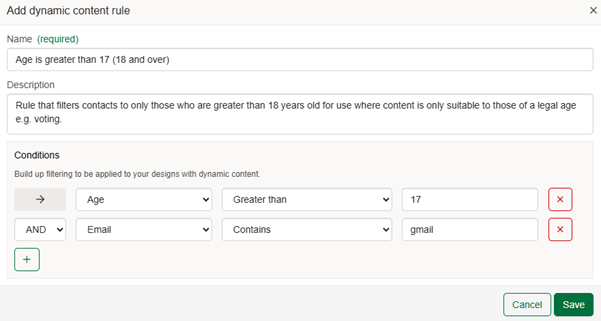
Important: Each dynamic content rule can contain multiple rules, however if you wish to display one piece of content to over 17-year-olds and another piece to under 17-year-olds, please note you will need to setup an entirely separate dynamic content rule.
Once you are happy with your rules, click the save button to return back. You will now find your rule saved as seen below.

What do the headings mean on this page?
Name: The name you set for your rule.
Description: The description set for your rule.
Conditions: The number of conditions used within the rule.
In use in design: If your rule is in use in designs, the number of different designs it is being used in will display here.
Created: The date the rule was first created and by whom.
Last modified: The date the rule was last updated and by whom. (If never updated will be blank).
Using your rules in Smart Editor designs
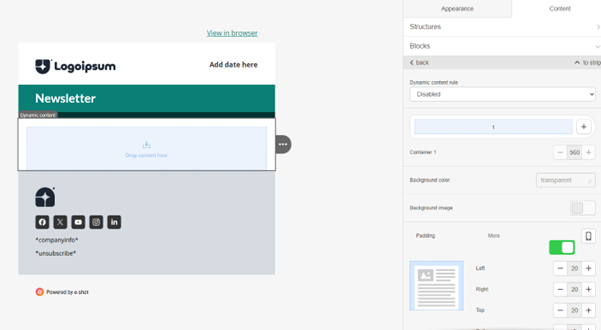
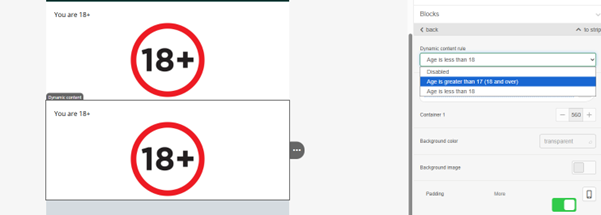
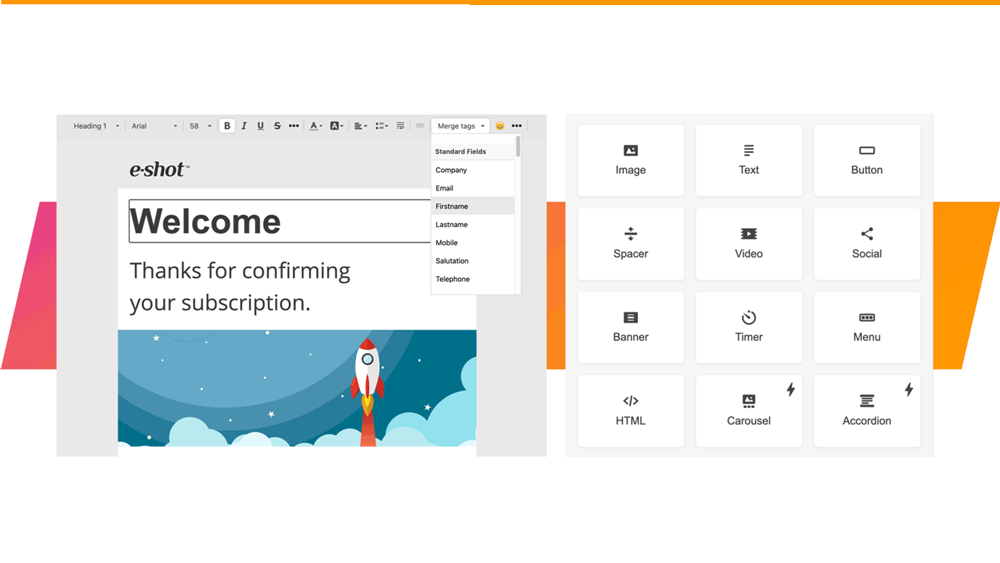
Inside the Smart Editor design type, under ‘Blocks’ you will find the ‘Dynamic content’ block as seen below.

To setup a dynamic content block, first drag into your design in its desired position.
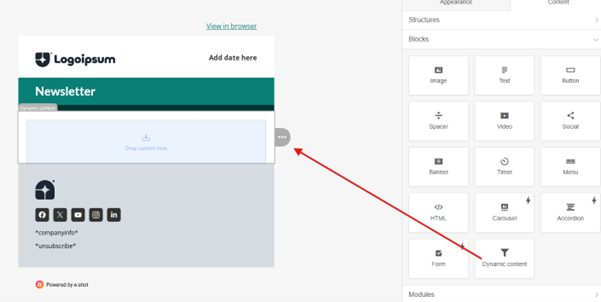
For now, I’m going to start with one piece of dynamic content. Once you’re happy with its position, you can click onto the block just like any other block and on the right-hand side you will find the options available.
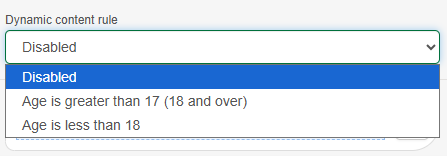
The most important section over on the right is the 'Dynamic content rule'. Here you will choose from the rules you previously set up.
Important: Please note, the option chosen here determines that if the chosen rule is met that the content within your block will show. If the rule is not met, the rule will be ignored.
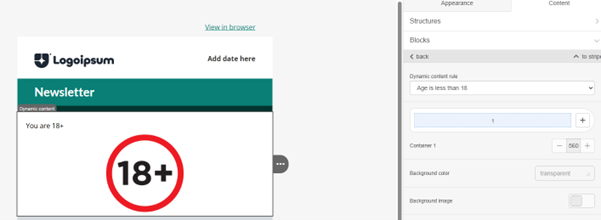
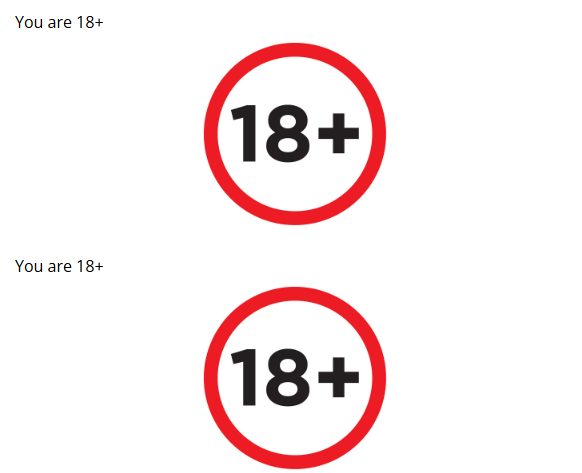
As you can see have two rules currently setup, one for age is 18+ and one for under 18’s. In my design I am going to show one image to those that are 18+ and an entirely different image to anyone under 18.
For my first dynamic content block (18+) the below image will display with the heading ‘You are 18+’.
As my content for under 18 will remain the same, I will save time by cloning the existing block and updating the rule and its content.
To copy a block, select what you wish to copy, click the three dots and then the copy button seen below.
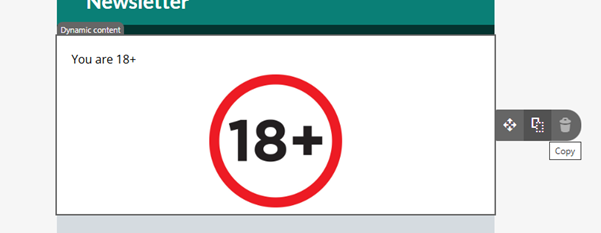
This has now duplicated my content block.
Now selecting the duplicated block, I will change the dynamic content rule to ‘Age is less than 18’.
I will then also slightly adapt the content for this rule as seen below.
So, to recap:
The top image has been set to use the rule for age is over 18
The bottom image has been set to use the rule for age is under 18
Depending on the age set for the contact, either the top or bottom image will display with the other one being ignored
Testing your dynamic content
Now you have setup your dynamic content within your email, it's important to test it out, especially if it is your first time using this feature or a new set of rules.
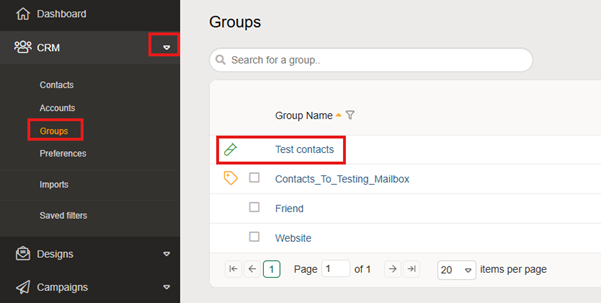
The easiest way to do this is by using test contacts. Under the CRM section, select groups, here you'll find the test contacts. As an e-shot user, you should already be in here.
On your test contact record, ensure the rule you have set has the correct data that matches your rules. For example I will need one contact with an age above 18 and one below.

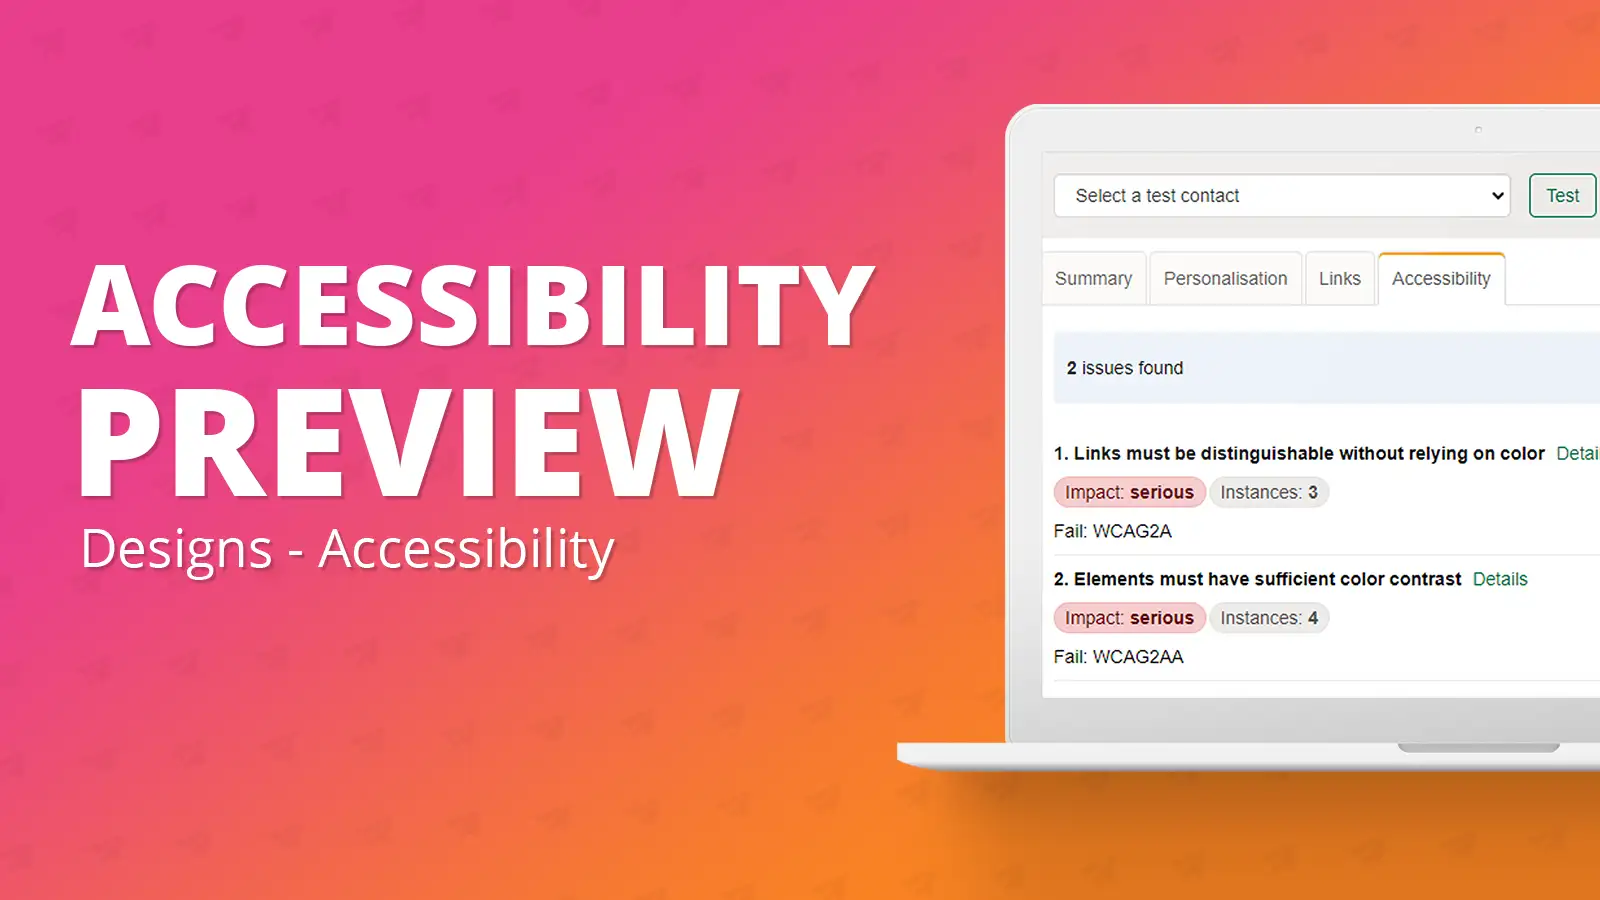
Once you are happy you have test contacts you can test with. Preview your design, you can do this by clicking the actions drop down and choosing preview.
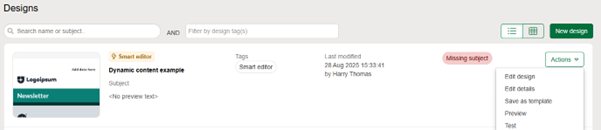
Taking you to this page.

On the right hand side you can use a dropdown to choose a test contact.
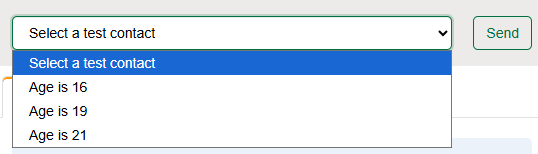
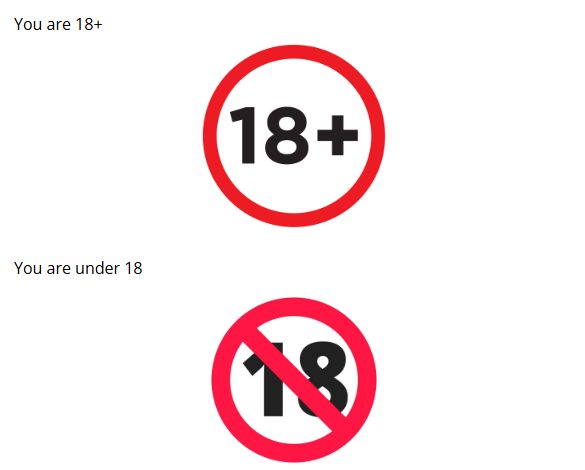
Now for the magic. See currently with no contact selected, no content is shown.

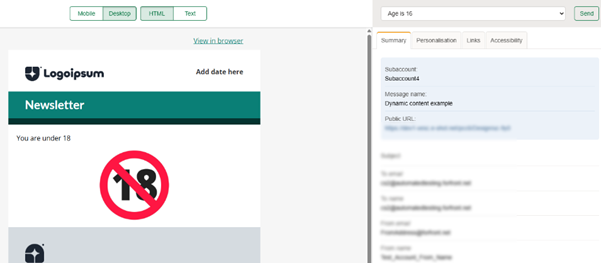
Firstly, I will choose the contact with their age set to 16. See below how the email now only shows the section for ‘You are under 18’.
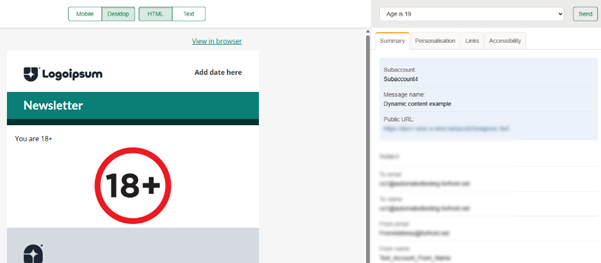
Whereas when I change this to a contact with an age over 18, the content shown changes to only show ‘You are over 18’.
You can also test this in live test sends to your inbox by selecting a test contact and then using the ‘Send’ button to send an email to a specified email address.
To conclude
That's a run through on how you can setup dynamic content within e-shot and your Smart Editor designs.
Despite the example in this walkthrough being simple, please note the rules are endless and can be catered for on all contact records you have setup in your e-shot account.
It's also important to note you can use multiple different rules inside one email design, it doesn't have to be two rules relating to the same contact field like in our example. You could have content showing depending on all sorts of things all within email.
You may also like these articles
.png)
Campaigns Settings Designs
Social share
July 25th, 2025 - Harry Thomas
e-shot’s social share feature helps your subscribers to share your emails with their networks and helps you gain new subscribers from those shared...
Designs
Smart Editor: Basic blocks and how to use them
January 27th, 2021 - Sadie Burgess
Smart Editor has its own hierarchy of elements. We can start from the stripes and proceed in descending order, through the structures and...
Designs Accessibility
Smart Editor: Accessibility Preview
September 19th, 2023 - Harry Thomas
The accessibility widget tool allows the user at any moment in the design creation process to preview their design and address any WCAG AA...
Solutions
Email Marketing
Create email campaigns and newsletters and manage end-to-end subscription processes with forms and preferences.
Marketing Automation
Create sophisticated automated campaigns for email and SMS combined.
Digital Communication
The comprehensive solution to manage and automate your digital communication across email, SMS, websites and landing pages.
Email marketing healthcheck
We are confident that we can help you, which is why we offer a free healthcheck to identify potential issues with your current programme and free advice on things that could be done to improve it.