Help articles
CATEGORY: AnalyticsCampaignsCRMForms and Landing Pages
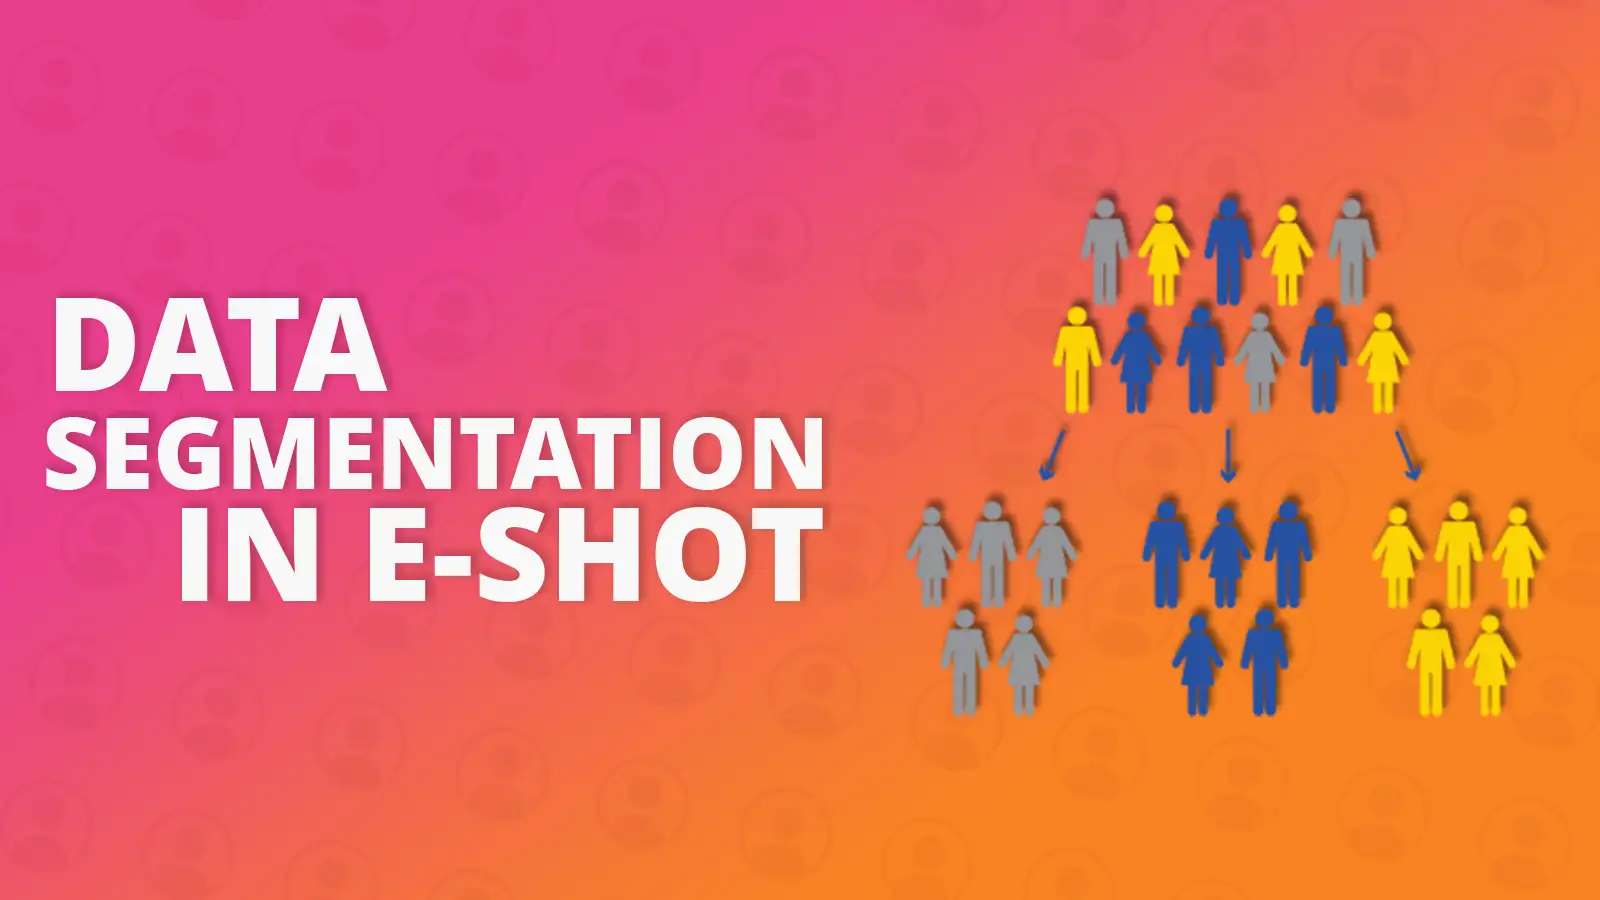
Data Segmentation within e-shot
Within e-shot you have a few ways to segment your data (contacts). In this help document, we will be covering some of the main ways you can do so. All the methods work differently, and some may be more beneficial to you depending on how you manage and use your data.
Groups and preferences
The two ways to store your contacts within e-shot is by using groups and preferences. We often get asked what the difference is between the two, for clarity they have been described below.
Groups: Groups are predominantly managed by you the user. When you import contacts, you must import them into at least one group. As the user it is your responsibility for managing groups, you can choose if to add or remove to groups at any time.
Preferences: Preferences are managed by the contact through the use of a preference centre. Contacts can use the preference centre at any time to subscribe or unsubscribe from any of the preferences you have to offer.
How does sending to your contacts work with groups and preferences?
When sending to contacts you have three options to choose who receives your email.
Sending just to a preference: This means only the subscribed contacts to that preference will receive your campaign.
Sending just to a group: This means only the contacts in that group will receive your campaign.
Combining a preference with a group: This option allows you to segment and filter your audience to a more specific group of contacts. The example we use for this is as follows: Imagine you have 5 preferences, offering emails on different topics. For this example, we shall say (Education, Jobs, Transport, General news, and Emergency notifications) and then you also have a group for each part of the county (North, East, South and West). If you had a job opportunity in the South, you would send to the ‘Jobs’ preference and filter by the ‘South’ group. This would send the email only to contacts that are subscribed to the ‘Jobs’ preference and in the ‘South’ group. Combining groups and preferences allows you to send more targeted emails to your contacts that are likely to be more relevant to them.
Subaccounts
A subaccount is a dedicated area for your contacts and other areas of e-shot such as designs. Subaccounts are designed to provide an efficient way to manage your email marketing and CRM for separate brands or business units.
Subaccounts allow you to manage different data and teams separately but under a single solution. For example, a Local Government may have a team for transport, a team for education, a team for fostering etc. In this case each team could have their own subaccount under the same account.
Although subaccounts create dedicated areas, contacts only count once across multiple subaccounts. For example, if a contact was subscribed to communications both from the fostering and education team, they would only count as one contact, not two. This means you don’t have to pay for duplication but can still keep contact details separate.
Subaccounts ensure that personal data from one business unit is completely separated from others. This is very useful from a data protection perspective and helps larger organisations to give their operational units autonomy within their own areas.
More details on subaccounts can be seen in our dedicated video on subaccounts.
Filters in e-shot
Within e-shot there are several ways you can apply filters to contacts, either at a CRM level or within your campaign.
Contacts field manager filtering
Within e-shot, users can setup their own fields for contacts, these fields can then be added to a sign-up form or preference centre with the standard data you may gather on a contact such as their email and first name.
You can set these for anything you like and can choose from a range of data types as shown below.

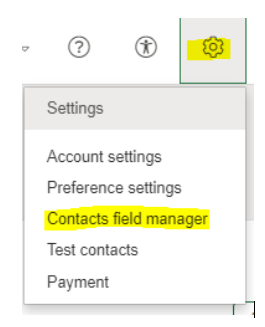
You can setup or edit these fields by heading to Settings > Contacts field manager.
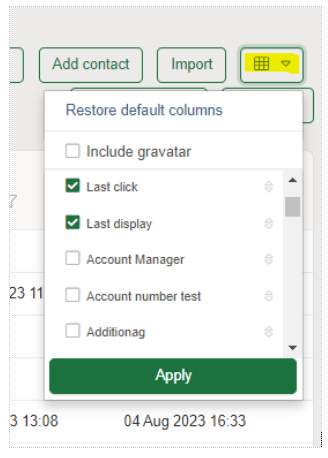
With any of these fields, you can then use them to filter your contacts. To do this, head to the portion of contacts you wish to filter, this could be your entire CRM or just a specific group or preference. When you are here, you can click the highlighted option shown below to add them to the contact's page.
To then filter using any of the fields, click the filter icon next to the field you wish to filter on. From the dropdown you can also choose from various options depending on what detail you have.
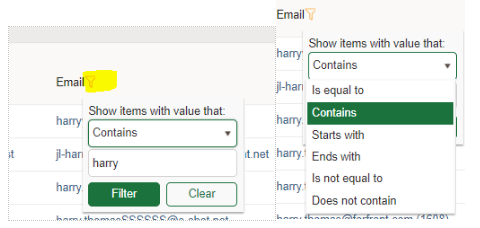
An example of this in action is me filtering via the email field to find email addresses that only contain my name in them. All I then must do is click the green ‘Filter’ button and my list of contacts will be filtered, only showing email addresses that contain ‘harry’ somewhere in them.
Once you have applied the filters, depending on if it just for research or potentially a campaign sends, you may wish to add these contacts into their own group.
Saved filters
Saved filters is also an option available within the e-shot CRM, they work quite similarly to the above filtering style as you can also use your contacts fields to filter in this section. Saved filters offers more options and allows the user to save the filter to use and apply to any contacts at any time.
For the full details on how to set up saved filters, please refer to our dedicated help article here.
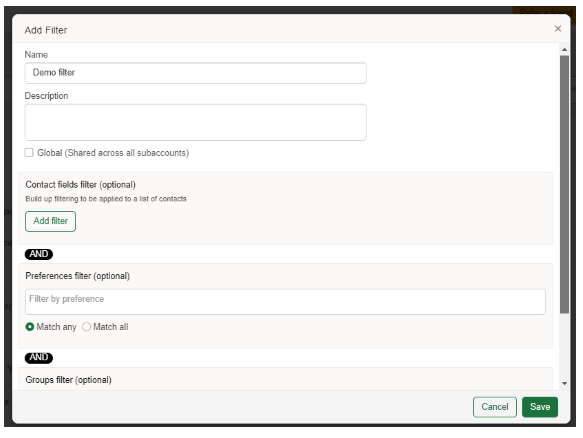
As you can see above, you have the choice to filter by groups, preferences or contact fields when using saved filters.
Following on from the contacts field manager example, I have replicated that in a saved filter as shown below. Once I save this saved filter, I can access it at any time to use again.

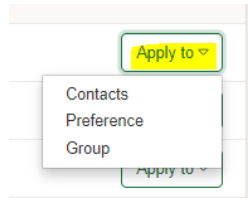
Once you have saved your saved filter, you can click the ‘Apply to’ dropdown button to apply it your choice of contacts.
Saved filters are also able to be applied when creating a campaign, for example, if I wanted to apply my filter to contacts, I was sending a campaign to, I could. This will be covered in more detail in the next section of this help article.
Filtering from within a campaign
When you are ready to send your campaign, there are several options available to filter your audience. To turn on filtering for your campaign head to the advanced section within the campaign.
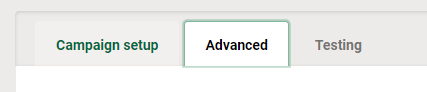
Upon scrolling down on the advanced tab page, you will see both audience and performance filtering.

These filtering options allow you to apply filters to your campaigns audience (which has previously been chosen within the campaign setup tab).
The three options available are saved filters, sign up form filtering, and performance filtering.
Saved filters
As previously explained, saved filters can be created and saved within your account, not only can these be applied within the CRM, but they can also be applied to you campaigns audience. Using the same example as before, I could choose to send to every contact in my CRM but then apply the ‘email contains Harry’ saved filter. Upon doing so my audience will be but down to only email address that contain ‘harry’ in them.
In a more realistic example, a saved filter you may create is one to filter down to only slipping away contacts, disengaged contacts or both. This is something you may set up if you are running some form of a re-engagement campaign.
To apply a saved filter to your campaign you will first need to create it by heading to CRM > Saved filters. Once created and saved, you will be able to choose it from the dropdown in the campaign as shown below.
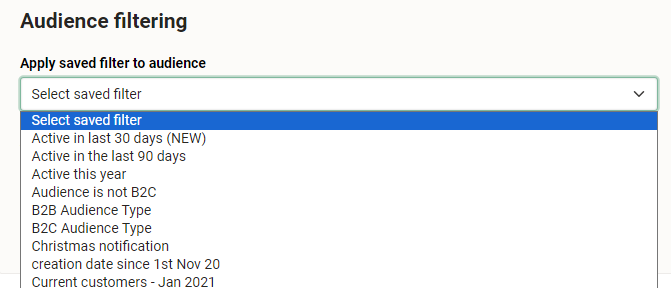
Once chosen from the dropdown your filter will be applied and your audience will be filtered to match that saved filter.
You can only apply one saved filter to a campaign.
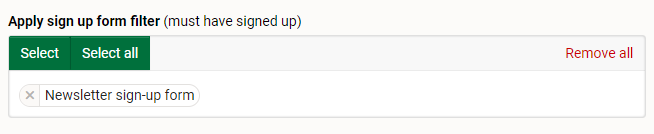
Sign up form filtering
Sign up form filtering simply allows you to filter via the contacts that have signed up via a certain sign-up form in your account.
As shown below, when you click into the select, it will open a modal showing all the sign-up forms you have in your account. You can then choose which form/s you would like to filter by.
For example, if you would like to send a campaign only to contacts that signed up using the ‘Fostering’ sign up form, you would select that option and click the save changes button at the bottom.
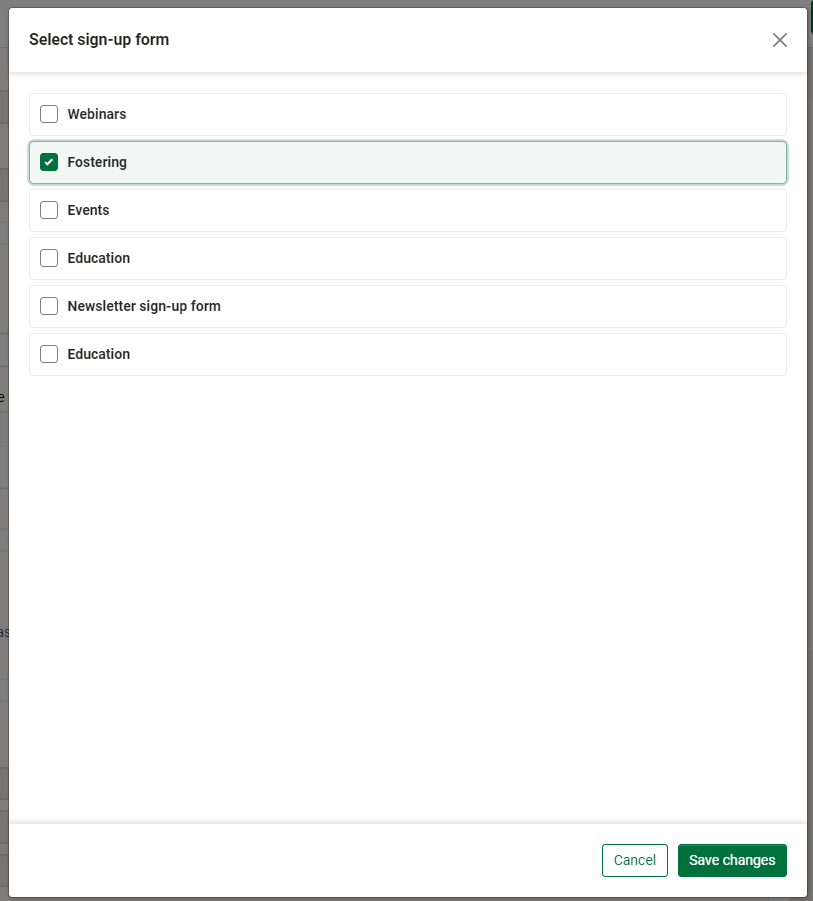
More than one sign up form filter can be applied so if you did want to filter by more than one form, you can do so. Select all and remove all links are available for you to use if needed.
Performance filtering
Performance fileting offers two different areas, those being send and performance filtering.
To begin applying performance filtering, click the 'apply performance filter' button, this will bring up a modal to choose your filtering.

The first two options deal with whether a contact has or has not been sent any number of campaigns within a period of time. Here you can choose the number of emails and the timeframe or date range to narrow the filter as shown below.
The next two options deal with whether a contact has or has not been sent a specific campaign. Here you are presented with a selection list containing all the campaigns that have been sent from that subaccount. You also have the and/or operators to choose from if you want to select multiple campaigns as shown below.
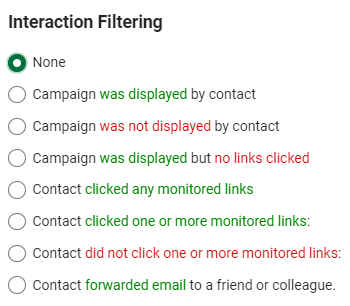
Once you have applied your send filtering, only then does the interaction filtering become available.
Interaction filtering
As mentioned, this form of filtering only becomes available once you have chosen some form of send filtering. With interaction filtering, you can choose to base your filtering on the level of engagement with the campaigns selected in the previous stage (send filtering).
The options available within interaction filtering can be seen below.
These are the all the ways you can apply filtering within e-shot. If you have any queries or need assistance with anything we’ve covered, please contact our support team when logged in as normal.
Solutions
Email Marketing
Create email campaigns and newsletters and manage end-to-end subscription processes with forms and preferences.
Marketing Automation
Create sophisticated automated campaigns for email and SMS combined.
Digital Communication
The comprehensive solution to manage and automate your digital communication across email, SMS, websites and landing pages.
Email marketing healthcheck
We are confident that we can help you, which is why we offer a free healthcheck to identify potential issues with your current programme and free advice on things that could be done to improve it.