Help articles
CATEGORY: CRMFAQs
CRM - Importing Contacts

Importing contacts is a quick and easy way to add a larger list of contacts into e-shot. Contacts can either be imported via the API or manually through the CRM using a CSV, XLS or XLSX file. Importing contacts via a spreadsheet allows you to simply map your spreadsheet column headers with a contact field in e-shot. Our import feature also automatically removes duplicated email address and provides a list of errors if there are any.
See our guide specifically on preparing your file for importing here.
Beginning the import process
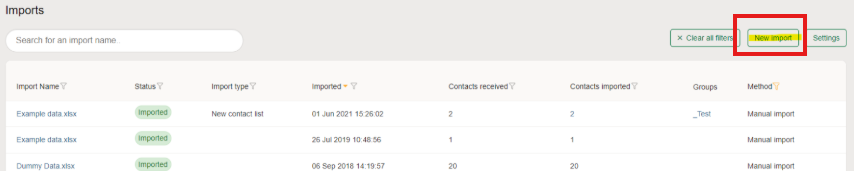
To begin the import process, head to the CRM > Imports page. This will provide you with a list of all the previously completed imports in that subaccount.
To import a new list of contacts, click the ‘New import’ button in the top right of the page.
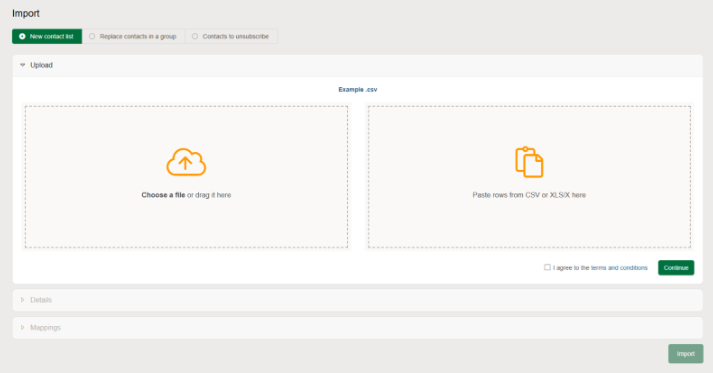
This will take you to the new import page seen below.
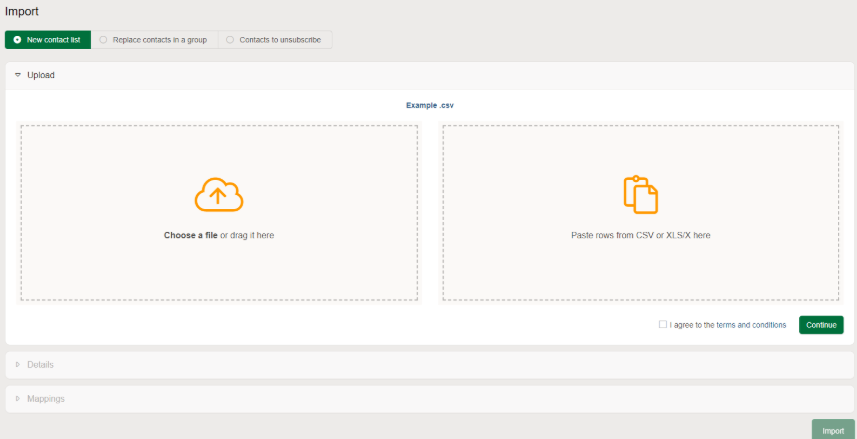
The first element offers you three options for you to select the type of import that you would like to perform.

New contact list: This is the most common import type and allows you to import a list of contacts into groups and preferences.
Replace contacts in a group: This import option will replace the contacts in your chosen group, with the ones in your uploaded file. Note: If the contacts currently in the group do not exist in any other group in this subaccount, they will be deleted from the CRM entirely.
Contacts to unsubscribe: If you would like to mass unsubscribe a list of contacts, then this is how you can do so. It simply unsubscribes all the imported contacts.
We will continue using the ‘New contact list’ option.
Uploading your data
Once you have selected the kind of import you wish to perform, the next step is to upload your data. You have two options of how to bring your data into the import.
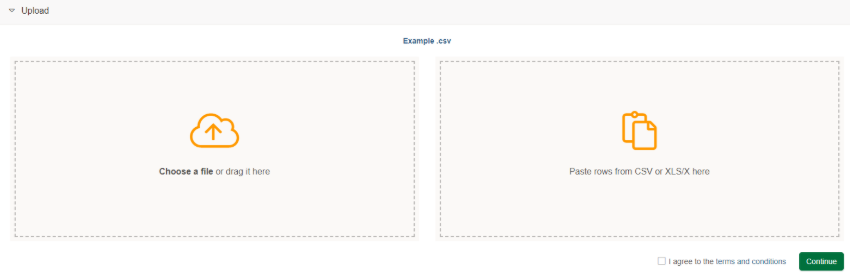
Choose a file: This allows you to choose your CSV, XLS or XLSX file from your files. You can either drag it into the box or click to open your files.
Paste rows: This allows you to paste rows from your file. Typically, we would only advise this if you were importing just email addresses and no other data such as first name.
Note: Ensure that your data has a header row, as this will be required for your data mapping later.
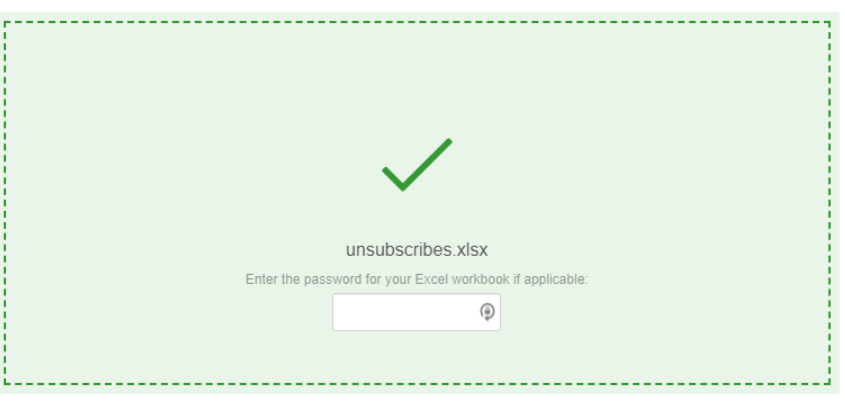
If you are uploading an .xlsx file, you will have the option to enter a password for the workbook if applicable.
Once you confirm that you agree to the terms and conditions, click the ‘continue’ button to proceed.
Details
The next section of the flow is the ‘Details’ section.
From here you can give your import a name as well as select the group, or create a new group, preferences, source and enter the email address you would like to be notified on and select your import spreadsheet before continuing.
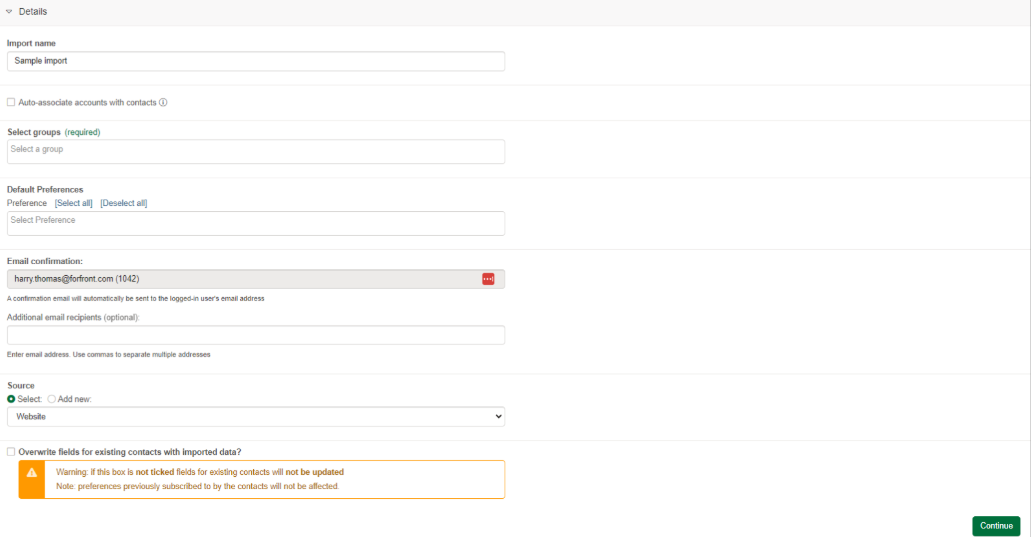
Import name: This is the name for this import that will be in the list view previously shown (This is only visible to e-shot users).
Select groups: Choose which groups (new or existing) you would like the contacts to be imported into. Note: you must choose at least one group.
Default preferences: Choose which preferences if any you would like the contacts to be imported into.
Email confirmation: An email confirmation for the import will automatically go to the logged in user, but you can add an additional email.
Source: Here you can set the source for your import. This is recording where you obtained the list of contacts that you are importing. This will be recorded against each contact record in the CRM, encase you need to know it at a later date.
Overwrite fields for existing contacts: This option will need to be ticked if you are uploading contacts that already exist in your subaccount. Ticking this box means, if any updates have been made to any of their data (say a change of last name). This contacts last name will only update if this option is ticked.
Note: for an entirely new list of contacts that don't already exist in your subaccounts CRM, this option can be ignored.
Once you are happy with everything on this page, click the ‘Continue’ button.
Mappings
The final step of the process is the column mappings page. Your spreadsheet columns will automatically be matched with the e-shot fields if the names are identical. Your file columns can be manually matched with your database columns if required by selecting an item from the dropdown list.
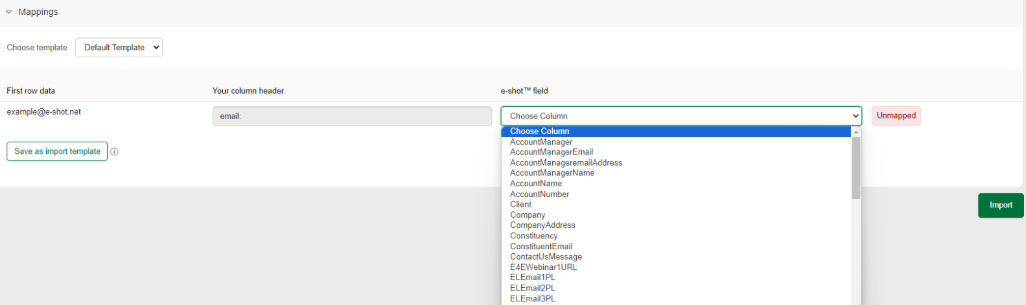
The only field that must be mapped is the email address. The rest can be mapped or left unmapped if you don't want to import that column.
Once you are happy with your mappings, you can click the ‘Import’ button to begin importing your data. This will return you to the list of recent imports, where you will find yours in the ‘Processing’ status until it is completed.
Completed import
Once the import has fully completed, it will either be marked in green ‘Imported’ or red ‘Errors’. Green means all contacts were successfully imported whereas red means there was at least one error with an email address being imported.
On the import list page, you can see the contacts received (how many contacts were present in your import list) and contacts imported (the number of contacts successfully imported into e-shot).
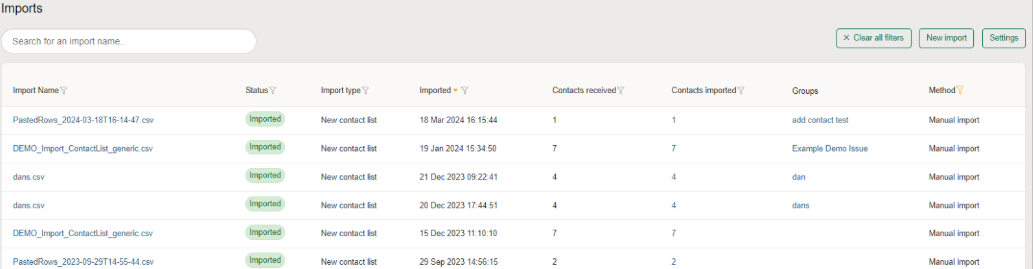
If there is a difference between the numbers, this either means there was duplicated email addresses or there were errors.
If your import has errors, as mentioned it will be marked in red. If you click the red ‘Errors’ button, an invalid rows file will be downloaded on your computer for you to open and see which rows in your file errored and why.
Common errors include no email being present or an email that isn't a valid email address format e.g. missing the @ symbol.
What if my import goes over the contact limit?
Any contacts in the file you import that already exist in your account will be processed. The contacts will be added to the selected group(s) and all related fields will be added or amended (based on your overwrite choice).
Any new contacts within your container limit will be added (in alphabetical order).
New contacts exceeding your contact limit will not be added and will be listed in the NotImported CSV file attached to the e-shot™ Import exceeded contact limit Notification emailed to you.
You may also like these articles

Best practice
Maintaining your email marketing database
February 22nd, 2019 - Dan Hare
Your email marketing database is like a plant. It needs to be continually fed, watered and pruned if it is to stay in good health, yet...
CRM
Preparing your import file
September 2nd, 2019 - Sadie Burgess
When importing contacts into e-shot, you need to make sure that your file is saved in one of the following three formats: csv xls or xlsx No...
Solutions
Email Marketing
Create email campaigns and newsletters and manage end-to-end subscription processes with forms and preferences.
Marketing Automation
Create sophisticated automated campaigns for email and SMS combined.
Digital Communication
The comprehensive solution to manage and automate your digital communication across email, SMS, websites and landing pages.
Email marketing healthcheck
We are confident that we can help you, which is why we offer a free healthcheck to identify potential issues with your current programme and free advice on things that could be done to improve it.