Help articles
CATEGORY: Campaigns
Campaign list view
Going from top to bottom, left to right we will explain the details seen on the page.
First, you’ll see a search bar with the text ‘Search name or subject..’ within it. This is a way to search for your campaigns, if your account is large and many different people are constantly creating campaigns, this is way to find your campaign without needing to scroll.
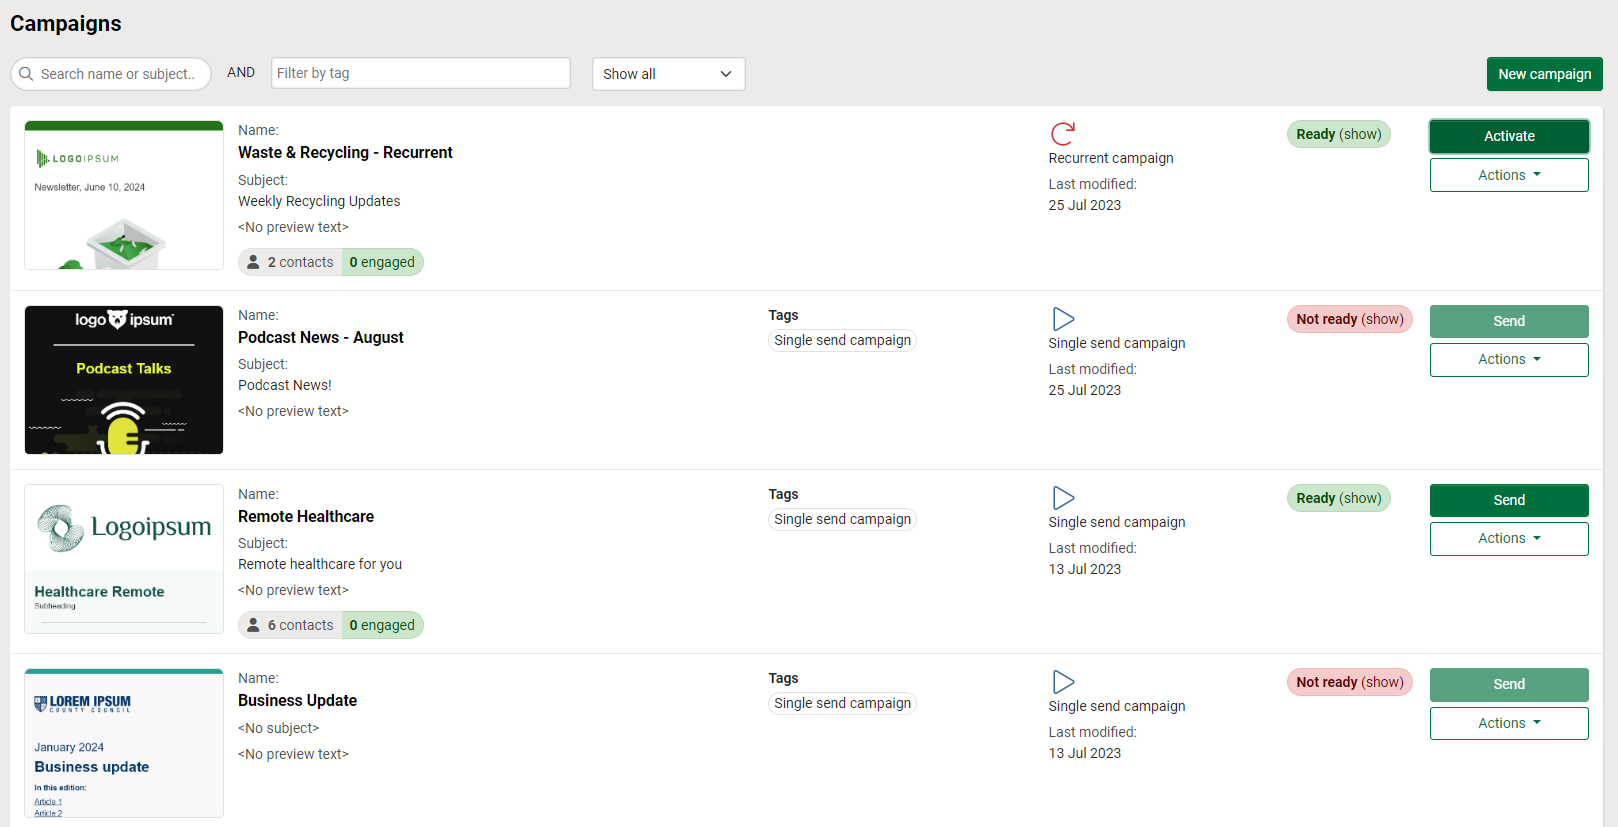
Next along you’ll see a box labelled ‘filter by tag’, when you create a campaign, you have the ability to assign tags to your campaign, giving you another simple way to organise and search your campaigns. For the full details on tags, please head to our dedicated article.
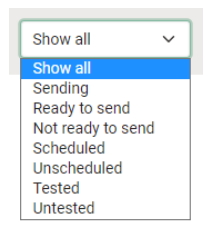
Once you have started adding tags to your campaign, this is way to filter to specific tags you have created. Next along you will see a dropdown menu labelled ‘Show all’, this is another way to filter the campaigns have been created within the account. The filters available can be seen below.
To the right of this filter, you will find the ‘New campaign’ button. This button will take you to the page to begin creating a new campaign, once created it will be shown in the list view.
Moving down into the actual campaigns list now, on the left you will now see a snippet from the top of the design you have attached to that campaign, similar to the ‘Existing designs’ page within the Designs menu. If no design has been attached to a campaign yet, the text ‘<No design selected>’ will be shown in the box.
Following along from there you will see the campaign name along with the subject line and preview text that has been set for the campaign. Below this, if you have set an audience for your campaign, you will be able to clearly see the total number of contacts you will be sending to and the number of those that are currently engaged.
Next along you will find the tags that have been attached to this design. Please note by default a tag with the campaign type will now automatically be applied to every campaign you create. If you choose to remove the auto applied tag and add no others, this section will not be shown.
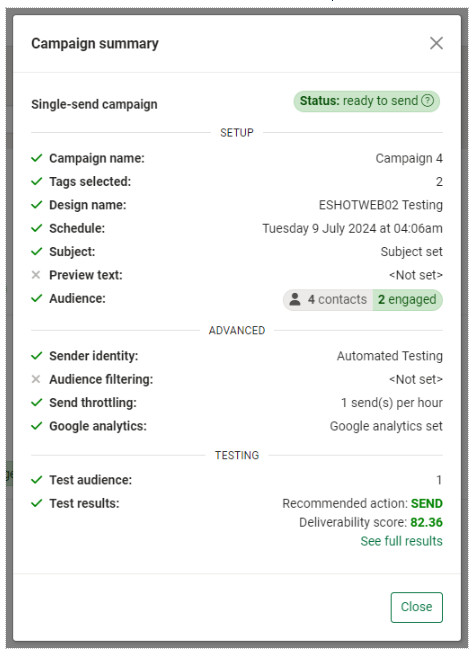
Following along from tags you will see the campaign type for the campaign along with the date it was last modified. The next section along shows if your campaign is ‘Ready’ or ‘Not ready’ to send. Inside this section you will see the text ‘[Show]’. Clicking this will bring up the new campaign summary panel. For full details on the campaign summary panel, please refer to the dedicated article, it can also be seen below.
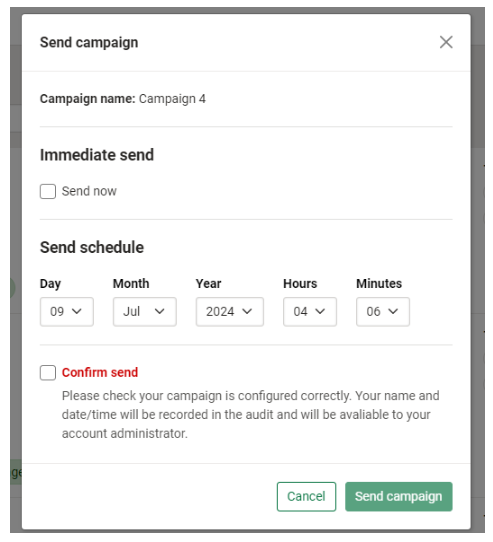
Finally, on the far right you will see the ‘Send’ button for the campaign, clicking this will bring up the below pop up to either schedule your campaign for sending or send now. Please note the button label will be different for various campaign types.
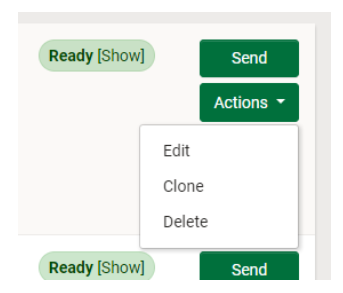
Below the ‘Send’ button you will see a dropdown button labelled ‘Actions’. This will bring down different options depending on the campaign type. The options for a single send campaign can be seen below.
Solutions
Email Marketing
Create email campaigns and newsletters and manage end-to-end subscription processes with forms and preferences.
Marketing Automation
Create sophisticated automated campaigns for email and SMS combined.
Digital Communication
The comprehensive solution to manage and automate your digital communication across email, SMS, websites and landing pages.
Email marketing healthcheck
We are confident that we can help you, which is why we offer a free healthcheck to identify potential issues with your current programme and free advice on things that could be done to improve it.