Help articles
CATEGORY: CRM
CRM - Accounts List

Accounts List
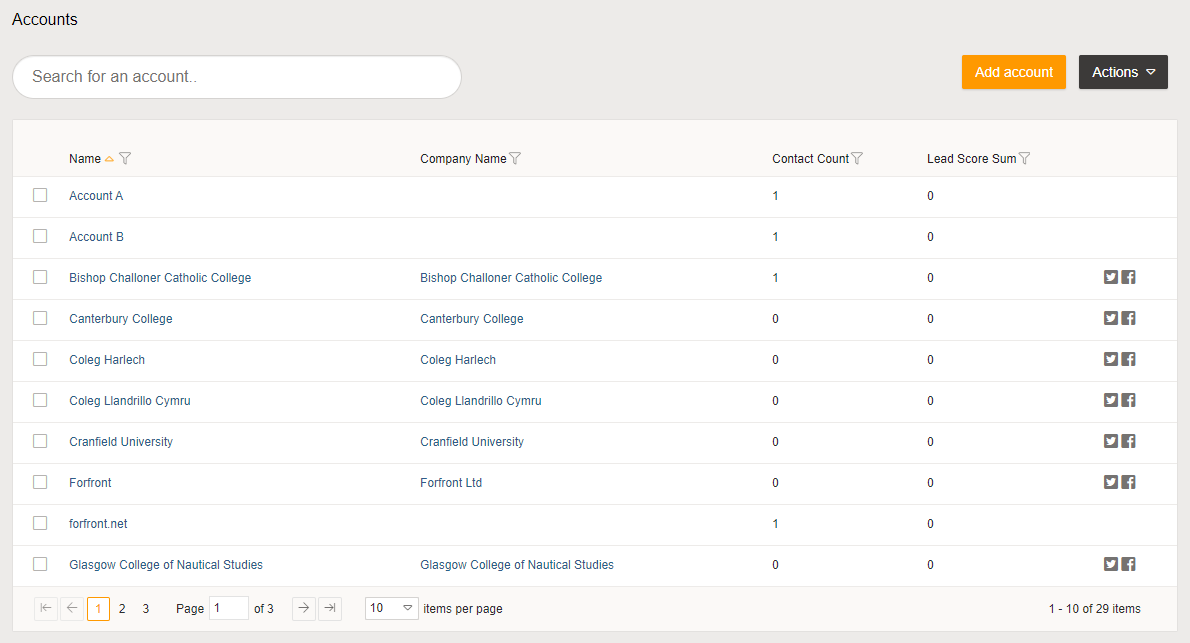
Accounts are an e-shot ultimate feature and the Accounts page is accessible from the CRM side menu. The page displays the account name, company name, contact count and lead score summary for each account within the chosen sub-account, along with links to their social media if applicable. The search bar at the top of the page can be used to quickly locate a chosen account.
Adding an account
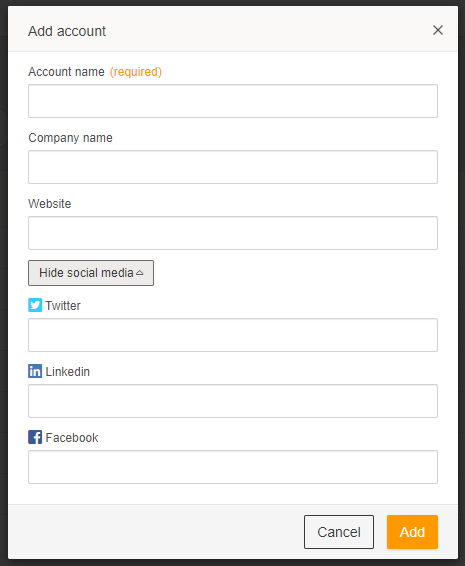
There are 2 ways of adding an account, which can either be done manually or accounts can automatically be created from email domains. The later can either be initiated during the contact import process for that group of contacts, or as a one-off process to create accounts for all contacts within the sub-account, which is accessed from the e-shot ultimate tab of the Settings page for admin users. To add an account manually just click the Add account button from the Accounts page, complete the required fields and click Add. Account names have to be unique within each sub-account.
When accounts are enabled the automatic domain based account creation is also enabled, to use this feature just tick the 'Auto-associate accounts with contacts' checkbox on the Details section of the contact import process. This will check each contact record within the import spreadsheet and for each record where the contact's domain is not an Internet Service Provider an account will automatically be created and the contact associated with it.
Contacts can be associated with existing accounts during the contact import process by using an AccountName column and specifying a value for each contact. As long as the AccountName value matches an existing record then the contact will be asssociated. However, including an AccountName column in your spreadsheet will overwrite the domain based mapping and account creation, so it's advisable to not include that column if you intend to use the domain based account creation.
Filters
Each of the account columns can be filtered, which is accessible by clicking the symbol in the column header, then simply select your operator and value then click Filter to update the grid results.
Paging
The account grid can be customised to show a different number of rows based on your preference. You can choose to show either 10, 20, 50 or 100 rows within the grid, which is saved to your user profile and will persist between pages, so each of the grids on the other CRM pages will show your preferred choice.
Actions
The Actions button contains two options available for selected accounts. To select an account just tick the checkbox against your chosen row, alternatively you can tick the column header checkbox to select all accounts from all pages in the grid.
Delete
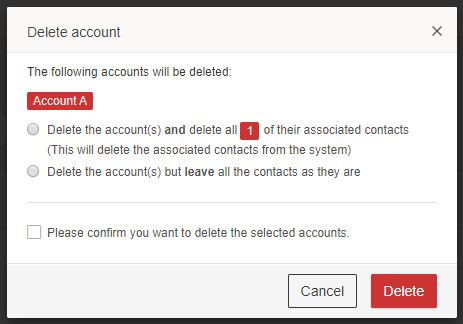
Selecting your chosen accounts and clicking the Delete option from the Actions menu will offer two options; the account and all associated contacts can be deleted in their entirety, or the account can be deleted but all the contacts remain intact, just unassociated from the selected account(s).
Merge
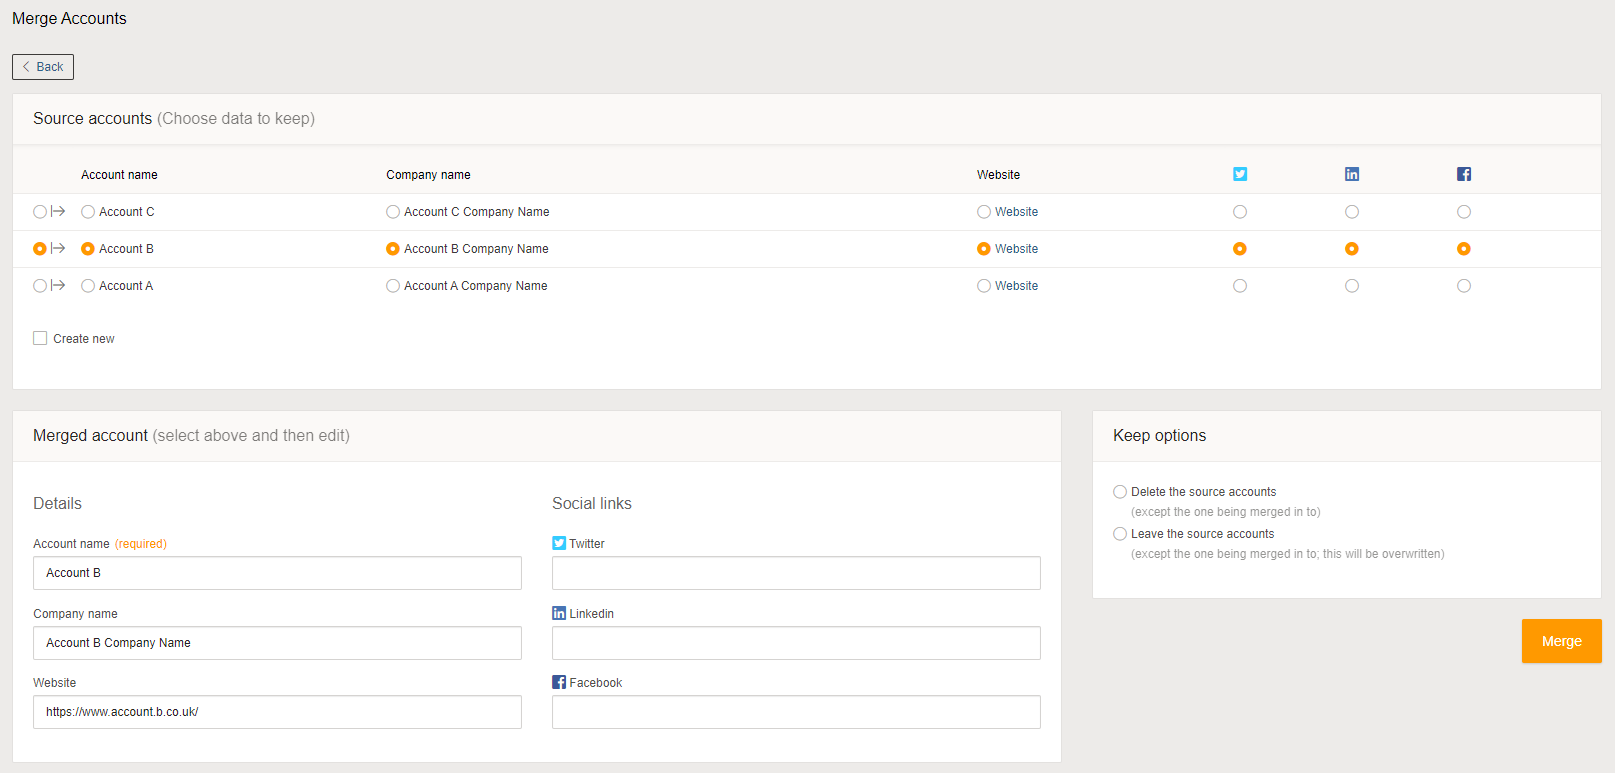
Two of more accounts can be merged together, either into an existing record or creating a new account, as well as being able to leave each of the source accounts as they are or choosing to delete them. Choosing the account data radio option you would like to keep will populate the merged account section. From that point you can choose to optionally overwrite any of the field values if required.
You may also like these articles
FAQs
Account & Dashboard FAQs
September 24th, 2019 - Sadie Burgess
What is the e-shot dashboard page? The dashboard page is the page you will first land on after logging in to e-shot. It gives a brief overview into...
Solutions
Email Marketing
Create email campaigns and newsletters and manage end-to-end subscription processes with forms and preferences.
Marketing Automation
Create sophisticated automated campaigns for email and SMS combined.
Digital Communication
The comprehensive solution to manage and automate your digital communication across email, SMS, websites and landing pages.
Email marketing healthcheck
We are confident that we can help you, which is why we offer a free healthcheck to identify potential issues with your current programme and free advice on things that could be done to improve it.