Help articles
CATEGORY: AnalyticsCampaigns
Using tags in your campaigns for analytics benchmarking
In this help article we will delve into how tags can be set on your campaign and used to benchmark your campaigns.
Benchmarking is a new feature that allows you to compare your campaign send against previous ones. This is even better when combined with tags as if you set up a “Newsletter” tag you can compare one newsletter send to the previous ones.
Essentially with this new feature, you will be able to tag certain campaigns and email reports, let's say ‘Monthly newsletter’. Then when it comes to your analytics, you can compare each campaign sent using that tag against previous ones. As well as getting an average across that tag, making it easier than ever to report on a certain campaign send you perform.
How to set tags on your campaigns
Tags can currently only be applied to single send campaigns in the new campaigns flow.
To begin this process, either create a new campaign or edit an existing one.

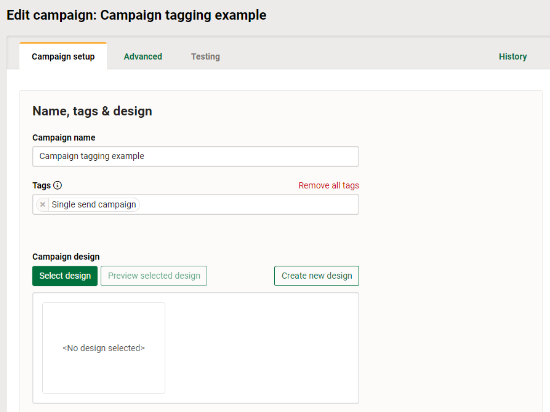
Once inside the campaign, you’ll find the tags section right at the top of the page, under the ‘Name, tags and design’ heading.
The tag ‘Single send campaign’ will be applied to your campaign automatically but this can be removed using either the ‘X’ next to the name or using the ‘Remove all tags’ link.
To add new tags to your campaign, simply click into the ‘Select tags’ box. This will open a list of all the tags you have ever assigned to a campaign. You can then click on the one you would like to assign to the campaign.
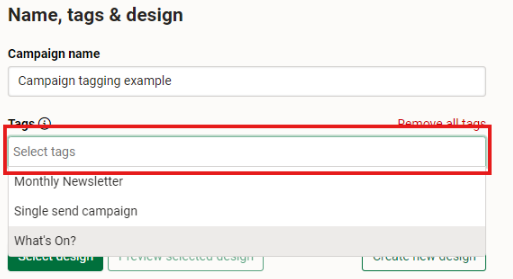
If you would like to add an entirely new tag, type out what you would like and again click on the option once you are done.

Once you have assigned all your tags, you’ll end up with something like the below.

You can assign several tags to one campaign, however we advise to stick to one or two that relate to the email being sent. For example ‘Environmental Newsletter’, ‘Fostering’ or ‘Internal updates’.
Once you are happy with your tags, finish of the rest of your campaign so it is ready to send or schedule. For the full run through on setting up a campaign, find our dedicated help article here.
When your campaign is in the campaign list view page, you will be able to see the tags assigned to it as well as filter your list by tags as seen below.

Viewing campaign benchmarks using your tags
Once a campaign has been sent, it will move to the email reports page.
Benchmarking is only available in the new analytics UI. Down the left-hand side in the e-shot navigation bar, you’ll find the ‘Analytics New’ and the ‘Analytics’ legacy.
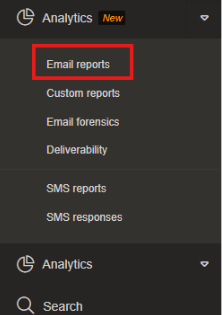
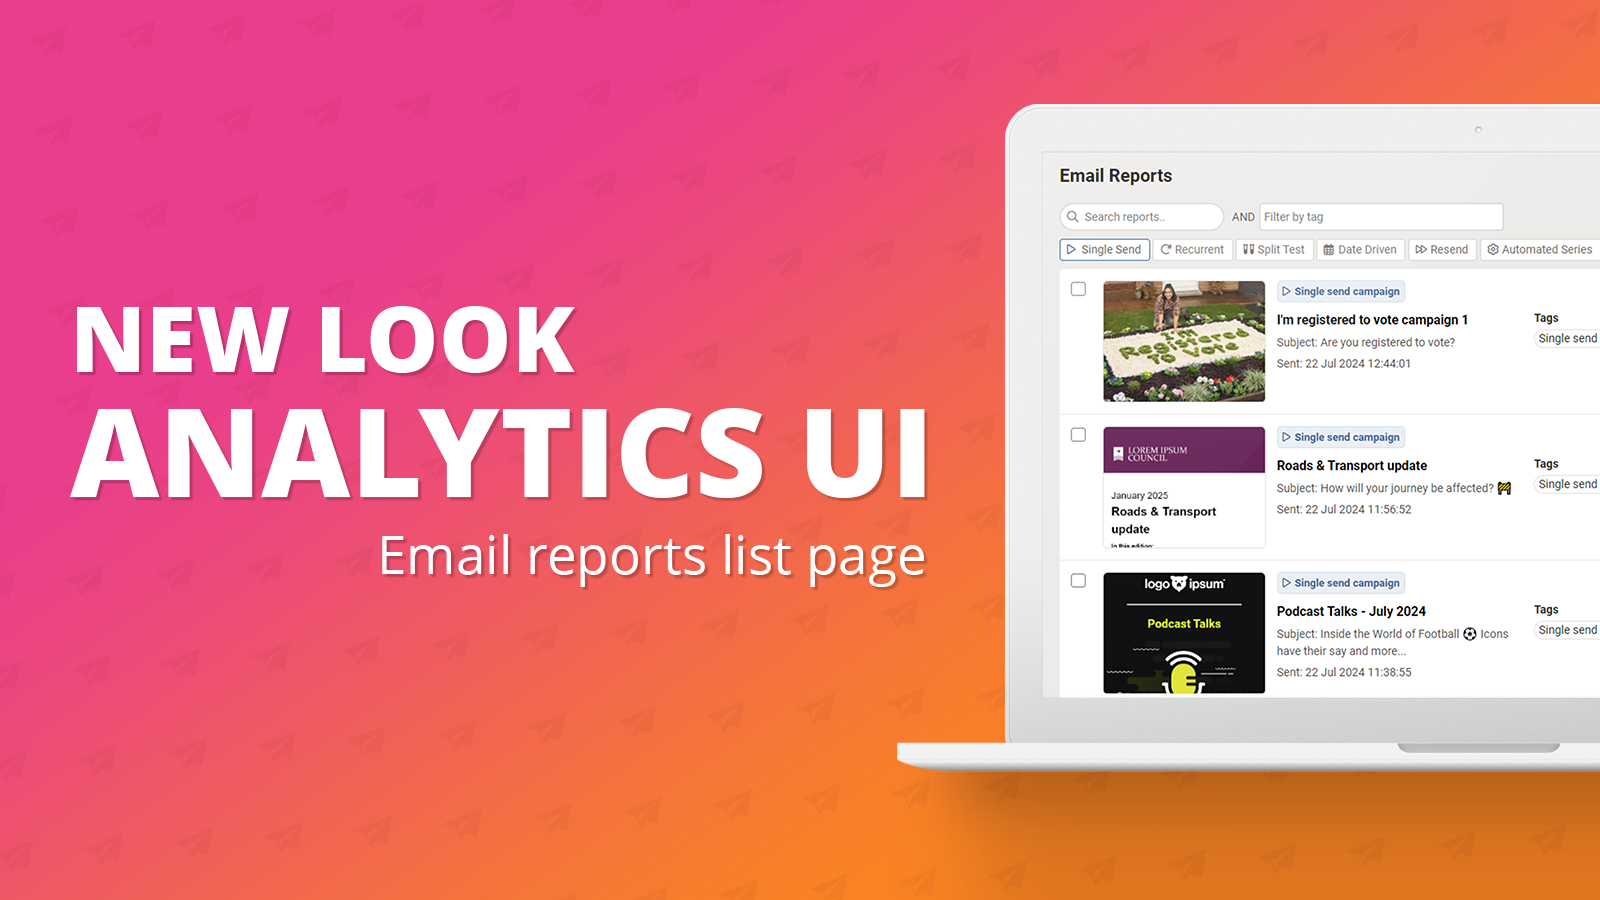
To begin head to ‘Analytics New’ > ‘Email reports. This will take you to the page seen below.
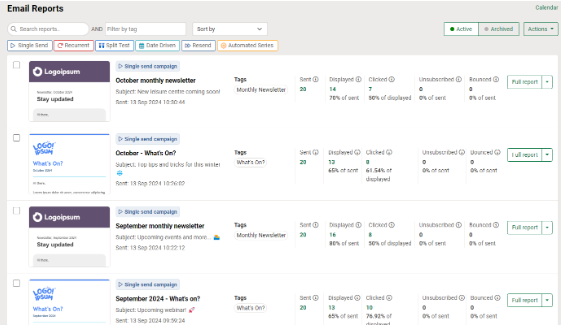
This is the new look analytics email reports page, this page contains the same functionality you’re used to, just with an improved and up to date UI. For the full details on this page, you can find the dedicated help article here.
On this page you will find all your sent campaigns with their base line stats and following on from the campaign section, you will find the tag you previously assigned.

Like on the campaigns page, you have several filters to use, again including the tag filter.

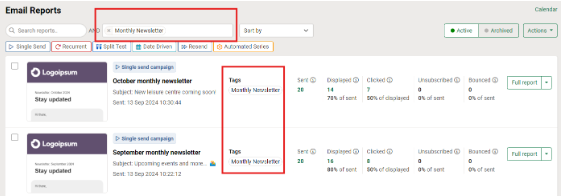
Meaning if you did want to filter all your sent campaigns by a certain tag, you can do so as seen below.
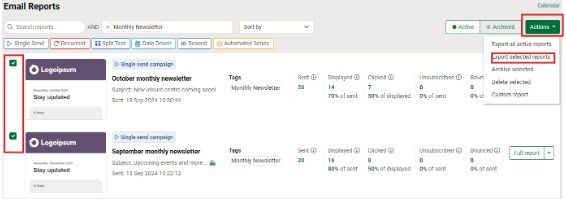
This makes it easier than ever to export a select number of campaigns, as seen below once filtered by tag, I can easily select them and export all the data for those campaign sends into one file.
Now let's jump into how you can benchmark your campaign against others. To begin, use the ‘Full report’ button next to the campaign you wish to view the benchmarks against.

This will take you to the full report page for that campaign as seen below. For the full details on the new analytics full reports page, see our dedicated help article here.
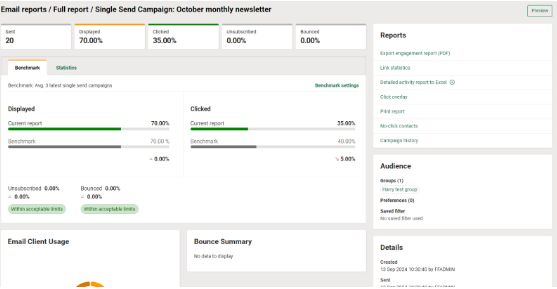
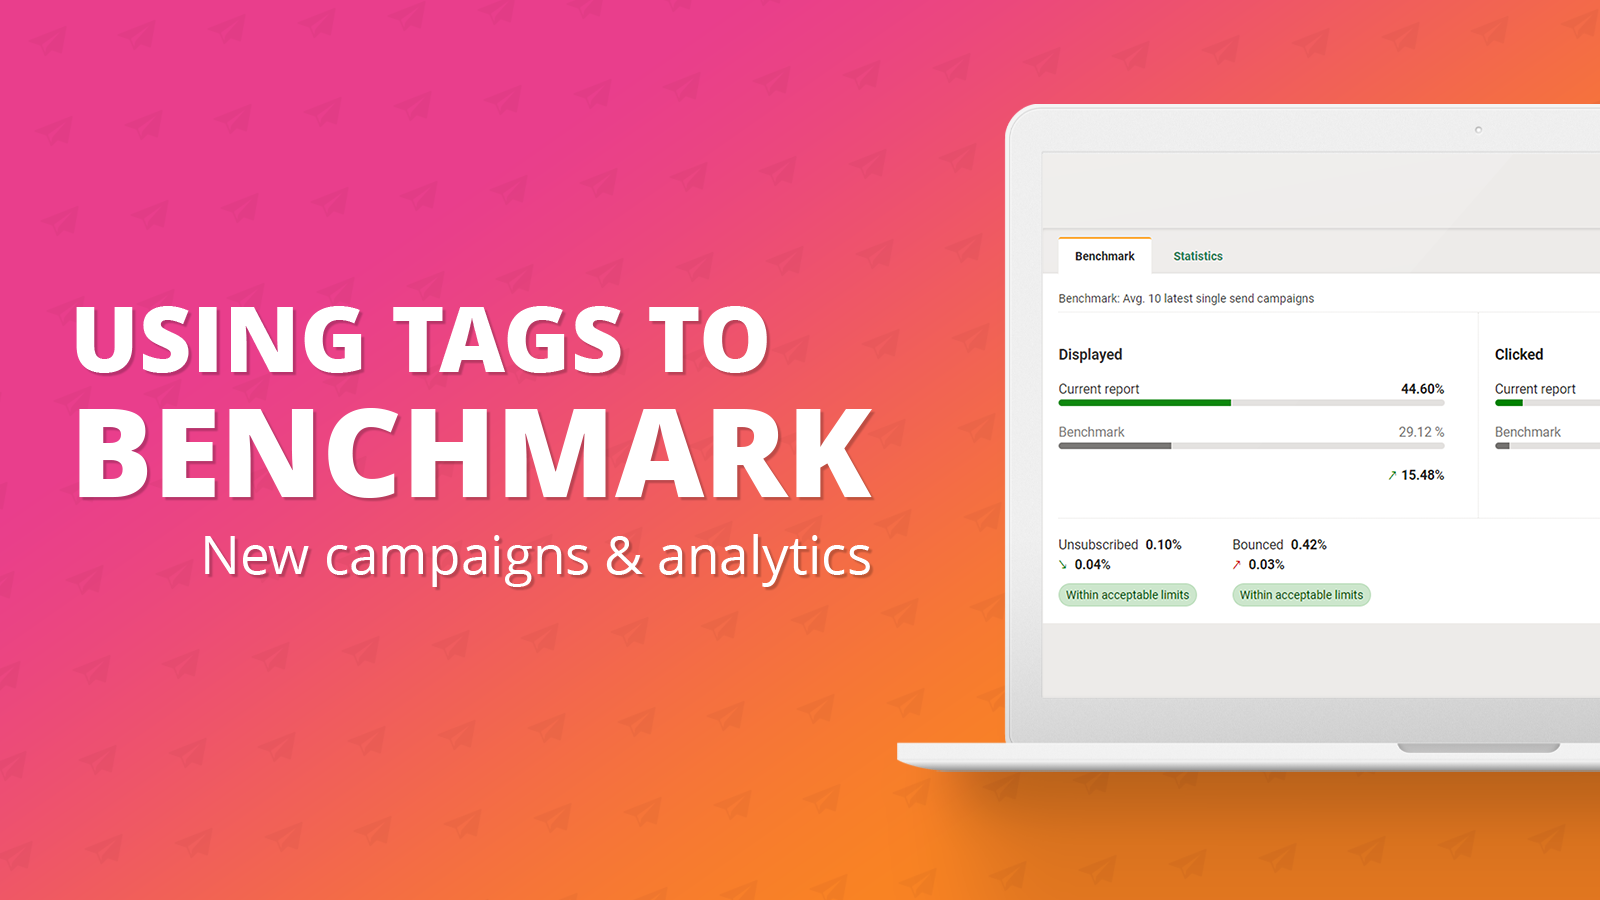
On this page you will find two main tabs labelled ‘Benchmark’ and ‘Statistics’. The statistics tab will show you the stats for this campaign. It is the benchmarking tab we are interested in here.
By default, your campaign will be benchmarked against the previous 3 sends, no matter what those sends were.
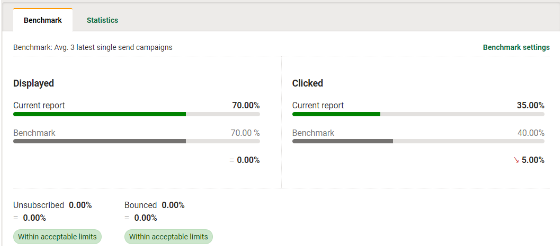
As seen above, you can see the green bars (your current campaigns stats) as well as the grey bars (the average of the campaigns being benchmarked against).
Now, I'm sure many of you would like to benchmark your campaigns against email sends and not just the past three sends. Don't worry! This is why we covered setting tags on your campaigns as they will come into play here.
You can change your benchmark settings by using the ‘Benchmark settings’ link in the top right corner.

Upon clicking this link, the modal below will appear.
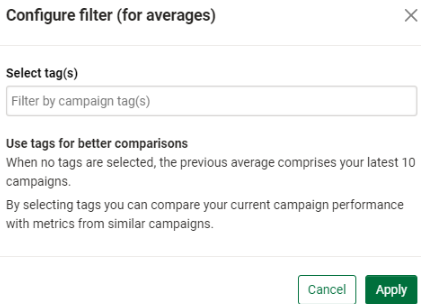
Here you will find a brief description of how comparisons/benchmarking works but also can benchmark against a particular campaign tag and not just the previous sends.
To do so, click into the box and select the tag you want to benchmark against. For this example, I will use the ‘Monthly Newsletter’ tag.
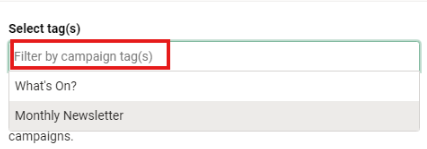
Once selected, you will see the tag now shows in the ‘Select tag(s)’ box, you can add more tags if you wish, doing so will benchmark across the previous 3 campaign sends for only the selected tags.

Once you are happy with your tag's selection, hit the ‘Apply’ button. This will return you back to the benchmark stats as shown below.
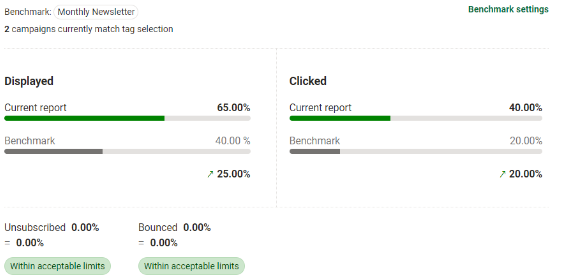
Now, you will see similar data is shown to me, however it is now only benchmarking against the ‘Monthly Newsletter’ tag and not just the previous campaign sends.
As seen in the top left you can see which tag you are benchmarking against as well as the number of campaigns sent using that tag.

Amending tags on an already sent campaign
If you ever forget to tag your campaign, tag it incorrectly or want to use the benchmarking on older campaigns, don't worry! You can retrospectively tag your campaigns in the analytics section, here's how.
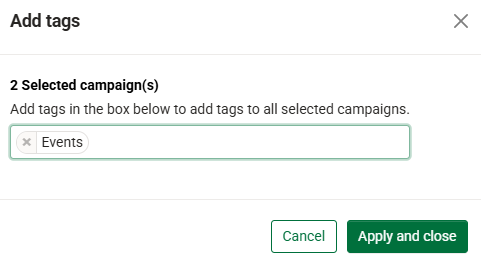
First, select the campaigns you wish to amend the tags for, in the top right corner select 'Actions', then you can choose to add or remove tags to those campaigns.
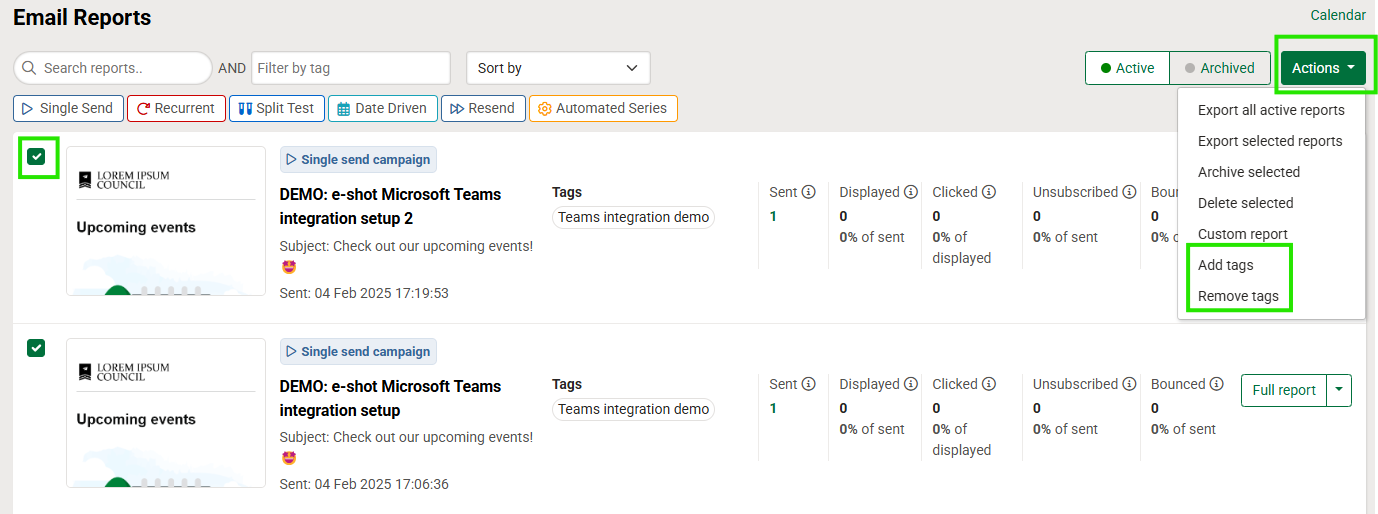
Once you have selected, the below will pop up where you can choose which tags to add or remove from the selected campaigns. Once you are happy click 'Apply and close'. Any tags you choose to add or remove will now be respected against the campaigns.
That’s an overview of how you use tags in the new campaigns experience to benchmark in the new analytics UI.
If you’re interested in learning more about either of these new experiences, you can find all the relevant help documents on our website. Alternatively, if you have any questions on this, you can contact us via Live Chat.
You may also like these articles
Analytics
Analytics UI (New): Email reports list page
July 23rd, 2024 - Harry Thomas
On Thursday 18th July, as part of e-shot's latest release, the analytics page within the platform has had a complete UI overhaul. As part of...

Analytics
Analytics UI (New): Full report page
September 20th, 2024 - Harry Thomas
In this article we will cover the new look full reports page of the analytics section in e-shot. Please note the same functionality you’re used to...

Campaigns
Campaigns: Single send campaign
June 11th, 2024 - Harry Thomas
The ‘New single send campaign’ offers the same functionality as the legacy single send campaign but with an improved overall user experience. New...
Solutions
Email Marketing
Create email campaigns and newsletters and manage end-to-end subscription processes with forms and preferences.
Marketing Automation
Create sophisticated automated campaigns for email and SMS combined.
Digital Communication
The comprehensive solution to manage and automate your digital communication across email, SMS, websites and landing pages.
Email marketing healthcheck
We are confident that we can help you, which is why we offer a free healthcheck to identify potential issues with your current programme and free advice on things that could be done to improve it.