Help articles
CATEGORY: Campaigns
Campaigns: Automated Series campaign
The Automated Series campaign allows you to set a series of steps which will automatically do the work for you, once it’s been activated. Common use cases include a new subscriber welcome series, a re-engagement campaign or an event series.
In this article, we will run through how you can setup an Automated Series campaign as well as what the steps available mean.
Before you begin creating an Automated Series campaign, it's always good to have an idea in mind of what you want to achieve and the ideal steps you’d like the contacts to take. We recommend mapping this out on paper or Microsoft Word etc so you can refer to it whilst creating your campaign in e-shot.
Creating your campaign
To begin with, go to the Campaigns > Existing campaigns and click the ‘New campaign button in the top right.

Or Select ‘Create new campaign’ under the Campaigns menu.
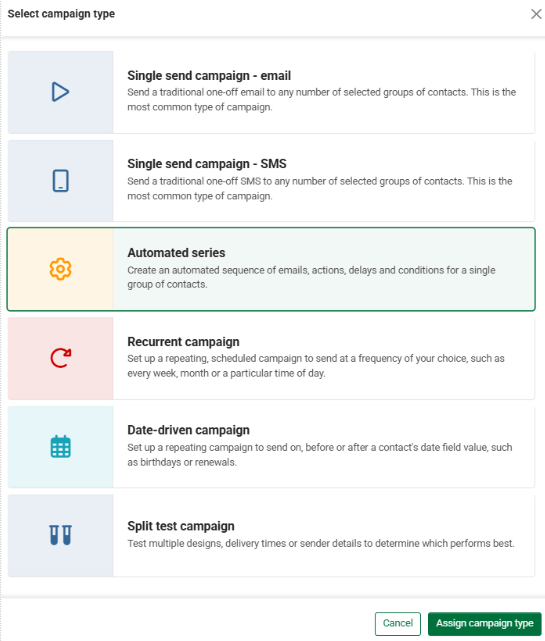
Next select the ‘Automated Series’ campaign type. You can do this by clicking on the ‘Assign campaign type’ button.
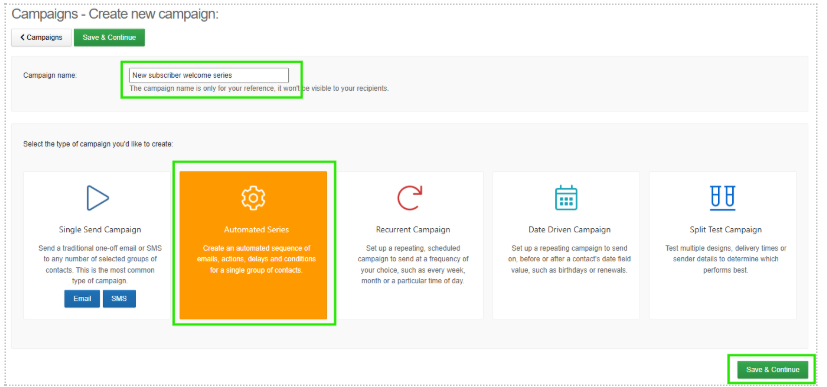
Once that’s been do you will be taken to the page where you can name your campaign. Make sure you choose Automated Series again and then click the save and continue button.
You will be taken into the campaign editor as seen below.

Here is where you will set out the steps for your series.
*Please note, for my demonstration I will be creating a simple step series which welcomes new subscribers.
Firstly, you will need to set the ‘start group’ for the series. Click the edit icon on the start step and choose your group from the dropdown. The group chosen are the contacts that will be sent to if they exist or are added into the group.
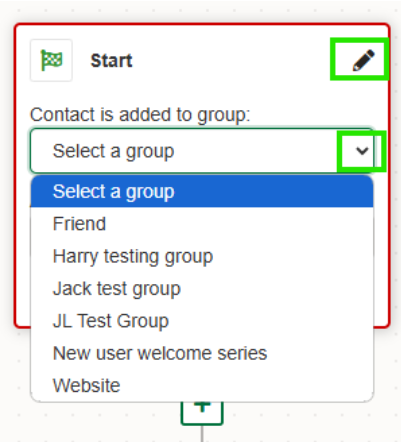
Once selected, make sure to click the save button on the step. Your group will now be assigned as seen below.
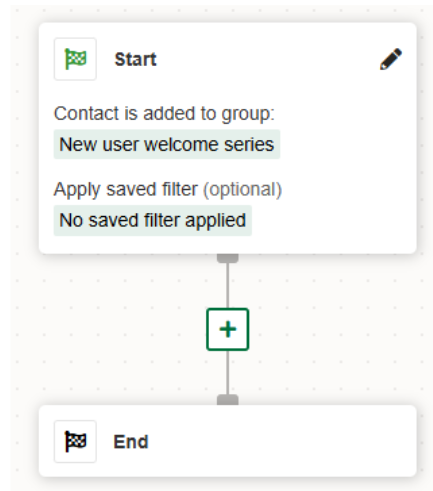
Now you have set the start group, it's time to add your desired steps.
Simply click the green + icon in between the start and end steps.
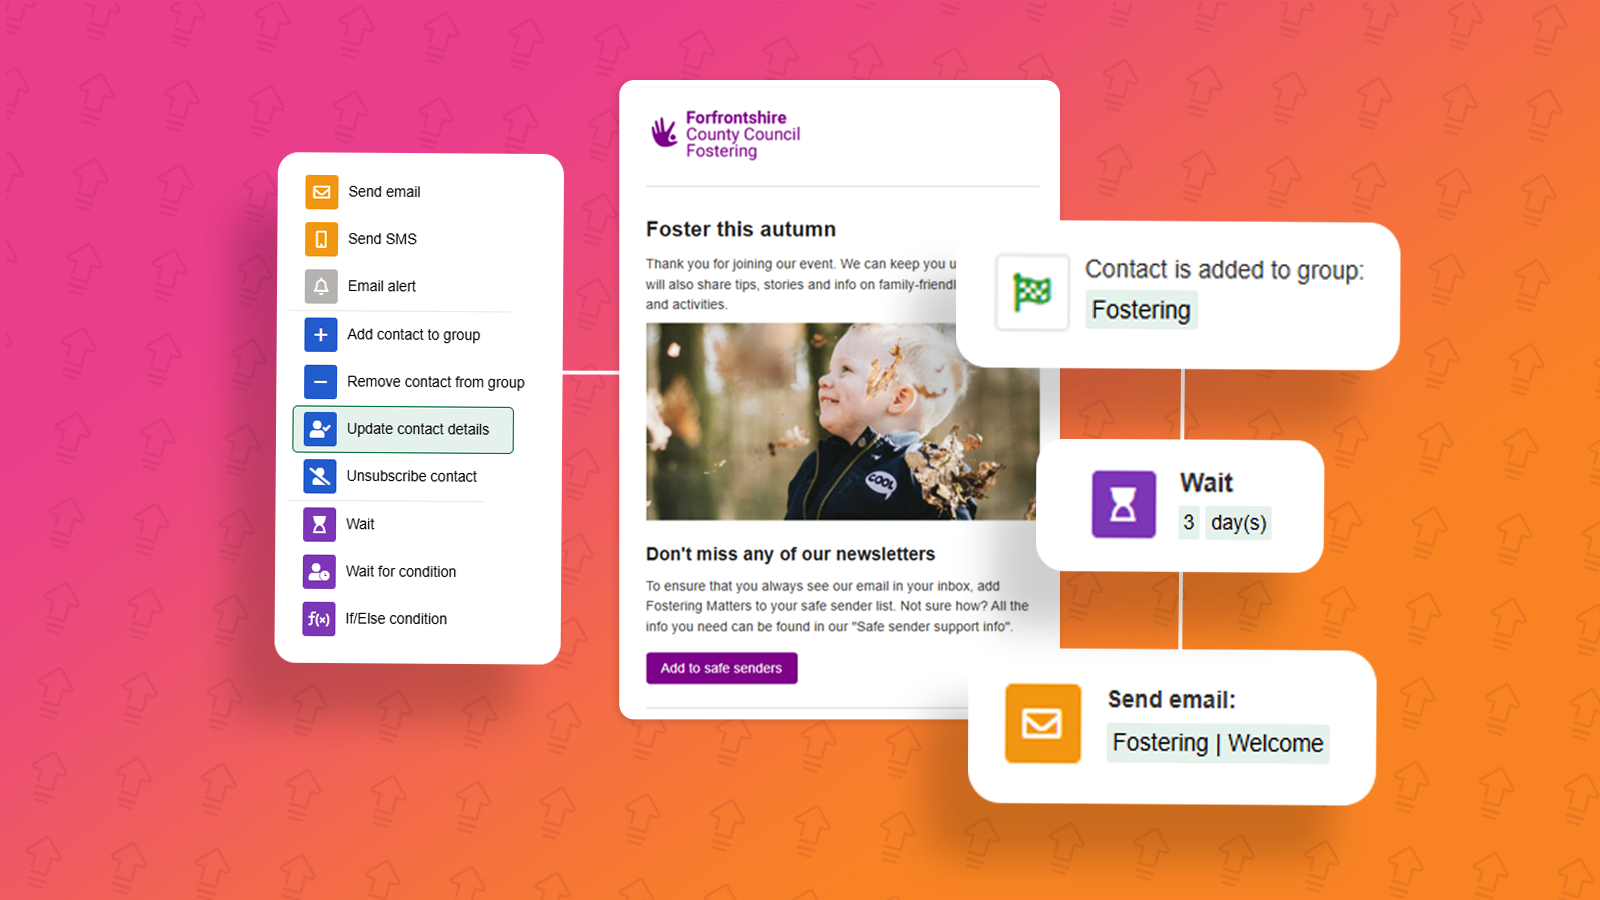
In doing so you will be presented with all the steps you can add to your series as seen below.
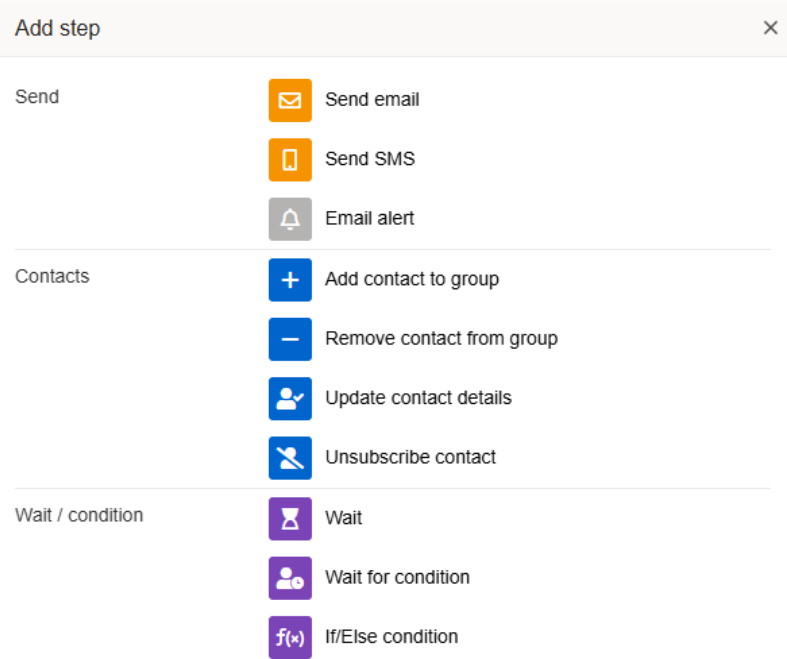
Let's cover what each step means.
Send steps options:
Send email: This step will allow you to choose an email design in your account to send to the contacts.
Send SMS: This step will allow you to choose an SMS design in your account to send to the contacts.
Email alert: This allows you to send an alert to an email of your choice after a certain step is performed in your series e.g., they have clicked a contact me link in an email.
Contacts steps options:
Add/Remove contact to group: Allows you to choose a group for the contact to be added to or removed from.
Update contact details: Allows you to choose a contact field in your account to be updated once a step is completed. E.g. If a contact clicks an interested in being a foster carer link in an email, the ‘Shown interest in being a foster carer’ field for that contact changes to yes.
Unsubscribe contact: Unsubscribes a contact from all comms once a certain step has been performed.
Wait/condition steps options:
Wait: Allows you to set either a wait for a time period, wait for date/time or wait for day(s) of the week condition. This is great for when you don't want all steps to be done at once and want to allow some time in between.
Wait for condition: Allows you to wait for a certain condition before the contact continues through the series. E.g. wait for email to be displayed.
If/else condition: It’s similar to the wait for condition but splits the options down to a true and false path. E.g. If contact displays email add to X group, if contact does not display email, resend email.
Now that you know what each step does. I will finalise my new user welcome series and show you an example.

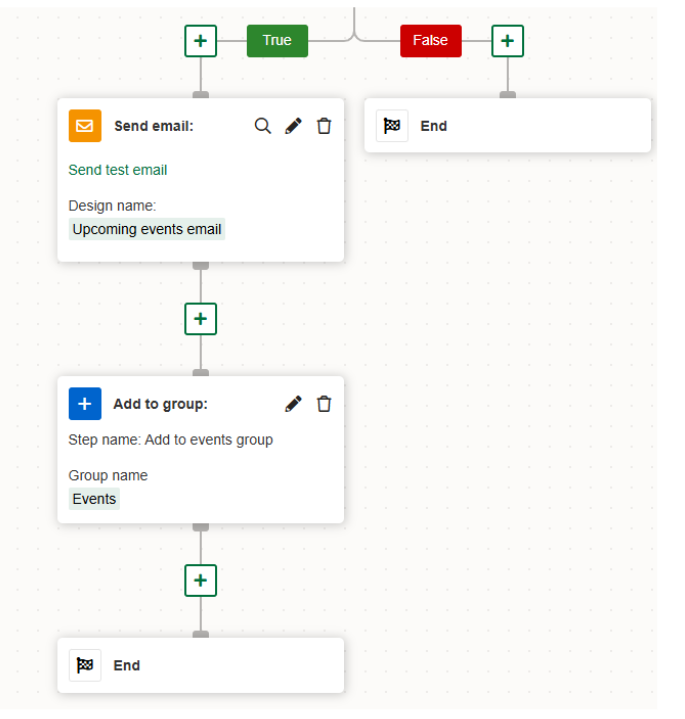
To explain my simple new subscriber welcome series seen above. I am essentially sending them a welcome email upon subscribing. This email asks in they are interested in hearing about events. My steps explained below:
If added to new subscribers' group
Send welcome email
Are one of two event links are clicked in the welcome?
If true add the contact to the events group and send them an upcoming events email
If false end
My example is a simple yet effective way to welcome new subscribers and it also gets them interested in other emails you have to offer.
If you have any questions whilst setting up your own Automates Series campaign, please contact us via the live chat so we can assist you.
Spotting errors in your series
Whilst you are creating your series, it is possible you may not fully setup the step correctly. If you haven't, e-shot will let you know by putting a red box around the erroring step.
See below, my If/Else step is failing as I have not set the condition for the step. This means e-shot doesn't know how to determine if the step is true or false and thus can't continue.
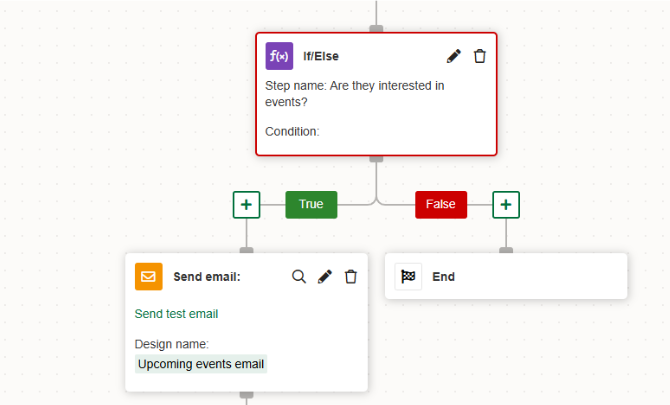
*It is important you check for any erroring steps before continuing and setting the series live. If you have any doubts, contact us.
Campaign start procedure
When you are happy with your series, click the ‘Save and continue’ button at the top or bottom of the page.
Doing so will take you to the final setup step seen below.
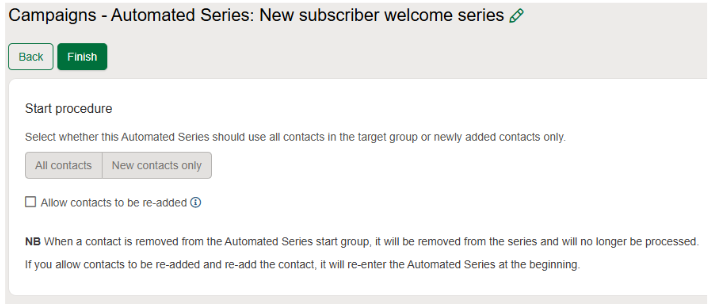
Here is where you decide which contacts in your chosen group it's sent to.
All contacts: Contacts already in the group and ones added once set live will ALL go through the series.
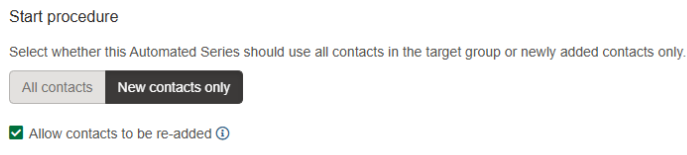
New contacts only: Only contacts added into the group once the series is set live will go through.
Allow contacts to be re-added: If a contact is removed from the group but re-added should they go through the series again? If yes, ensure to tick this box.
Following on with my new subscriber's theme. I only want this email to go just new subscribers, I would use the new contacts only option. I have also ticked the allow to be re-added box in case a contact unsubscribes and resubscribes for example.
When you’re done, click the ‘Finish’ button. Doing so will take you back to the campaigns list page where you will find your series.
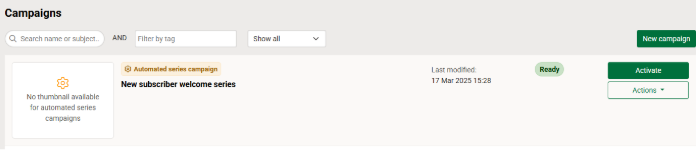
From this page before setting your campaign live, you can make changes to your steps by clicking the Actions dropdown and selecting ‘Edit’. This will take you back in where you can add, edit or remove steps from your series.

Before you activate!
When you’re ready to activate your campaign, like with other campaigns we recommend testing the series actions the way you expect.
The way we recommend you do this is by cloning the series, changing the start group to a test group and changing any wait steps to much shorter period (so the testing is quicker).
Then activate your cloned series and add yourself to the test group so you begin moving through the series. You can then ensure every step is completed as expected. This is particularly important for more advanced series.
Activating your series
Once your series is ready and tested. You can set it live from the campaigns list page by clicking the ‘Activate’ button next to the campaign, you will then need to confirm your activation by clicking the ‘Activate campaign’ button again.
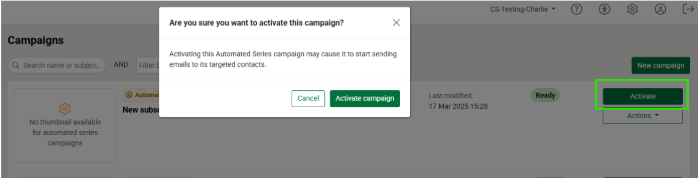
Once activated, the campaign can still be found in the list view marked as ‘Active’.

Management of your series
Once live, you can view your campaigns steps, clone or deactivate it by using the actions dropdown.
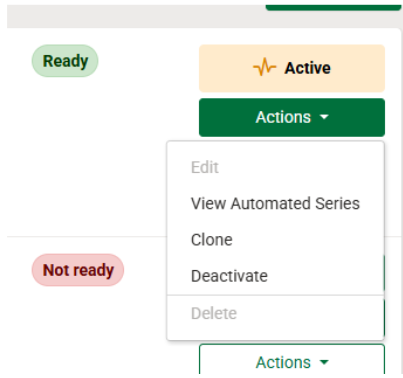
*Please note once a series is active, you cannot make changes to it unless it is deactivated. Upon doing so you will only be able to edit steps that contacts have not been passed through yet.
We never recommend deactivating or making changes to a series once contacts have started going through the series unless you don't plan on re-activating. The reason for this is you don't want to mess with the steps part way through contacts going through to ensure a smooth series for both you and your contacts.
*Also note Automated Series campaigns are ran differently to others such as Single Sends. At each step our campaign processer needs to process the step and exactly which contacts are being passed. This can mean steps such as an email send are not always instant but rest assured they will be actioned in a prompt manner.
You may also like these articles

email-marketing Automation
3 reasons you should be using email automation
May 25th, 2017 -
“Email Automation” has become a buzzword for 2017. If you’re a business owner and you are actively searching to increase the efficiency of your...
Campaigns Analytics
Understanding a contact's progress through an Automated Series
March 24th, 2025 - Harry Thomas
In this article we will be looking at Automated Series campaigns and how you can view the contacts progress through your series’ steps as well as...
Solutions
Email Marketing
Create email campaigns and newsletters and manage end-to-end subscription processes with forms and preferences.
Marketing Automation
Create sophisticated automated campaigns for email and SMS combined.
Digital Communication
The comprehensive solution to manage and automate your digital communication across email, SMS, websites and landing pages.
Email marketing healthcheck
We are confident that we can help you, which is why we offer a free healthcheck to identify potential issues with your current programme and free advice on things that could be done to improve it.